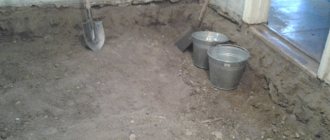
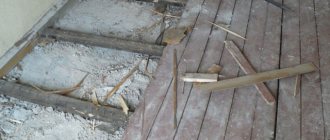
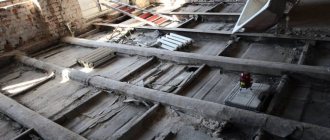
Removing old coating
To remove wooden flooring you will need to prepare the following tools:
- hatchet;
- mount;
- nail puller;
- shovel;
- electric saw;
- garbage bags.
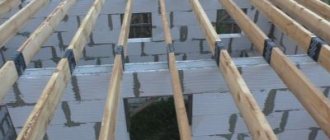
Floor removal is carried out according to the following algorithm:
- remove baseboards along the perimeter of the room;
- dismantle the logs;
- clean the area thoroughly.
Figure 1. Removing old coating
Work order
In any business there is a certain order of actions, a certain plan, following which you can achieve a result. There is a procedure when pouring a concrete floor. First of all, you need to mark the floor level so that in the future the floor will be level. Then you need to work with the soil, then lay out a layer of bulk materials, this is necessary for the strength of the floor and saving concrete. Typically, gravel is added first. For convenience, you need to drive a few pegs into the gravel before filling in the materials, and then they can be removed. Gravel can be laid out about 5-10 centimeters thick. Then the filled gravel must be compacted and watered. On top of the gravel you need to pour a layer of sand, the approximate thickness of which will be 10 centimeters. And the last layer will be crushed stone, it needs to be compacted and sprinkled with sand, preferably a thin layer. The resulting surface should be as smooth as possible.
This is followed by insulation work, as usual, it is carried out to protect the floor from various types of influences. Then reinforcement and formwork are carried out. Only after all this is concrete poured and screeded.
Evaluation of the list of works
The reinforced concrete slab under the wooden flooring must be inspected and the level must be measured. The following situations often occur:
- there are several slabs in the room with height differences;
- there is a noticeable depression or bulge in the center of the room;
- The slab is installed at an angle.
It is important to assess the volume of actions required to fill the screed with a minimum mass. For this reason, the concrete layer is made no more than necessary. It is carried out on the backfill or a lightweight composition is used.
If there are height differences above 70 mm, the procedure is as follows:
- the concrete mass is laid with a thickness of 40–50 mm;
- the remaining unfilled space is filled with a composition of expanded clay concrete mixture.
You can use other options to solve the problem:
- the rough surface is covered with sand (such a pillow is characterized by heavy weight);
- prepare a plywood base, under which loose and lightweight material is poured.
This event will allow you to level the level and get a flat, smooth area.
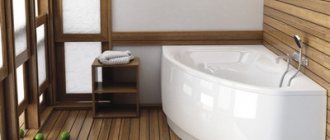
Basic requirements for screed
Concrete screed in a house on a sand cushion
When deciding to make a concrete floor in a private house to mask communications, you need to take into account that it must be of sufficient thickness. In this parameter, the screed should exceed the installed pipes by at least 2 cm. At the same time, it should not be too thick, especially if the foundation does not have sufficient load-bearing qualities.
It is important to make the surface as smooth as possible and level out height differences.
When the composition is poured onto the soundproofing layer, you need to retreat 40-50 mm from the wall edges. These gaps are filled with appropriate material.
The screed can serve as a base for laying flooring (parquet, ceramic tiles and other types); sometimes it is used to create a slope of the surface. In a room where the floor experiences heavy loads, the screed helps distribute them.
Execution steps
Figure 2. Pouring a concrete floor
Making a new screed is easy, using several techniques. If there are small differences in the rough base, when it is planned to lay wood flooring, it is recommended to fill the surface with a self-leveling solution. Technology of using dry mixture:
- prepare a solution;
- pour the mixture onto the platform, level it with a wide spatula;
- to avoid the appearance of air bubbles from the concrete solution, pierce the floor material with a needle roller;
- leave to dry.
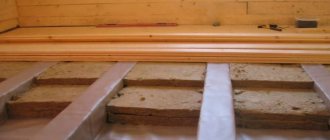
The following materials can be laid on a flat floor:
- insulation with finishing;
- sheets of plywood, under which to organize an infrared warm coating;
- secure the wooden covering to the joists.
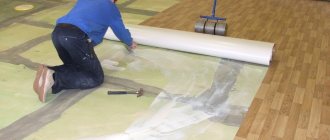
Floor waterproofing
Having completed the rough work, they begin to lay the waterproofing layer. For this purpose use:
- polymer film;
- roofing felt;
- glassine;
- all kinds of bitumen insulators;
- vapor-permeable membrane.
Before using the rolled material, the following preparatory work is carried out:
- the perimeter of the area is glued with a special construction tape;
- coat the floor with bitumen mastic;
- wait for it to dry;
- glue a layer about 20 mm thick with damper tape;
- spread the rolled material.
The strips of material overlap each other. Along the perimeter, the insulator is placed on the walls. The seams are processed as follows:
- if a polymer film is used, then the edges are glued with tape;
- materials containing bitumen are carefully heated along the seam and then rolled with a roller.
It is not advisable to use floating insulators in an apartment. To glue them, you need a kerosene burner - its use is problematic in a confined space. Self-adhesive roll materials speed up the work. Although their price is higher, the flooring is significantly lighter.
After the installation of the insulator is completed, insulation is placed on top of it. This action is performed when a heated floor is installed.
Installation of beacons
When concrete is to be poured, level indicators are special profiles or ordinary corners. They are mounted on plaster mounds. After installation, take a building level and use it to check how smooth the surface formed by the beacons is. If the base is uneven, there will be a difference in height. To obtain a flat plane, some of the beacons are removed, and the mounds are made of different heights.
The distance between the beacons should not exceed a distance of 50 cm. The tags are attached starting from the window, heading towards the door. Removing profiles is allowed only after the poured concrete solution has completely hardened.
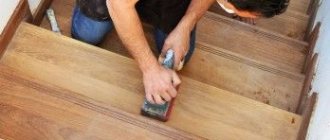
Surface grinding
During the hardening process of concrete, milk of cement is released on the surface and hardens in the form of a smooth film. In the future, this may create problems with the adhesion of the finishing coating and the concrete floor, which will turn out to be fragile. Therefore, some time after pouring (from several hours to a day), it is necessary to grind the surface. This will help get rid of the film. This operation is easier to perform using special grinding devices, but you can also do this with a hand grinder, for which you should purchase corundum mesh.
Related article: The apartment has a cold floor: what to do, expert advice
The resulting surface must be moistened regularly for about a week to prevent the concrete from drying out and cracking. The floor reaches maximum strength after 4-5 weeks.
If, when pouring the concrete mixture, the surface is not very smooth, a screed will be required. For it, it is better to choose a self-leveling composition, which is poured onto the base and leveled using a special brush. After this, the mixture is further rolled with a needle roller to remove air bubbles. This screed will dry in 7-14 days. After this, you can proceed to the finishing coating.
Preparation of the solution
When it is necessary to replace a wooden floor with a concrete one in a private house, but it is undesirable to put excessive pressure on the existing floor, it is recommended to use ready-made mixtures. The most popular brands are KREISEL, which allow you to fill a layer from three and a half to seven centimeters. The dry composition does not need to be stirred - it is completely ready, all you have to do is add a little water.
Much more often they use the classic version - cement-sand mortar. To prepare it, the following proportions of ingredients are recommended:
- cement M400 - one part;
- sifted construction sand - 3 parts;
- lime dough required as a plasticizer - 0.1 parts;
- If there is no mesh for reinforcement, fibers are added to the solution, using the amount recommended by the material manufacturer.
Before adding water, the dry mixture must be thoroughly mixed so that it becomes evenly colored. Then gradually add liquid without stopping stirring. The action is continued until the consistency of the solution becomes similar to thick sour cream.
In order to properly fill the floor, you need to prepare the required volume of dry mixture in advance. Then all that remains is to dilute it with liquid without stopping the filling procedure. If you use equal parts of the mixture for kneading, it is easy to understand how much water you need to add - you can get the finished solution much faster.
Laying the screed
You need to start laying the screed from the window or the far wall, moving in the direction of the door. The mixture is spread out in large portions at once, and then leveled according to the marks using a long rule.
There are usually no difficulties in such work; it is only advisable to act quickly, without waiting for the solution to set. It is more convenient to perform such an action together, then everyone has their own familiar part of the event - one does the kneading, the other applies it.
Finish coating
Every apartment owner wants to get the most durable, aesthetically pleasing concrete floor. To do this, the finished screed is processed in the following ways:
- use sandpaper for sanding;
- cover the concrete with a polymer composition or paint it with paint;
- the surface is ironed three days after the solution has partially hardened;
- form a self-leveling floor on top of the screed.
When it is planned to cover the floor with tiles, no additional measures need to be taken to prepare the surface. But before covering the surface with linoleum or laminate, it is advisable to carry out ironing. If you use a self-leveling coating, you can get a perfectly smooth surface with an effective decorative design.
Preparatory stage
All of the above points, up to pouring, can be combined into a single category - the preparatory stage. Naturally, you need to start by calculating the floor area in order to understand how much and approximately how much time will be spent on pouring.
If we are talking about how to properly fill a floor in a private house, then the calculation of purchased materials is made according to the following scheme (using the example of a room measuring 5x5 meters)
Taking into account the calculations made, materials should also be purchased.
From all of the above, we can conclude that before properly pouring floors in a private house, it is necessary to purchase the main components for pouring the screed in accordance with the calculations made.
Regarding the height of the floor, it is necessary to know the thickness of not only the screed and bulk layers, but also all the materials being laid: steam, hydro and thermal insulation.
Pouring floors in a private house begins with cleaning the workspace. Naturally, it is necessary to remove dust, dirt, and debris from the subfloor using a broom, or even better, a powerful household or industrial vacuum cleaner. After cleaning, you can begin a process such as filling the floor in the house with your own hands, which is not the easiest.
It is worth considering the difficulty of creating the required amount of solution.
If you knead manually, it will take a lot of time to prepare one portion. It is best to use a concrete mixer with a large capacity. Only with automatic mixing can a correct, uninterrupted supply of solution to the floor be ensured.