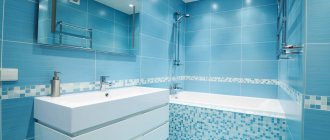
Before purchasing materials, you need to calculate the tiles for the bathroom in order to buy exactly as much material as you need. There are 2 ways to calculate the number of tiles in a bathroom: using an online calculator or manually. The calculator will provide a quick calculation, but it may have inaccuracies due to its versatility. If you are buying expensive luxury tiles or decor, it is better to check all the calculations manually.
To calculate, you need to decide on the following parameters:
- How will the layout be laid out?
- What colors will be used?
- Do I need to adjust the pattern?
- Will decorative elements be used?
- What size tiles will be used?
Primary calculation (convenient calculators)
The method for this calculation is simple: you need to calculate the total area of the walls.
All you need is a tape measure and a calculator.
- First, we measure the height of the ceiling.
- Now you need to find the perimeter of the room - the sum of the lengths of all the walls. Let's measure them and add up the indicators.
- We calculate the area of the bathroom walls by multiplying the perimeter by the height.
- We divide the resulting area by the area of one tile (length multiplied by width) and obtain the number of elements required for covering the surfaces.
Example of primary calculation:
The bathroom has 4 walls, the length of the short one is 2.43 m, the long one is 3.7 m. The height of the room is 2.66 m.
We calculate the perimeter of the bathroom by adding the lengths of all the walls:
Perimeter = (2.43 + 3.7) × 2 = 12.26 m
We calculate the area of the walls:
Area = 2.66 × 12.26 = 32.61 sq. m.
Round to the nearest whole number, we get 33 sq. m.
Our convenient calculator will help you easily calculate the required area taking into account the doorway.
Therefore, to tile the walls in this bathroom, you will need 33 square meters. m of tiles. To purchase tiles, follow the link >>>
Let's count the number of tiles in pieces for this area.
Let the size of the product be 20 × 30 cm or 0.2 × 0.3 m.
The area of one cladding element is 0.2 m × 0.3 m = 0.06 sq. m.
Then the number of tiles for covering the entire room in this example will be:
33 sq. m: 0.06 sq. m = 550 pieces.
For a quick calculation, just enter the data in the form below.
Now you know how many tiles you need, you can choose and order!
You can calculate the number of packs of tiles, if this is more convenient in a particular case. For packaging, the manufacturer and seller usually immediately indicate the total area of material in it. Therefore, we simply divide the calculated area of the walls by the area of the tiles in the pack and get the number of packages required for tiling the bathroom.
The calculation is approximate and does not take into account trimming at the corners of the room, gaps in pasting and decor.
Calculation of the number of floor tiles
There is less work here, everything can be done in a few minutes. How to calculate how many floor tiles you need for a bathroom?
Step 1. Measure the two side walls of the room. There is no longer a need, the perimeter of the room looks like a rectangle, the sides have the same dimensions. In our case, the length is 3.0 m and the width is 1.5 m.
Step 2. Find out the area of the room. 3.0 m × 1.5 m = 4.5 m2.
Step 3. If you do not want to tile the floor under the bathroom, then you need to subtract its area. This can only be done in cases where the bathtub has a continuous decorative screen that hides the lower space. The dimensions of our bathtub are 1.7 m by 0.7 m, the area is 1.19 m2.
Step 4 . Determine the area of the open area of the bathtub floor. 4.5 m2 – 1.19 m2 = 3.31 m2. Taking into account the reserve, you will need approximately 3.7 m2 of tiles.
Select and buy tiles online
Anton Tsugunov , I have been doing repairs and finishing since 2003.
I prefer to buy tiles in an online store - it is very simple, convenient and safe. You can buy tiles without leaving your home. Most often I order delivery directly to the site, so as not to waste time and not “damage” the car.
In the online store you can find the exact specifications and real customer reviews. There is a photo of how the tiles look when finished.
Moreover, when I pay for the tiles with my card , I receive cashback of up to 30% of the purchase amount!
It turns out to be a double benefit! I don’t risk my health, I don’t waste time on the road, I receive the paid tiles at the time I specified and also save up to 30%.
You can select a tile by following the link>>>
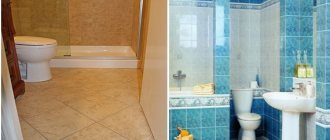
Dimensions of bathrooms
Examples of bathroom layouts
The area of the bathroom is taken into account not only during renovation work, but also when purchasing a new home. And to understand whether all the necessary household items will fit in it, it is worth assessing the dimensions of the room. So you define:
- how best to place plumbing fixtures;
- how to lay all the necessary communications;
- what finishing options to use during renovation.
Regulatory regulation of parameters
Before starting redevelopment, you must obtain permission from the BTI
The height, width and optimal area of the bathroom are directly related to the linear dimensions of the bathroom. They are regulated by a considerable list of regulations of the relevant authorities, such as GOST and SNiP. Therefore, before you begin implementing your design projects, you need to familiarize yourself with the regulatory framework in this area. If this nuance is neglected, the redevelopment of the litter will be considered illegal.
Important! Separately, it is worth noting the redevelopment in the apartments. Most often, the BTI does not give the go-ahead for the implementation of the plan if the wet area differs in configuration from the bathroom of the neighbors below. Indeed, in such a situation, the area of the bathroom may be above the living area, which is unacceptable according to the standards.
What are the minimum dimensions?
Example of a small bathroom
Tips and recommendations for summer residents and gardeners on the VodaKanazer portal, as well as tips and recommendations on water supply and heating.
The minimum parameters of the bathroom do not allow you to fit all the necessary equipment into the room. Therefore, owners of compact bathrooms try to expand the premises, but the main thing here is not to violate the sanitary standards specified in SNiP.
Minimum parameters:
- The height of the bathroom must be at least 2.5 m;
- the depth of the room will be 1.2 m;
- The width of the bathroom should not be less than 0.8-0.9 m;
- The ceiling height in the corridor near the bathroom will be at least 2.1 m.
The last point should be taken into account by those people who want to additionally equip the mezzanine.
Good bathroom designer
The dimensions of a combined toilet and bathroom are not strictly regulated. Therefore, when creating a suitable design, first of all you need to proceed from considerations of convenience.
Having determined the parameters of the bathrooms, it is much easier to rationally use the usable space in the room for optimal placement of plumbing fixtures.
Standard parameters
Dimensions of a standard bathroom
For panel houses and Khrushchev-era buildings, there is a clear gradation in the dimensions of bathrooms:
- small restroom with sink and toilet - 1×1.5 sq.m;
- bathroom with washbasin and toilet - 1.5x2 sq.m;
- combined bathrooms (small, medium and large):
- 1,98×1,73;
- 2,5×1,5;
- 2,9×2.
- bathroom with shower corner or cabin instead of a font - 1.4x1.5 sq.m.
These bathroom dimensions are determined for standard apartment buildings. The minimum size of a bathroom for a private home can be calculated by rounding up the available data.
Optimal distance between plumbing fixtures
Recommended distances between plumbing fixtures
When planning, you need to take into account not only the optimal size of the bathroom, but also the distance between plumbing fixtures:
- The distance from the font or shower to other types of plumbing must be at least 0.7 m;
- The free space in front of the toilet must be at least 0.6 m;
- The width of the doorway is at least 0.55 m.
The area of the bathroom must be sufficient to comply with these standards. Otherwise, it will be inconvenient for you to use the plumbing.
Detailed calculation: drawing up a sketch
For detailed calculations you will need a sketch of the bathroom. To compile it, you need to consider:
- what kind of tile pattern will be on the surfaces;
- places without tiles (for example, behind the bathroom);
- layout option.
The most popular tile designs:
- One type of tile, without decoration.
- Vertical and horizontal stripes.
- Chaotic inserts of piece decor on a tiled background.
- Using a ready-made panel.
- Breaking the walls into color blocks (for example, the top is one shade, the bottom is another).
Places that can be missed when laying tiles:
- behind the bathroom;
- for furniture;
- behind the mirrors. Especially if you are planning only a mirror sheet, which is usually glued to an uncoated surface.
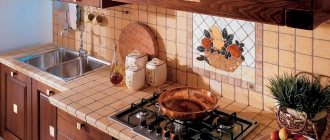
What is the difference between wall tiles and floor tiles?
The important qualities that ceramic tiles should have have already been mentioned above.
It is worth paying special attention to them, because often the choice is determined precisely by the properties and functionality. Wall tiles must be moisture-resistant, hygienic, able to withstand temperature changes and maintain their appearance for a long time. Many tiles have these properties. The first place in this rating is occupied by tiles, or rather a variety of them called porcelain tiles. This surface consists of clay and iron oxide, making it resistant to mechanical damage. Floor tiles must be resistant to use in more difficult conditions. Thus, strength for such tiles is one of the key indicators. Advice!
It is better to choose square tiles for the floor; they are more durable and can withstand heavy loads.
To sum it up, size matters. The format of the tile determines how it will present itself in the design as a whole. Small tiles will create a cozy and playful feel, especially if they come in different colors, while large tiles will look good in larger spaces.
Economical option
Only the wet area can be tiled, that is, the place of direct contact of surfaces with water - near the bathtub or shower. The remaining walls are painted with specialized durable paints.
The advantage of selective cladding is obvious - financial savings. Each square meter is not only the price of the tile itself, but also the cost of work and consumables. The downside is that it won’t be possible to make a rearrangement, only during the next repair. The decision is always individual and depends on the budget and characteristics of a particular room.
Parameters of bathrooms in Khrushchev buildings
An example of arranging a bathroom in Khrushchev
The standard dimensions of a bathroom in Khrushchev-era buildings cannot please you, since in a room with parameters of 1.9 by 1.7 sq.m. Only a washbasin with a font can fit. This is the minimum bathroom area.
For your information: What size should a bathroom be in order to accommodate at least a washbasin, shower, toilet and washing machine? As a rule, the size of standard bathrooms does not exceed 3-4 square meters. meters. But, as practice shows, this space is enough to accommodate the necessary equipment.
It is impossible to determine the ideal size of a bathroom, since everything depends on the layout and dimensions of the plumbing that will be installed in it. With proper design of the room, even 2.5 sq.m. can be arranged tastefully. Therefore, the standard dimensions of bathrooms do not play a decisive role in the functionality of the room.
Types of layouts
When drawing up a sketch, you need to choose one of the tile layout options, which can be as follows:
- Seam to seam, or straight layout. This is the traditional, most economical way. The tiles are arranged in even rows, each next one is joined to the previous one at an angle of 90 degrees, both vertically and horizontally.
- Diagonal. The finishing elements are placed not at right angles, but at an angle of 45 degrees. The most expensive layout in terms of tile consumption, since it results in a lot of scraps.
- Laying with offset or “staggered” Similar to a straight line, but each row is offset from the previous one, usually by half the size of the finishing element.
Other types of layouts (herringbone, modular and others) are much less common than the three presented.
Room measurements
The easiest way is to measure a room that will be finished in one of the monotonous ways - straight, offset, diagonally. But even in this case, measurements must be taken in compliance with a number of rules, so that during the repair you do not unexpectedly encounter a shortage of material. Measuring a bathroom, the cladding of which will be done according to an individual design project, is even more difficult. Let's consider how to correctly take measurements in a room planned for finishing in a monotonous manner. Knowledge of this technique will help you cope with an identical task in the room that will be tiled according to the project. Bathroom measurements are carried out with a construction tape with a division value of 1 mm; you may also need a pencil or marker.
Draw a diagram for each wall
After drawing up the sketch, you can begin the final calculation. To do this, you need to draw up a diagram of each wall that you plan to tile.
The scheme should include:
- the length of the wall and its height;
- places where there will be no tiles, indicating the size of these areas;
- decorative inserts.
You will also need values such as:
- length and width of elements;
- seam width.
Useful tips
It is useful for a master engaged in finishing work to listen to the following recommendations:
- Having made a choice in favor of a particular model, you should first make a drawing of the walls and floor with such cladding. It will show what effect the tile produces and how wide the outer rows (from trimmed modules) are.
- It is worth paying attention to sets of floor and wall tiles offered by some manufacturers. The material here is ideally combined not only in size, but also in color, pattern and decor.
Collections are produced for several rooms with different purposes, for example, for the bathroom and kitchen.
Even the most expensive, high-quality, perfectly laid tiles will look ridiculous if their sizes do not match the dimensions of the room. Therefore, you should think carefully about the size of the modules. After familiarizing yourself with the tips presented in this material, the reader will be able to avoid mistakes.
Calculation for direct layout
We count how many tiles will fit in a row.
To simplify the calculations, let’s immediately increase the size of the elements by the width of the seam. For example, the tile has dimensions of 35 × 25 cm, and taking into account the joint width of 3 mm, the parameters are 35.3 cm × 25.3 cm.
Let's look at an example:
Let the length of the wall (DL) be 235 cm. We will lay the tiles vertically, its width (W) – 25.3 cm.
DS: ШП = 235 cm: 25.3 cm = 9.28 pcs.
We round up to a larger whole value - to lay one row you will need 10 pcs.
The calculation for height is similar:
The height of the wall (WS) is 260 cm, the length of the cladding element (DP) is 35.3 cm.
VS: VP = 260 cm: 35.3 cm = 7.4 pcs.
Round up, we get 8 pieces.
Thus, to cover a surface of 260 × 235 cm with tiles 25 × 35 cm you will need:
Number of tiles in a row × number of elements in height = 10 × 8 = 80 pieces.
Similar calculations are performed for each wall.
After calculating the number of tiles, taking into account the layout, a grid of rows and columns is applied to the sketch directly on top of all existing designations.
Tips for room measurements
To measure the room you need to use a tape measure. The most accurate values can be obtained using a laser device. Having found out the parameters of the bathroom (the height and length of the walls, the size of the doorway), you can make preliminary calculations of the number of tiles. The simplest option is when the room has the outline of a rectangle or square. In this case, it is necessary to measure the minimum number of walls.
If the bathroom has a complex shape, you must carefully measure all protruding elements and take into account existing niches. The results need to be recorded on the diagram, so it will be easier to calculate the materials. A drawing made to scale will also allow you to take into account all the details of the bathroom design and correctly plan the arrangement of furniture. The calculation algorithm is influenced by the type of laying of floor tiles (diagonal, rectangular, rhombus, etc.).
How to take into account areas without tiles in calculations?
Let's take a door as an example. Let's turn to the diagram of the wall with the applied mesh.
Thanks to the real calculation of the arrangement of elements, immediately after applying the grid, you can see how many tiles cross the door. We count the number of whole elements that fall on the opening and subtract them from the total number. Tiles that partially crossed the door area are not subtracted.
We do the same with any area that remains uncoated.
Tile selection
Before calculating the required number of products, it is necessary to determine their characteristics. The bathroom differs from other rooms in its high level of humidity, which makes the requirements for finishing materials quite high.
When purchasing tiles, you should take into account their properties, which they should have especially for flooring:
- abrasion resistance;
- high strength;
- resistance to temperature changes;
- moisture resistance;
- resistance to household chemicals;
- resistance to agents with an abrasive component.
How to adjust the result taking into account the decor?
The simplest and most economical option is if the decor has the dimensions of the background tiles. Then we replace the main elements in the calculations with decor (in rows, columns or individually), subtracting this quantity from the total.
Example:
On the already calculated surface there should be decor located vertically. Its size matches the parameters of the main elements.
The size of the wall in the tiles is 8 rows × 10 columns.
This means, taking into account the decor that will occupy one column, the main tile will have 9 columns by 8 rows, i.e. 72 elements. The decor will be represented by 8 tiles.
We do the same with decor located horizontally. Piece decor is simply subtracted from the total quantity.
If the decorative elements do not match the main ones in size, we use the calculation principle for areas without cladding (example with a door). We apply the decor and grid of the main tiles to the wall diagram. Then we determine how many whole products are at the intersection and subtract them from the total number.
Classification of tiles by size
The cladding in question is produced industrially, both according to GOST standards and according to the regulatory documentation of TU, STO, OST. Therefore, the sizes of ceramic bathroom tiles are unified only in the first case, but may differ from one manufacturer to another.
For example, for flooring, the industry produces tiles 30x30 cm and 33x33 cm in almost the same volumes. On the territory of the Russian Federation, the following classification of ceramic cladding for bathrooms has been adopted:
- mosaic – 10x10 mm – 70x70 mm, with a pattern, pattern, color transitions, various shades;
Mosaic in the bathroom interior.
- small format – 100x100 mm – 200x200 mm, plain or with a pattern, ornament, unidirectional decor (imitation board, marble);
Finishing the bathroom with small tiles.
- "brick" – size 60x120 mm or 65x130 mm, less often the length of the tile is 150 - 300 mm, width 75 - 150 mm, the second self-name is “hog” due to two technological holes on the back side, reminiscent of an animal’s snout;
Boar tiles in bathroom design. - medium format – square or rectangular with sides from 200 mm to 400 mm, their length ratio from 1:1 to 1:3;
Bathroom wall tiles with medium sized tiles.
- large format – the length of any side of the tile is from 450 mm.
Using large tiles in the bathroom.
If professionals are hired to finish a bathroom, then the optimal dimensions of the tiles are selected by the designer who prepares the project, and not by the tiler who ensures the quality of the coating. When doing self-repairs, the home craftsman has to solve all the issues alone.
Experts believe that it is best to use small and medium-sized cladding for bathrooms, since most typical bathrooms in apartments have modest dimensions. Naturally, this does not apply to spacious rooms.
Calculation for the “Diagonal” layout
Accurate calculations for this option, taking into account decoration and omissions, are only possible using a diagram drawn to an exact scale.
After all the calculations, it would be correct to additionally multiply the result by 1.1. This allows for an error of 10%. This will save you from searching for similar ceramic tiles in case of errors in cutting, different colors and other troubles.
All these rules apply to tile calculations on any surface, including in the toilet and for tiles on the floor.
USEFUL INFORMATION: Cost of turnkey bath and toilet renovation: calculation of the cost of bathroom renovation
Calculation of bathroom area for finishing with expensive ceramics
From the methodology described above, it is clear that calculating the need for tiles based on the area of the base being finished has a significant error. Today, tiles, the price of which is not significant, are used only in utility rooms, and ceramics for bathrooms are chosen from materials in the mid-price range and above. Therefore, the advisability of purchasing, for example, 44 squares of tiles, of which 4 squares constitute a reserve, is not justified. In addition, modern bathrooms are rarely tiled in monotonous ways - at least combinations of zones are used both on the floor and on the walls, the finishing of which is done with tiles of different colors, formats, and textures. A reserve of 10-15% of tiles for each such zone is not justified, therefore in such premises the area is used to determine the need for an adhesive mixture or to calculate payment to the contractor. To calculate the consumption of tiles for such bathrooms, a layout map is drawn up on paper, which shows on a scale the optimal layout in each zone of a particular type of tile.
If the cladding option is not too complicated, then the base itself can be laid out in a similar way.
This method allows you to calculate the amount of ceramics accurate to one tile, and as a reserve add one or two sheets for facing difficult areas.
Plumbing hatch for tiles: dimensions, features
Meters are usually installed in bathrooms, so the question is: “How to provide access to utilities without spoiling the exterior finish?” sounds very relevant. The best option would be to install a hidden plumbing (inspection) hatch, which will not stand out from the general background.
Hidden invisibility hatch
The design of a hidden inspection hatch consists of several main elements:
- The frame and door are usually made of aluminum, covered with moisture-resistant gypsum fiber sheets.
- Magnetic latch.
- Installation loops and adjustment units.
Such technological hatches do not outwardly stand out against the background of the premises: there is no handle, the hinges are not visible. To open the invisible hatch, you need to click on its center, the magnetic lock will work and access to meters and pipes will be open
How to choose a hatch to match the size of the tile
Determining the size of an invisible hatch for already purchased tiles consists of several stages. In particular:
- You need to calculate how many tiles are needed to completely close the door.
- It is taken into account that the size of the door should be less than the area of the tiles.
- The ceramics protruding beyond the lid should not occupy more than 40%.
When determining the size, only the number of whole tiles is taken into account: cut and adjusted elements will deprive the secret hatch of its invisibility status.
| Hatch size (w*h*d) mm | External dimensions (w*h*d) mm |
| 150*150*35 | 210*210*35 |
| 150*200*35 | 210*260*35 |
| 200*200*35 | 260*260*35 |
| 200*250*35 | 260*310*35 |
| 200*300*35 | 260*360*35 |
| 200*400*35 | 260*460*35 |
| 250*250*35 | 310*310*35 |
| 250*300*35 | 310*360*35 |
| 250*350*35 | 310*410*35 |
| 300*300*35 | 300*360*35 |
| 300*400*35 | 360*460*35 |
| 300*500*35 | 360*560*35 |
| 300*600*35 | 360*660*35 |
| 400*400*35 | 460*460*35 |
| 400*500*35 | 460*560*35 |
| 400*600*35 | 460*660*35 |
| 400*700*35 | 460*760*35 |
| 400*800*35 | 460*860*35 |
| 500*500*35 | 560*560*35 |
| 500*600*35 | 560*660*35 |
| 500*700*35 | 560*760*35 |
| 500*800*35 | 560*860*35 |
| 600*600*35 | 660*660*35 |
| 600*800*35 | 660*860*35 |
Optimal size of notched trowel
Notched trowels are commonly used for laying ceramic tiles. Thanks to this tool, the glue is applied in waves, so the excess does not protrude beyond the boundaries of the tile area.
To achieve this result, the spatula must be selected according to size. Ideally, the width of the tool should be equal to the sides of the tile, or slightly greater. It remains to determine the size of the comb teeth. For tiles of any shape other than square, you can use the following diagram:
- Tile area 50-100 cm2 – tooth size 4 mm.
- Area 100-400 cm2 – size 6 mm.
- Area 400-900 cm2 – size 8 mm.
- Area 900-2,500 cm2 – size 10 mm.
For uneven bases and floor coverings, the size of the teeth may vary larger.
| Side size of a square tile (when using rectangular tiles, the calculation is based on the area - see above) | Recommended spatula tooth size |
| Up to 5 - 7 cm | 3 mm |
| Up to 10 cm | 4 mm |
| From 10 to 20 cm | 6 mm |
| From 20 to 30 cm | 8 mm |
| From 30 to 50 cm | 10 mm |
| Over 50 cm | 12 mm |
Recommendations for laying ceramic tiles
To properly lay ceramics, you must follow the following technological process:
- Work always starts from the far corner and is carried out towards the door.
- To simplify the process, it is recommended to install beacons and make markings.
- In uneven corners, tiles can be laid through a special plastic corner, which partially compensates for surface errors.
- At the final stage, the base row is laid out, which levels out all the unevenness.
After laying the tiles, the gaps are filled with grout mixture.
Common installation mistakes and how to fix them
Inexperienced tilers may make mistakes during the installation process, including:
- Insufficient preparation of the surface to be coated. Bathroom wall tiles stick especially poorly in areas where wallpaper or paint has not been removed.
- Incorrectly prepared solution. A liquid mortar will cause the tiles to slide, but a mortar that is too thick will make it heavier, increase drying time, and impair adhesion. Lumps in the solution will also weaken the hold.
- Cracking of tiles. The reason for this is that the solution is not applied to the entire surface of the tile, but along the edges. To replace one tile on the wall, it is carefully removed along with the remaining mortar. Fresh adhesive is applied to another tile and placed in place of the removed one.
- Differences between tile planes. The reason is an uneven wall or a layer of mortar of different thicknesses. To avoid such a mistake, you need to use a level in your work.
- Inconsistency of seams. This error can only be corrected by timely dismantling of several tiles and their subsequent re-laying.
The appearance of the installation is spoiled by incorrect measurements, incorrect cutting of tiles, and mismatched seams on adjacent walls. One mistake made leads to other mistakes.