Gypsum decor is varied, which allows it to be used in interiors of any style, size and purpose. To decorate your home with relief decor, it is not necessary to purchase ready-made elements or order them from workshops. Working with alabaster is not difficult, just study the technology and features of the material. From the article you will learn how to make stucco molding from plaster with your own hands.
When we see intricate relief decorations, it’s hard to believe that we can do it ourselves at home. The secret is that such decor is not sculpted, but cast in special patterns. Sculpting an elegant figure from alabaster is possible for people with artistic skills. For the rest, additional devices help create plaster products with their own hands at home. They greatly facilitate the process of obtaining decor.
How to choose material?
The appearance and durability of the decoration depend on the correctly selected raw materials. Experts recommend using alabaster grades from G5 to G25. For large works, grades from G4 to G7 are suitable. The powder is sold dry in paper bags ranging from 5 to 30 kg. To make your own gypsum products white and durable, it is recommended to purchase raw materials from large construction stores or specialized markets.
Advice! When purchasing gypsum by weight, make sure that there are no sand impurities or caked lumps. The color should be uniform and the grind should be fine.
Some manufacturers produce raw materials marked “for artistic stucco.” Products made from it are distinguished by increased whiteness. It is fine-grained, durable, and has a high solidification rate.
In craft departments or construction stores, special plaster casts are sold - containers for pouring the mixture into the model. Previously, they used rubber balls cut in half. By squeezing one edge of the plaster, it is convenient to fill the template details with the contents.
Preparatory activities
Do-it-yourself plaster stucco molding at home is created in stages:
- Determine the size and model of future jewelry. It is necessary to plan in which part of the room the elements will be located. Dimensions and decor design should harmoniously complement the style of the room.
- Make a full-size paper sketch. Based on the drawing, sculpt a model of relief decoration from construction or art plasticine.
- You can order a prototype of a future work in the workshop, buy a polyurethane analogue.
- Make an impression based on the obtained sample.
- Cast the product and process it.
Advice! Large complex stucco decorations should not be installed in small rooms. It will look out of place and weigh down the space. It is better to give preference to laconic images of small sizes.
Before starting production, it is necessary to prepare the site. It would be good if it was a separate room - a garage or a workshop. If there is no such room, when work will be carried out in a living room, nearby surfaces must be covered with film to protect them from dirt and dust.
For work you will need a table or other surface corresponding to the size of the elements. It is important that the tabletop is absolutely flat and horizontal. This can be achieved using a level.
During the creation process you will need tools and materials:
- construction plasticine;
- beaker;
- plaster;
- spatulas of different sizes;
- stationery knife;
- narrow brush;
- silicone;
- release liquid, silicone oil, ordinary soap or soap solution;
- painting mesh or gauze.
What to make a decorative column with your own hands: materials and their features
The choice of material should be taken responsibly - as mentioned above, the service life of the columns and the difficulty of making them yourself depend on it. Among the most common materials from which decorative columns are made today are the following types.
- Decorative column made of polystyrene foam.
We can say that this is the cheapest option, but you can’t count on fully producing columns from it. You will have to purchase polystyrene foam for the columns. This is a kind of permanent formwork in the form of cylinders cut lengthwise. They are installed in the right place, after which their internal cavity is filled with concrete - a kind of molds that are not removed after the concrete has dried. The technology for making such columns with your own hands seems to be simple, but as far as finishing and operation are concerned, there are several pitfalls here. Plastering polystyrene foam is very difficult - this time. And the second drawback is that it is soft (this material is great for finishing with stone or mosaic, but not for plastering or painting). Decorative foam columns photo - Decorative wooden columns.
This is an excellent option, especially if you plan to use a lot of wood in the interior of the room. Making high-quality columns from wood is not as easy as it might seem at first glance - at least, ordinary household tools are not enough. At a minimum, you need a lathe on which the column is turned in parts, and they are already assembled into a solid product by installing anchors. Decorative wooden columns photo - Decorative columns made of plaster.
To make them, molds are required - today this is not a problem at all. Gypsum columns are made by casting, which is very easy to do at home. This is an undoubted advantage of this material, but besides it there are also disadvantages. First of all, this is a complex and painstaking technology for finishing the columns, as they say, to condition - the gypsum product is puttied with a very thin layer in order to eliminate various types of cavities formed during the casting process. After this, it is cleaned and only then mounted and painted. This process itself is not complicated, you just need to be patient, especially if we are talking about columns of complex configurations, decorated with bas-reliefs. By the way, columns can be cast from concrete in almost the same way. Decorative gypsum columns photo - Columns made of decorative stone. This material is notable for the fact that columns made from it do not require finishing. One of the disadvantages is the fact that they are not suitable for every interior. In most cases, they look massive and only look good in large rooms. We can say that columns made of decorative stone are in some way similar to columns made of foam plastic - both materials are used as permanent formwork. That is, first a cylindrical formwork is constructed from stone, similar to brickwork, which is subsequently filled with concrete. If the core of the column is reinforced with metal, then it can also perform load-bearing functions. Polystyrene foam columns can be reinforced in the same way.
Drywall. Here is another material that you can use to make decorative columns with your own hands. This method of making columns should be discussed separately - oddly enough, it is most often used in home repairs.
Columns made of decorative stone photo
Mold making
To make gypsum stucco molding look beautiful with your own hands, you need to choose or make the right matrix for casting yourself. You should not save either money or time on this. Cheap templates stretch, have inaccuracies, and may break. Metal patterns are of high quality and durability. They cost several times more, and they are usually made to order.
Silicone is suitable for creating a template at home. When handling it, you need to take into account the following features:
- less durable than metal ones;
- the composition does not spread well over the workpiece.
These problems can be solved. For greater strength, a frame is made of alabaster or other hard material (plastic, wood) under the silicone template. To make the gypsum solution easier to distribute over the impression, the latter is lubricated with a liquid that improves sliding.
The finished model is coated with silicone using a brush. At this stage, it is important to prevent bubbles, which will lead to unevenness in the plaster decor. After applying the first layer, reinforcement is done - gauze is laid, then repeated 2-3 more times. The thickness of the silicone should be 3-5 mm. The gauze should not be stretched so that when compressed it does not deform the product. Each layer of silicone takes 2-3 hours to dry.
After final drying, the silicone blank is removed from the model. For greater stability, a frame or base is constructed. The first one is made from boards according to the dimensions of the workpiece. The second is cast from alabaster. It follows the contours of the silicone template and does not allow it to change when pouring plaster.
Removing the silicone mold from the model
Advice! For small molded units, ready-made silicone blanks are suitable, intended for creating soap, candles, and confectionery. They are presented in a wide range in the creativity departments.
Columns in the interior of a modern apartment
As we have already said, columns in a city apartment today are used mainly for decorative purposes.
Columns in the interior can be both decorative elements and supporting structures
However, in a loft-style room and wherever there are no partitions, the column can also bear the load.
The upper part of the column is called the capital, the lower part is called the base. The capital can also be a decorative decoration of the ceiling
Columns are made today from the following types of materials:
- Marble, granite
- Brick, concrete
- Drywall
- Gypsum
- Polyurethane
Today, decorating columns and arches with artificial stone or polymer concrete is also popular.
Do-it-yourself finishing of columns with plasterboard
Dry method of bending a plasterboard sheet
Marble and granite are certainly expensive materials, and they have to look for alternatives
Columns made of lightweight plasterboard look like real ones. It won’t even immediately occur to you that these are dummies, that is, hollow objects (false columns)
The most difficult thing in making such columns is the frame.
The column can be rectangular or round. There is also another variety - pilasters. They relate to columns conditionally. This is actually half a column protruding from the wall.
Let's first consider how to make a rectangular column from plasterboard.
- Two bases are made from a metal profile (upper and lower)
- The contours of the base are compared using plumb lines
- The bases are attached to the ceiling and floor with dowels
- Profile posts are attached to the corners of the bases
- All sides of the frame are reinforced with cross members
- Then sheathing with plasterboard and final finishing with a finishing plaster mixture is carried out.
Video: DIY column finishing
How to make round columns
Round columns made of plasterboard are made according to the same principle. They are also easy to make with your own hands. But the manufacturing process is more labor-intensive:
- First, circles are drawn on the ceiling and floor, also using plumb lines.
- Cuts are made on the profile for the bases at a distance of 5 cm
- The profiles are combined with circles and secured using dowels
- A sheet of drywall on one side is cut along its entire length, also at a distance of 5 cm between cuts
- The finished sheet is bent around the frame, the cuts are sealed with a plaster mixture and left to dry.
- Then attach the sheet to the guide profile
- They do the final finishing, adding stucco as necessary.
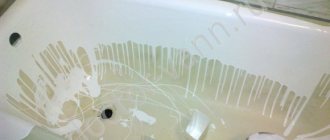
Preparation of the solution
To make your own gypsum stucco molding beautiful and durable, you should choose high-quality dry raw materials. They differ in composition. Some manufacturers add additional components that make working with the mixture more convenient and the final product highly durable.
- The solution is prepared in small portions in order to have time to distribute the entire amount among the containers.
- First, water is poured in, then powder is poured in, but not vice versa. Otherwise, lumps will form and the mixture will not work.
- The ratio of parts of water and alabaster is 10 to 7.
- The liquid is used cold.
- The consistency of the solution resembles liquid sour cream.
- First, the gypsum is poured into water and allowed to settle. Then mix thoroughly. A small volume is stirred with a spatula; for a significant amount, a drill with a mixer attachment is used.
- To improve the plasticity of the composition and to prevent the finished product from cracking, PVA glue is mixed into the mixture.
- Cement is added to increase strength.
Beginners in handling gypsum should know the features of the material:
- liquid solution is plastic;
- hardens quickly;
- when drying, alabaster expands;
- the final product is fragile, especially small parts.
The solution hardens within 5 minutes. During this time, it is necessary to fill out all the blanks. For those who are faced with such work for the first time, the task will be impossible. The hardening mixture will not penetrate into all recesses, especially small and narrow ones.
Advice! To slow down the hardening of the gypsum mixture, add gelatin or hide adhesive solution, borax, slaked or quicklime. They allow you to delay hardening by 30-35 minutes.
In some cases, hardening needs to be accelerated, for example, if a figure is formed on a wall. The easiest way is to pour in hot water. And also for this purpose, add alum, sodium sulfate or regular table salt.
Creation technology
First, prepare the silicone pattern - clean it from dust and small particles. To make it easier to remove the plaster figure, a release silicone grease is applied to the template. To do this, use a brush to treat the entire surface, leaving no uncovered areas. In untreated areas, the composition will set tightly; removing the hardened product without damage will be problematic.
The prepared solution is poured into lubricated matrices. It is recommended to do this in two steps:
- Apply the first layer of gypsum mixture with a brush. In this case, you need to make sure that there are no air bubbles left. When they burst, depressions and cavities will form on the figure, and the surface will not be uniform and smooth.
- Fill the container to the brim.
Advice! Large-sized works or works with thin parts are recommended to be reinforced with reinforcement. To do this, after applying the first layer of gypsum, a painting mesh is placed in the mold. Then fill the remaining space.
Afterwards, the structure must be gently shaken to release air bubbles. The back part needs to be leveled with a spatula. If it turns out to be lumpy, then fixing it to the wall or ceiling will be unreliable. There will also be noticeable gaps between the figure and the wall. Additional effort will be required to seal the cracks and level them.
The gypsum solution is kept for 20 minutes, after which it is carefully removed. If you do this earlier, the alabaster that has not completely set will be damaged. If left for a longer period of time, the plaster will harden greatly and adhere to the silicone template. Deformations may occur during removal.
The finished part is left to dry for a day. The air temperature should not be lower than +16℃.
Drying finished parts
Leveling, puttying and grouting
But even though the column is mounted, it doesn’t look very presentable. Therefore, you will have to work a little more on its appearance to make it look truly expensive. First you need to correctly design all the corners with visible defects. And here a plastering corner for finishing work will come to your aid. In those places where the corners of the foam are uneven or damaged, you just need to glue such corners of certain sizes. They are glued with the same tile adhesive, but you can use regular wood glue. While working, make sure that the glue does not dry out on the front parts of the foam, otherwise subsequent decoration will not be perfect.
To make the column look natural, all defects are puttied after its installation.
Next we move on to the process of applying putty. It is applied in 2 main layers. The 1st layer will be the base layer, and the 2nd layer will be the final layer, determining the very degree of smoothness of the surface. This two-level processing will provide better adhesion to the material and maximum smoothness.
First you need to apply the thinnest plaster mesh to the column, and then apply the first putty layer. This layer should be such that the mesh only adheres to the surface and is not completely invisible under the putty layer. This is how the column is finished over its entire area, including visual supports.
When the 1st layer is dry, you can begin the 2nd. The 2nd layer must be applied especially carefully. Please note that the putty layer itself should also be thin. But at the same time, in the end, it must hide behind itself all the defects, irregularities and finishing materials on top (mesh and plaster corners). So, after the putty dries, a smooth white surface with no visible defects should form.
Now that the putty has completely dried, you need to lightly grout the surface of the column. To do this, use fine-grained sandpaper. Only during work you don’t need to get too carried away, since this grouting is done for preventive purposes in order to remove very small imperfections. Finally, use a dry cloth to wipe off any dust from the columns.
Finishing work
If all the steps are completed according to the instructions described, then the DIY stucco molding should turn white after 24 hours of drying. At this stage, the part is polished, defects are removed, and brought to the desired appearance. For leveling, use fine sandpaper. You must act carefully so as not to damage the fragile part. Then the parts are coated with a primer.
Sanding of finished products
The plaster figure has a matte white color. Having covered it with colorless varnish, we get a decoration ready for installation. Alabaster stucco in a natural shade is used in many interiors. But if, according to the idea, the figure should have a different color, then it is painted with water-based paint or patinated. It is more convenient to do painting before attaching the parts.
How to mount a semicircular wall from plasterboard
Today we want to tell you how to make a wall or partition from plasterboard of an unusual shape, namely a semicircle. such an unusual wall will decorate not only the interior of the apartment, but will also add a unique twist to your country house.
The difficulty of installing a semicircular plasterboard wall with your own hands is as follows:
- Only steel fasteners (profile) are suitable for it.
- The HA has a tensile strength, so it must be bent carefully and according to a template.
But to make it easier for you, our website will tell you all the intricacies of this matter.
1. Draw a line on the floor along which the wall will go. To do this, take a rope and a pencil (you can use chalk or a marker). We press one end of the rope (this is the zero point), and draw an arc with the other.
2. Take the U-profile and make cuts on it. They usually have factory cuts so all you have to do is continue them.
3. Now we attach the cut profile to the floor using quick installation.
4. Using a plumb line (it can be the same rope), we make a projection of the zero point onto the ceiling. Now, based on this point, we draw an arc in the same way as we did on the floor.
5. We mount the first vertical element using the C-profile. Now we connect the C and U profiles with screws. To ensure that the profile stands vertically and at right angles, you need to use a level.
6. Now we are preparing the profile for the ceiling. It is done in the same way as for the floor. We fix it with a vertical profile, but do not attach it to the ceiling yet, only strengthening it with a wooden wedge. Then we mount the profile in the same way in the middle and on the other edge.
7. Now we drill holes in the profile on the ceiling to secure it. Then we install vertical profiles in increments of 20cm.
8. We strengthen the outer profiles with U-profiles. And we fix it with screws with profiles on the ceiling and floor.
9. On the resulting frame, you can begin to attach plasterboard slabs to the outer side of the arc (convex). It must be secured with screws at 15 cm intervals.
Fill the space between the profiles with mineral wool or other sound insulation so that the wall transmits less noise.
10. After this, we sheathe the inside of the arc. Installation must be done starting from the center to the edges of the structure. After finishing with the first layer, we proceed to covering the second layer.
11. We cut the slab in half lengthwise and begin installation from the floor - this is done so that the fastening places do not coincide.
12. We cut off and sand all protruding parts. Then we attach a strip of drywall equal to the width of the profile to the profile. And we polish again.
13. We glue the joints of the slabs with a special mesh tape for drywall.
14. Apply putty to all corner parts, and a perforated corner on top. Then level it with an angle spatula. Also, it is necessary to putty the joint between the plasterboard and the ceiling. Then we apply the finishing (fine-grained) putty to the wall and sand it with “zero” (the finest sandpaper).
15. After everything, we remove dust, prime and paint.
That's it, the wall is ready. Good luck with your work!
Attention, TODAY only!
Related News
Installation features
Three days after low tide, the figures are ready for installation. Small gypsum units are fixed with an adhesive composition. It consists of PVA glue and water in a ratio of 1 to 1.5. Notches are previously made on the back side for better adhesion to the surface. The glue is applied to the wall or ceiling, to the element. Then they are connected using rubbing movements. In this case, excess glue will protrude around the edges. They are removed with a spatula before they harden.
Large figures are heavy. They are additionally fixed with dowels. To do this, holes are drilled in the product and screws are screwed into the wall or ceiling. The resulting depressions are covered with gypsum mixture and sanded. The same composition is used to rub the cracks and correct the figure if necessary.
Tips and a description of the technology on how to make plaster products with your own hands will help you create a unique decor for your apartment or house. A tastefully selected volumetric composition will create a harmonious space with a special mood.
Assembly of square columns
This is the simplest option that does not require the purchase of special materials and a lot of time.
Square columns have the easiest assembly option; installation can be done using metal profiles or wooden beams.
- First, at the installation site of the column, markings are made for its base.
- Afterwards, the frame base is assembled at the marks. A guide profile is mounted on the floor, secured to dowel-nails or anchors. Before final fixation, you must measure the diagonals, then you will get a perfect square.
- Exactly the same design is made on the ceiling, which should be located directly on top of the floor.
Options for laying decorative gypsum bricks on the wall: step-by-step instructions
The frame can also be assembled using a wooden beam with a cross-section of 50×50 (40×40) millimeters. For the base, they are cut to the required size and secured to the floor with anchors.
The supports are made from a rack profile, which is inserted into the guides, and attached with “fleas” or press washers. The entire installation of racks is checked with a plumb line or level.
Wooden racks are fastened to the base using mounting angles and self-tapping screws.
- To add rigidity to the entire structure, you need to add jumpers from the same rack profile. To do this, shelves are cut to the width corresponding to the rack on parts cut to size. The remaining plane will serve for attachment to the supports.
- When the frame is ready, it is covered with plasterboard. In this case, two faces are cut out with small protrusions, between which the other two sides of the column will be inserted. Sheets of material are fixed with self-tapping screws, pressing the caps into its surface.
- After assembly, the surface of the columns is prepared for finishing and decoration.
Half-columns are assembled in the same way with only one feature: only one side is adjacent to the load-bearing wall.
Tips for use in the interior
Who said that stucco has no place in a modern interior? It's all about the quantity and design of the elements. Relief decor decorates walls, ceilings, niches, fireplace facades, window and doorways. The shape of the stucco is also different. Let's look at some types.
Socket
Gypsum rosettes are used as a base for a central chandelier. In classic interiors it has a round shape with various ornaments. The options are extensive; in modern style rooms they are found in the form of geometric patterns and abstract shapes.
Plaster rosette on the ceiling
Panel
They decorate part of the wall indoors or outdoors. The variety of drawing subjects allows you to organically fit three-dimensional images into the interior, highlighting a certain wall. If there are defects on the surface, then thanks to the panel they can be hidden.
Skirting
One of the most popular stucco forms in interiors of any style. They are used to decorate the junctions between walls and ceilings or floors. By varying the width of the plinth, you visually increase or decrease the height of the ceiling. They are often painted in a color contrasting with the walls, which gives the room solidity.
Ceiling plinth in the interior
Molding
Another popular stucco decor. Smooth moldings without a pattern are suitable for rooms in a minimalist, hi-tech, and modern classic style. Products with various ornaments will look good in Baroque, Art Deco, and Classic styles.
Plaster molding in the interior
Plaster molding in the interior
Cornice
Cornices are most often found in the exterior decoration of buildings, but they are also popular for interior decoration. They emphasize the junction of the wall and the ceiling. In modern apartments, this type of stucco is installed as part of the lighting solution. A space is left between the cornice and the ceiling in which an LED strip or other light sources are placed.
Plaster cornice in the interior
Pediments
We came to interior design from classical architecture. In rooms, pediments are installed above door and window openings, arches, and built-in wardrobes. Traditionally they have the shape of a triangular vault, which is not always appropriate in living rooms. The clear geometry makes the space uncomfortable, and the size of the element allows it to be used only in spacious rooms. In this case, use the option with a gap at the top. The figure becomes less elongated and takes on an interesting shape.
Pediments in the interior
Pediments in the interior
3D panels
Decorative gypsum panels are a trend in modern interiors. They are used to decorate walls, giving them expressiveness and an interesting texture. They are painted and tinted. Thanks to the backlight, the convex parts of the structure emphasize the three-dimensionality.
3D plaster panel
3D plaster panel
This element is used to decorate door and window openings, to divide space and design niches. Classic ones look like a regular arc. Modern options are presented in a wide variety: square, irregularly shaped, with niches and lighting.
Plaster arch in the interior
Columns in the interior - features of use.
Columns in the interior are among the most visible elements in interior design. After all, this large element will not go unnoticed in any case, due to its size and design features. Therefore, most often their design is the key point in further interior design; moreover, it is the columns that set the style for the future interior.
Different shapes and sizes allow you to play with space, thin high columns can give the interior more elegance, they can also visually make the ceilings higher and the room larger.
Thick columns will bring fundamentality and a sense of reliability to the interior, but at the same time they will lower the ceiling and make the room smaller.
The atmosphere and style of the room will, of course, be influenced by the appearance of the columns - their architectural design. It should be noted that they can be used not only in classical or antique-like styles, but also in completely modern ones. From hi-tech, loft, modern to country, columns of the appropriate design and shape can be used in most styles and in any room.
If used correctly, the interior of any home or apartment can be significantly improved. After all, thanks to such a material as gypsum, it can be built anywhere, even in the smallest apartment. This creates the opportunity to hide the shortcomings of the room, if any. In addition to the visual correction of the room, decorative columns in the interior can successfully hide load-bearing structures and various types of communications running along the walls or coming from the ceiling.
Using them you can successfully make zoning. For example, in a classic apartment, in this way you can easily separate the dining area from the cooking area in a large kitchen. You can perfectly highlight a fireplace in the living room if you install a column on either side of it.
How to restore
Over time or due to mechanical damage, the gypsum decor is destroyed. In this case, restoration of worn parts or their complete replacement will be required.
Renovation Tips
When carrying out restoration activities, the following recommendations are taken into account:
- Before starting reconstruction, you should study the scale and type of damage, and then choose the appropriate method of exposure or camouflage.
- If a small fragment is destroyed, replacement is not required. Existing damage is repaired directly on the element.
- If the stucco molding has changed color due to getting wet or dirty, the entire product is painted in a color that matches the interior. Water-based paint is suitable.
- Artistic painting will help hide minor scratches. Oil paints are used for this.
- In case of loss of a significant part, restoration work is carried out by checking the photograph, if available.
- If there is no photograph of the lost part, then a new one is made taking into account the general style of the room.
- During restoration, cracks and seams are opened and re-sealed with fresh mortar.
- Weakly fixed parts are removed, the surfaces are leveled and fixed again. In this case, double fastening is recommended - with glue and dowels.
- If paint comes off on an area of a figure, the entire element is painted over. Otherwise, the color of the freshly coated area will be different. To do this, the old layer is cleaned off the part, the surface is sanded, primed and a coating of the desired color is applied.