At a time when the analog standard for transmitting television signals reigned, home televisions required only one outlet - an electrical outlet. And the wire from the antenna was pulled across the entire apartment and connected directly to the device. Now that the analog signal has changed to digital, and the number of wires is being minimized, TV sockets have become relevant. They allow you to connect the cable to the TV, and hide communications securely and aesthetically. Let's try to figure out what types of TV sockets there are, and what you will have to face during connection and installation.
Types of TV sockets
TV sockets are divided into three types:
- Single, they are simple, individual;
- Pass-throughs or tees;
- Terminal or trailing.
Each type has its own purpose and its place in the communications system. For example, you cannot install an end one where a single one should be installed. Let's take a closer look at what is used where and why.
Single sockets are a simple solution for apartments where there is only one cable and one TV. If you install an end signal instead of a single one, you will get signal attenuation and interference. Therefore, do not believe those who say that there is no difference, outwardly you may confuse them, but in work they give the opposite effect.
An example of a simple socket from the Legrand Valena series
Pass-through sockets are needed where there is only one cable, but there are several TVs. Remember the tee device - something similar here. From the outlet there is one output for connecting the cable from the TV, the other leads to the next outlet.
Try to minimize the number of pass-through sockets; at each link of this sequential chain the signal power is reduced. Long serial chains of sockets require an amplifier, otherwise there will be a very weak signal at the end of the chain.
An example of a pass-through socket from the Legrand Cariva series, which can be purchased on our website.
The terminal TV socket serves to close the line. It is always installed in systems with pass-through sockets, but is not used as the main one. Such a device is needed to ensure that TVs operating in conjunction do not experience distortion on the screens.
Termination TV socket from Legrand Valena series.
Design features of sockets
The last thing I want to talk about in this article is the design features of the TV outlets themselves.
In appearance and in terms of installation method, they resemble ordinary power ones, except perhaps for the connectors into which the antenna cable is plugged.
There are single sockets used for the star circuit. They have the simplest design, as well as matching filters that prevent signal reflection, due to which the level drop is no more than 3 dB - this practically does not affect the quality.
Pass-through sockets are more complex in design; they solve the problem of matching and transmitting a signal with minimal losses. If we talk about the drop in general, then at the output connector to the receiver it is no more than 3 dB, but the signal transmitted further drops by 10...15 dB.
The terminal socket for a pass-through circuit resembles a single one, but for all that it is significantly different, both in its purpose and design, and therefore they should not be confused in any way.
Connection diagrams
Sockets can be connected in series or in a star configuration.
A pass-through or series circuit looks like this:
In this model, pass-through TV sockets are installed at the beginning of the circuit. Two cables will come from each of them - one to the TV, the other to the next pass-through socket. At the end there will be a terminal socket. Keep in mind that the signal strength will decrease from link to link.
A star or parallel circuit looks like this:
The star circuit contains a signal amplifier. Typically, the power supplied to the input TV cable is enough for one, maximum two receivers. And if there are more of them, you need to either amplify the signal using the receiver, or ask the provider for additional power.
After the amplifier or after the input, a splitter is installed, from which several cables will go - separate to each TV. For example, Legrand Valena TV divider for F-connector 5-1000 MHz.
If all TV sockets in the star system are used, then simple and terminal models can be used. If one line remains unoccupied, you need to take terminal sockets, in this case there will be no distortion on the screens.
The “star” circuit is convenient for installation and testing - all wires are collected at one point, and a malfunction on one line will not affect the condition of the other. This scheme implies minimal signal power losses, which can be completely minimized with the help of an amplifier.
Regardless of the connection scheme, one thing you should discuss with your provider is the number of TVs that can be installed on the line for free. Some have no limit, others require additional payment, and if you connect unnecessary devices without authorization, you may be fined.
Tips for choosing the right one
The following recommendations will tell you which GSM socket is best to choose for your needs.
To avoid mistakes, pay attention to the following:
Manufacturer. Buy a product from a better known and reputable brand. The most popular are Sapsan, Siberian Arsenal, Tantos, ORCAM and Proline.
Available functionality. There is no point in buying a fancy model to turn off a forgotten iron and boil water to make coffee.
Number of connectors. Be smart about choosing a model with a certain number of outlets. There should be, if possible, exactly as many as required.
Power. This criterion is one of the most important, especially in the case of a power strip where several pieces of electrical equipment are connected. The permissible power reserve must be at least 30% of the maximum load.
Any additional features can significantly increase the cost of the product, so try to accurately determine the need for a particular function.
Installation
There are no strict rules for choosing where to install a TV outlet. The only thing you should be guided by is your own aesthetic sense. If you want your house to not look like a spider's lair, place the TV socket closer to the edge of the screen.
The cable laying from the outlet to the antenna can be hidden in a pre-prepared duct for low-current networks or external. The first option is ideal for those who want to forget about the existence of wires in the apartment. But if the repairs have already been carried out and the communications are hidden, the sockets will have to be installed externally, and the cables can be aesthetically hidden behind baseboards and cable ducts.
Different types of sockets are used for hidden and external installation. When choosing a device, ask the seller for the type of installation.
How to choose a TV cable
You can read about how to choose a cable for your TV and how it works in the article. Let us only recall that the cable for TV must have reliable insulation so that signal attenuation is minimal and the signal is protected from external interference factors. The most reliable in this regard are Italian Cavel cables. Domestic manufacturers have a simpler design, but their price is lower.
Cavel SAT 50 – suitable for hidden and outdoor installation.
Cavel SAT 703 – suitable for hidden and outdoor installation.
RG-58 A/U 50 Ohm – more suitable for outdoor installation.
Practical advice
We have listed all the existing methods for installing a socket box in a wall with your own hands. Finally, I would like to give some useful tips that will allow you to install glasses in grooves faster and more correctly.
- If your walls are covered with PVC panels (for example, in the bathroom), buy a socket box for plasterboard and carry out installation in the same way as the fastening technology in gypsum plasterboard sheets. To avoid accidentally tearing out the socket from the plastic panel when pulling out the electrical plug, it is recommended to make a reinforcing frame from plywood or the same plaster behind the plastic.
- Install the products after plastering the walls. If you first install the glass in the groove and then plaster the walls, you may not be able to install the socket flush in the future. It’s better to play it safe and not carry out installation while the walls are unplastered. At the same time, installing a socket box after the wallpaper has already been hung is also not the best solution, because... you will have to disturb the decorative decoration of the walls, which can ruin the interior of the room. That is why the golden mean is to install the product immediately after plastering, because as a last resort, finishing putty and wallpaper can cover all the defects.
- Check with a building level that the markings are horizontal, especially if you decide to install a block of socket boxes (for 3-4 sockets). Otherwise, after you fix the connected glasses in the wall, you may end up with an oblique block, which will negatively appear on the interior of the room (the double socket will be crooked). The video instructions for installing glasses in a brick wall (at the very beginning of the article) show a very convenient marking and groove technology, which will make the seats for sockets and switches perfectly level.
- If you have a situation where you need to install a socket box in a through hole (for example, in an apartment) or in a hole that is too large, simply apply more alabaster and use the usual method to smear the glass into the wall. You can also use a spacer made of wooden blocks to pre-attach the plastic cup. Using polyurethane foam for fastening is a controversial issue. On the one hand, the rules of the PUE do not prohibit the use of this material, but on the other hand, foam will not satisfy fire safety conditions, so it is better to use alabaster.
- When replacing electrical wiring in the house, you can, of course, leave the old holes for the socket boxes if you are satisfied with the installation height of the built-in sockets and switches. Otherwise, you can always cover up the old holes and make new ones where it will be more in demand.
- If the wall is too thin to mount a standard glass, it is better to install a surface-mounted switch or socket. You can, of course, trim the height of the socket box a little and make it suitable, but this is only as a last resort.
That's all I wanted to tell you about how to install socket boxes in a concrete, brick, wood and plasterboard wall. We hope that the information provided, photo examples and video tutorials were useful and understandable for you!
Also read:
- How to make grooves for wiring correctly
- What types of electrical outlets are there?
- How to install electrical wiring under drywall
Installation features
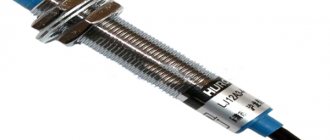
To connect a TV socket, you need to remove the insulation from the central core of the TV cable at a distance of 20-25 mm from the end of the cable. Make sure that the braided wire and screen foil are not damaged. Then bend the braid and foil over the cable sheath and strip the insulation so as to expose the core of the wire, leaving 1-2 mm of insulation near the screen. After this, the cable is inserted into a special hole, and its central core is fixed in the socket device. The installation method will vary from manufacturer to manufacturer.
It is better to entrust the installation to a specialist, since there are cable laying standards that, if not observed, can result in interference. For example, if you use RG‑6 type wires, you need to maintain a distance between the power and antenna cables. The gap should be 3 cm or more.
Installation of a socket for an electric stove
Power socket blocks that are installed to power power-demanding equipment must be selected taking into account high electrical safety parameters.
Standard sockets are rated for a current of 10 or 16A. When connecting a more powerful current, the contacts will heat up. To prevent this from happening, it is necessary to use 32A devices with a short-term load of 40A for power consumption less than 7 kW and 63A if power consumption exceeds 7 kW.
The best solution when connecting an electric stove and other powerful units is three-phase power. If you take 3-phase power sockets, then they will have up to 5 contacts.
When figuring out how to install a power socket for a stove, you should opt for an overhead structure using a multi-core copper cable with a cross-section of each core of 3x4 mm. Connection to the connector and plug is made according to the established diagram. The cable must pass through a 40A automatic protective device.
If you are faced with the absence of a grounding loop, then the cable must be “hung” on a special metal structure in the electrical panel. But connection to the metal body of the switchboard or grounding to the neutral wire is not allowed. Contacts must be cleaned and protected from oxidation.
We come across power connectors all the time. Their installation requires knowledge in the field of electrical engineering. This is especially true for installing sockets for powerful electrical equipment. That is why it is recommended to delegate these functions to specialists.
Combination sockets
When the outlet has one outlet, everything is simple and clear. And devices that are decorated with a bunch of connectors can be confusing, especially considering their complex markings, for example, TV-RD-SAT.
Such sockets are called combined sockets because they are designed to connect different receivers. If your provider immediately offers a package of terrestrial television + satellite + radio + Internet, then such a package implies a bunch of wires that need to be pulled to different devices. But everything can be simplified if you install a mixer block in the distribution board and collect signals from several antenna cables to it. Then only one outgoing cable is inserted into the apartment and the signal is divided by frequency on site. This is what the combined socket is used for.
Combination sockets vary in type, but there is nothing complicated about this either. You just need to know how to read their labels.
TV-RD-SAT – stands for television (TV), radio (RD) and satellite receiver (SAT). Accordingly, such an outlet can transmit a signal to the listed types of devices. This combination can be found in Legrand Valena series devices.
TV-FM-SAT – can transmit a signal for a television receiver (TV), FM radio and satellite receiver (SAT). Such sockets can be found from the Legrand company in the Cariva series.
If you have to select and install a TV outlet, start with planning. Determine how many devices you want to install and on which broadcast channels. Install TV sockets closer to the receivers and do not forget about power sockets, which can be beautifully combined into a group. On our website you will find reliable and modern sockets of both universal colors and interesting designs. We offer products from well-known brands. You can find it in the section.
TV socket device
The main parts included in the design of any TV outlet are:
- TV socket housing (or printed circuit board), which is designed to connect an antenna cable to it. In a single socket, this part does not have any electronic circuits and serves only to ensure reliable contact between its elements.
USEFUL INFORMATION: Wi-Fi router into an outlet: repeaters, repeaters
- Front panel. This design element of the device performs not only a protective, but also a decorative function. It can be chosen to best suit the interior of the room. Depending on the purpose of the Legrand socket, it may contain additional outputs, for example SAT and R. The TV-R-SAT socket is connected using a single cable coming from a special adder.
- Caliper. Serves to fasten all elements of the socket design to each other, as well as securely fix the device in the mounting box.