What does a Christmas tree garland consist of?
What is a garland of LEDs, is it worse or better than a regular one?
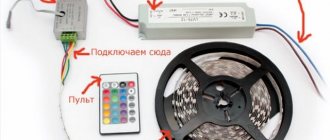
Externally, this is almost the same product as before - wires, light bulbs (LED), control unit.
The most important element is, of course, the control unit. A small plastic box on which various operating modes of the backlight are indicated.
They can be changed by simply pressing a button. The unit itself can be quite well protected with IP44 level of moisture and dust protection.
What's inside? To open it, use the sharp tip of a knife or a thin screwdriver to pry up the latches from below and remove the protective cover.
By the way, sometimes it is glued, and not just sitting on the latches.
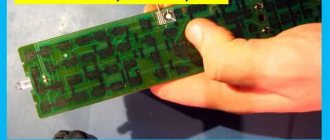
First of all, inside you will see wires soldered to the board. The thicker wire is usually the network wire, supplying 220V voltage.
Soldered on the board:
- the controller that creates all the lighting effects
- thyristors, each of them goes to a separate channel of the garland
- resistors
- capacitor
- and diode bridges
The number of board elements depends primarily on the number of light channels of the garland. More expensive models may have a fuse.
How to make an LED garland with your own hands using a simple circuit and lithium batteries
Electrics
The content of the article
- What you will need to install an LED garland
- Making a garland of LEDs
- LED garland on lithium batteries
- How to make a garland using lithium batteries
- How to make a “running lights” garland
LED garlands are the main attribute of the New Year holidays. They transform a dull winter landscape into a fairy-tale space. This type of illumination is used both outdoors and indoors. The LED garland can be hung on the Christmas tree, walls, railings, cornices and other structures.
What you will need to install an LED garland
Diodes come in different powers. Those intended for outdoor use have a higher efficiency, since the supplied energy is converted to a greater extent into light rather than heat. Indoor diodes operate with less power, but produce no less bright and pure light.
An LED garland, assembled with your own hands, will become a real holiday decoration. To make it you will need:
- 20 mA LEDs;
- wire with a cross section of 0.5 or 0.25 mm;
- power supply 6V;
- 100 Ohm resistor;
- soldering iron (preferably with a thin tip);
- kitchen or stationery knife;
- transparent silicone sealant;
- sealant gun;
- rosin;
- solder.
Making a garland of LEDs
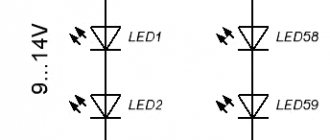
The simplest LED garland circuit is a serial connection of all its elements. Anyone can cope with this task, since it does not require knowledge of electronics and electrical engineering. The main thing is to follow the instructions exactly.
- At the beginning of work, they decide at what distance the diodes should be located.
- Next, unwind the wire and mark the location of the LEDs with a marker. It is optimal if one lighting point is 20-25 cm from the other.
- Where the marks are located, use a sharp knife to cut off the upper part of the wire insulation. It is enough to expose an area 2-3 cm long.
- Rosin and a little solder are applied to the cleaned part of the wire. This will make the process of attaching the LED easier.
- The legs of the diode are brought to the formed influx and soldered to the wire. But such a garland mount is not very reliable. Therefore, a reinforcing fixation is used, which will simultaneously cover the exposed part of the wire.
- Take a narrow piece of tape, cut a strip 3-4 cm long and carefully wrap it around the LED. This must be done so that it ends up in a kind of “pocket” and rests confidently on the wire. This is done with each lighting point throughout the entire garland.
- Using a special gun, the upper part of the “pocket” is closed with transparent silicone sealant. After this procedure, the light from the diodes will be more saturated and bright.
- Connect the resistor and power supply.
This DIY garland of LEDs can also be used for street illumination. But in this case it is recommended to use an 8-12V power supply. The LED garland circuit is extremely simple. But there are some that require knowledge of electronics to implement.
LED garland on lithium batteries
A garland of LEDs powered by lithium batteries is extremely impressive: when moved, it leaves behind a bright multi-colored trail. Using this type of illumination, you can create original patterns in the air. This garland is resistant to wind and precipitation. To make it you will need:
- multi-colored light-scattering 10 mm diodes;
- magnets with a diameter of 1.3 mm and a thickness of 3 cm;
- narrow tape;
- lithium batteries CR2032 3V;
- any epoxy based adhesive.
Since making an LED garland is not easy, you will need attentiveness, patience, soldering skills and strict adherence to the instructions.
How to make a garland using lithium batteries
- The first thing you need to do is test the diodes to see how bright they will be when powered by a lithium power supply. To do this, the longer leg of the LED must be connected to the positive pole of the battery, and the shorter leg to the negative pole. Accordingly, the anode is to “+”, the cathode is to “-”.
- In this position, wrap the diode and battery with a double layer of tape.
- A magnet is applied to the positive pole of the battery and also secured with tape.
- Fix each diode on a thin wire.
How to make a “running lights” garland
To make “running lights” type illumination, you will need three garlands, each of which contains several groups of parallel-connected diodes. To create and control the “running light” effect, a three-phase multivibrator on transistors VT1-VT3 is used. To make it easier to start, a 0.1 µF capacitor is installed in the shoulder of transistor VT2.
The machine is powered by a full-wave rectifier, implemented using diodes VD1-VD4. The garland can be mounted in the form of a square on a sheet of plexiglass with a thickness of at least 5 mm. The panel can be hung outdoors or indoors. These LED garlands, photos of which can be seen on New Year-themed websites, are very impressive. But for a beginner in electronics, it will be difficult to implement this rather complex circuit.
LED garland with your own hands, how to make an LED garland, LED garland for a Christmas tree, DIY LED garland, LED garlands, photo diagram of LED garlands, LED garland diagram, Electrics
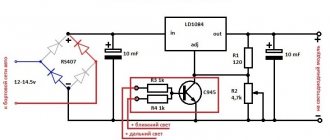
LED garland diagram
The AC mains voltage is supplied to the power controller through resistors and a diode bridge, already rectified and smoothed through a capacitor.
In this case, this voltage is supplied through the button, which is open in the normal state. When you close it, the controller modes switch.
The controller in turn controls the thyristors. Their number depends on the number of backlight channels. And after the thyristors, the output power goes directly to the LEDs in the garland.
The more such outputs, the more varied the colors the product can have. If there are only two of them, this means that only two parts (or halves) of the garland will work in different modes - some bulbs will go out, others will light up, etc.
In fact, these two lines of diodes will be connected on two channels in series. They will connect to each other at the end point - the last LED.
If for some reason you are annoyed by the blinking of the garland and you want it to glow evenly with only one color, it is enough to short-circuit the cathode and anode of the thyristor on the back side of the board using soldering.
The more expensive the garland you have, the more outgoing channels and wiring will leave the control board.
At the same time, if you follow the traces of the board, one of the mains voltage outputs is always supplied directly to the final LED of the garland, bypassing all elements of the circuit.
093-12-channel super garland on ATtiny2313.
2013 update added at the end of the article!
Update 2015
Update 2016
The New Year holidays are approaching and on this occasion I want to do something bright and festive! I decided to make a New Year's garland. What could be brighter and more festive than a New Year's garland? :). I decided to make not a simple garland, but a sophisticated one! 12 channels plus control from an IR remote control. In order not to make a garland from scratch, it was decided to use ready-made Chinese garlands as donors for internal organs of spare parts. This makes sense for the following reasons: - the cost of the garlands, let’s be honest, the cost is a pittance. Try to buy wires, LEDs, spare parts for the same money... And if you don’t take an LED garland as your goal, then light bulb garlands are now sold for almost nothing; — an important factor is ready-made LED lines soldered together. Soldering yourself, heat shrinking, making mistakes and redoing 12 lines is quite a tedious job; - yet, I don’t know about you, but I have a certain number of non-working garlands lying around (they are often brought to me to repair them - and they end up) you can not spend money on new ones at all, but collect them from what you have.
To get started, watch the video:
ATTENTION! The garland circuit is not galvanically isolated from the dangerous 220V voltage network! Touching any conductive part of a garland connected to the network is DANGEROUS TO LIFE! THEREFORE: - if you are not well versed in electricity, do not repeat this design; — any actions (soldering, measurements, etc.) with the circuit must be performed only after disconnecting from the network; — programming the microcontroller must be done either separately from the board (for example, in a breadboard specially assembled for this purpose), or by powering the garland board from an external 5 volt source (for example, from batteries); — the finished structure must be well insulated and inaccessible to small children and animals; - Be careful when assembling the structure!
If you are aware of the dangers of assembling such a garland and are committed to following safety rules when working with dangerous voltage, then you can read about how to assemble a super garland.
1 Garlands patients.
3 new LED garlands were purchased as sacrifices - they are beauties
