Home Buildings
Date of publication: 06/20/2019
0
4721
- Selection of materials and tools
- Waterproofing of floors, walls and ceilings.
- Ventilation system.
- Drain arrangement
- Installation of a shower cabin with your own hands.
Even a novice builder can make a shower in a frame house, bathhouse or country cottage with his own hands. The main thing is knowledge of engineering standards, a detailed plan and knowledge of professional tricks.
Bathroom in a frame house
Content:
- Choosing the right cabin
- Suitable installation locations
- Installation options
- Step-by-step instructions for equipping a shower cabin with your own hands
- Ventilation system
- Sewerage
- Preparing the subfloor for the shower room
- Waterproofing works
- Wall construction
- Manufacturing and connecting a shower cabin
- Video on the topic of shower cabin in a wooden house
Construction and interior finishing work in wooden houses is not easy and very expensive. Wood is considered an environmentally friendly type of building material, which is gaining more and more preference among the population. Wooden buildings have an excellent aesthetic appearance, do not harm human health and are reliable. However, there are also some nuances in engineering communications and repair work, for example, in order to create a shower cabin with your own hands in a wooden house, you will have to try.
Ventilation work
Special attention should be paid to organizing the ventilation system in the part of the room where the shower stall is planned to be located. Good ventilation prevents the appearance of condensation, fungal bacteria on the surface of the wood and other microflora that are harmful to human health. To better protect the material from destruction, it is necessary to use special compounds to impregnate the wooden structures of the house, thereby carrying out disinfection.
In order for the shower cabin in the bathroom to serve properly for a long time without destroying the structure of the wooden house, a competent ventilation device is necessary.
The simplest option is to use a fan and maintain the air speed in the room. In this case, there is no need to install a supply and exhaust system, which is quite difficult to implement in a residential wooden building. Recommended fan power is 110 cubic meters per hour. Important!
Rooms in which the humidity level is higher than normal must be equipped with a mechanical ventilation option so that the air circulates constantly. To ensure that the air flow is not hampered by the door fence, you need to create a small gap, closed with a special grille, at the bottom of the door leaf. This will allow air to enter the bath more naturally. After completing the water procedures, turn on the fan for a while. Proper installation of ventilation will remove excess moisture from the room and normalize the microclimate.
Choosing the right cabin
There are two main types of shower cabins - with and without a tray. The first type is much more practical, easier to use, and more convenient. The second one is easy to install and connect. If the room is small, a sloping floor will fit perfectly into its dimensions instead of a standard pallet, which is made of bricks (or poured concrete) and neatly finished with tiles. The most suitable material from which a movable wall is made is tempered glass; it copes well with the load during a strong impact.
The second way is to attach a regular plastic curtain, which carries moisture well and traps it inside the tray. If you decide to use a simpler option - use the most common transparent glass, instead of durable tempered glass, its minimum thickness should be 6 mm or higher. In this case, it is recommended to use a transparent (or colored, optional) self-adhesive film.
The principle of this action is clear - the film will delay the scattering of fragments around the room and protect those who are nearby. It is important to frame doors made of polycarbonate and acrylic in an aluminum alloy frame.
Complex waterproofing of a shower in a wooden house
After preparing the wooden base, a waterproofing layer is laid. To do this, perform the following actions:
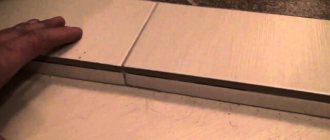
- Prepare rolled material or mastic. The latter can be applied without prior leveling the surface. Rolled materials are laid, overlapping the lower parts of the walls.
- Tape the joints with reinforcing tape. The floor level of the bathroom and toilet is lowered by 2 cm compared to other rooms. A low threshold setting is required. This eliminates flooding of neighboring premises in the event of emergency situations.
- They are building a pedestal for the cabin. The walls are made of brick or formwork is installed into which concrete is poured.
- Installation of the ladder. This stage is performed when arranging a stationary cabin. The floor is laid at a slight slope, allowing water to drain faster.
Types of moisture protection products
Waterproofing material.
All waterproofing materials are divided into two groups. The first is used to create a protective layer on the wood. The second type is used to impregnate boards, protect them from rotting and the spread of pathogenic microorganisms. The types of materials laid on the surface include the following:
- roll waterproofing impregnated with bitumen mastic;
- material based on cellulose fiber;
- viscous bitumen mastic;
- polymer substrates or films;
- polymer coatings.
The group of impregnations includes the following products:
- Oil compositions. Contain natural or synthetic components with hydrophobic properties.
- Varnishes, stains. The composition includes organic solvents, artificial resins, pigments. The products protect the wood from rotting.
- Hydrophobic compounds. When applying the solution, a film is formed on the boards, preventing water from penetrating into the thickness of the wood. The use of such a composition helps preserve the structure of the material.
Application of the composition.
Suitable installation locations
The first thing you need to do when choosing between a bathtub and a shower room in a wooden house in favor of the latter point is to decide on the installation location. Most often, preference is given to the corner option. In advance, it is recommended to supply water and electricity to the planned area. The cabin itself should be located slightly above floor level in order to properly install the water drainage. Operating rules and instructions for self-assembly come with the booth.
Self-installation of the structure
- Select a suitable box . Take into account the structural features of the cabin, the height of the bathroom (wood tends to shrink , so it is better to leave room under the ceiling with a reserve), dimensions .
- Ensure adequate ventilation of the room.
- Install drainage and water supply . This must be done before working on the floor .
- Prepare the floor . Install a cement screed or cover the floor with a high-quality moisture-resistant coating .
- Waterproof walls .
- Install the cabin .
Ventilation
For rooms with high humidity in a wooden house, additional ventilation . The easiest way to do this is with an exhaust fan . Algorithm for installing a hood in a bathroom:
- Mark the installation location of the device on the wall.
- Cut a hole using a drill.
- Insert the coupling and cut off any protruding parts.
- Connect the electrical wiring .
- Drill holes for fasteners .
- Install the housing and muffler .
- Close the housing with the lid .
- Cover the opening on the outside of the house with a ventilation grill .
How to make sewerage and plumbing
Installation depends on the type of water supply system . Stationary centralized is the easiest to implement . Pipes are laid after connecting to the water supply network independently or with the help of specialists. With a decentralized method of water supply, it is necessary that the water intake be located at a distance of at least 20 meters from the septic tank, cesspool and similar objects. The source of water can be a well , a well or an open reservoir . In a permanent residence, it is recommended to use a well with a powerful pump .
Installation of a shower cabin to the sewer begins with assembling the pallet . The pallet must be installed strictly horizontally using special supports. It must be located at right angles to the wall, otherwise leaks .
Photo 2. The Grundfos MQ 3-35 pumping unit, located in the house, effectively pumps a large volume of water from the well.
How to install a device with a pallet
- Remove the necessary fragments of the apron .
- One of the ends of the corrugated hose on the drain elbow .
- The other end of the hose is mounted to the drain hole .
- The first end of the hose is inserted into the side nipple located on the drain elbow.
- The pallet is installed in the appropriate place .
- A control drain is performed .
The procedure for connecting to the water supply system
Plugs and pipes for connecting to the water supply must fit well to seal the connections.
Step-by-step technology for connecting to water supply:
- Shut off the water supply to the riser.
- Open the cold and hot water valves to relieve pressure in the system.
- Remove the old faucet , if there was one.
- Unscrew the coupling with pliers.
- fittings on each of the water pipes .
- Lubricate the fittings (ordinary machine oil will do) and screw in the adapters for the shower stall.
- Install the anchors following the instructions.
- Attach the hoses to the adapters , tighten all connections.
- Place the shower panel .
- Attach water supply pipes and insert decorative elements .
- Turn on the water to check the tightness of all joints.
- Install the handle .
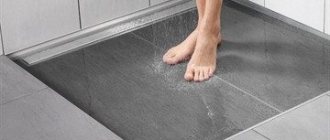
Flooring treatment
Preparing a wooden floor involves waterproofing the coating . There are several surface treatment methods:
- Waterproofing paint . The simplest and least expensive method . Polymer or bitumen are purchased . Before painting, you need to sand the floor surface and dry it . After finishing the painting work, the floor is varnished . Such insulation will not last long due to the appearance of cracks from temperature changes.
- Waterproofing mastics . More plastic, therefore less vulnerable to temperature changes . It is recommended to use glassine rather than cement mastics. Liquid glassine is not so fragile and can be applied to a wet surface .
- Insulating fill . This method will help smooth out differences in height and unevenness at the joints of wood boards. They are made from bitumen or asphalt concrete . Filling is carried out in several layers . The slabs are cleaned and the joints between them are sealed. Formwork is installed along the walls . To evenly distribute the solution, you need to use a notched trowel .
Photo 3. The process of treating the floor with concrete pouring for maximum insulation of wooden coverings and elements from moisture.
Installing the device near wooden walls
The walls in a wooden house can be built from round timber , timber , boards or OSB boards during frame construction. If they are made of round timber, timber or boards, it will be necessary to level the walls under ceramic tiles or PVC panels .
Important! It is recommended to use sealant and insulation of the same class . Mastic or emulsion is applied to the surface in several layers . The first layer is horizontal , the second is vertical , and so on until the end.
Leveling is done by constructing a plasterboard frame . In this case, the walls can be waterproofed using a water vapor-proof film . It is installed between a wooden wall and drywall. Seams and corners are sealed before waterproofing is applied .
Process steps
- Before installing the pan, you need to connect the drain system . Ideally, the pan drain should be located directly above the sewer drain , but if this is not possible, flexible hoses .
- Pallet assembly. Place the legs on the places marked in the pallet and tighten them until they stop , securing them at the top with nuts and washers .
- A frame is installed on this structure . The central support is secured with nuts . The pallet is placed in the prepared area and leveled using a building level.
- Siphon is connected . A flexible hose is connected to the drain hole and a control drain . If leaks the joints are treated with sealant .
- Partitions are being installed . The frame is assembled, all connections are treated with sealant. The panels are inserted into the grooves and secured with nuts . The contact areas are treated with sealant.
- Roof installation . Before installation a watering can lighting elements , speakers , and a fan if available, are fixed on it. The roof is attached to the frame using screws and self-tapping screws .
- Door assembly . Seals and rollers are installed on the door , and then the doors are attached to the designated places. The doors must close tightly .
- Water supply . Using hoses, connect the shower stall to the water supply .
- Electrical connection . a waterproof outlet in the bathroom with a specially dedicated electrical wiring line.
Attention! Before using the cabin, you must wait until the sealant has completely dried and make sure there are no leaks .
Installation options
Before you start installing a shower corner inside a wooden house, it is important to first make basic preparations: make waterproofing, ventilation (from insects that can live in a poorly ventilated room), put a concrete screed on the floor, it is best to finish the walls with tiles. Basic conditions that must be met when installing the booth:
- the shower tray must be clearly fixed on a flat surface;
- there are no recesses in the floor covering, and the corner section of the wall should be equal to 90 degrees;
- if necessary, the pallet must be installed on a support;
Installation to the sewer system occurs as follows:
- pipes for connecting to the water supply must be the same in diameter;
- the siphon should be located slightly above the drain level (for uniform flow of water into the sewer);
- The drain must be sealed with sealant after installing a waste pump.
The shower hose is connected separately, after carrying out the above work.
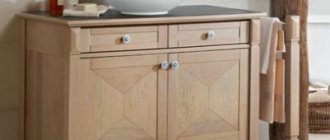
Interior of a bathroom with a cabin in the country: photo
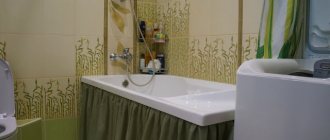
Photo 4. A spacious shower enclosure with a low tray without a roof effectively complements a wooden bathroom.
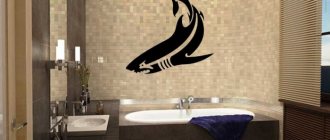
Photo 5. Glass shower stall isolated from a wooden wall using wide moisture-resistant walls.
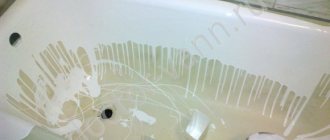
Photo 6. Classic corner cabin located in a compact bathroom in the country.
Photo 7. A shower cabin made of wood-look material does not interfere with the design of the room with log walls.
Step-by-step instructions for equipping a shower cabin with your own hands
Installing a shower cabin in a wooden house requires mandatory compliance with the relevant rules, without which installation will not be possible:
- a drain ladder must be equipped, which is responsible for draining water from the building;
- equip indoor ventilation at the proper level. This is a fundamentally important point for the release of moist air masses - the room must be well ventilated.
Step by step, a shower in a wooden house is arranged as follows:
- the stage of planning all the subtleties - the number of bathrooms in the building, the capacity of the room, the number of people who will use it. It is important to think through the details of the location of sockets for connecting plumbing, determine the location of the washing machine, shower stall, etc.;
- decide on repair work and finishing of the bathroom, parameters of pipes, ventilation passages, and wiring;
- draw up a schematic plan for the placement of furniture and household appliances in the room, clearly indicating the additional distance between them, in accordance with safety regulations;
- separately consider the finishing of the ceiling and walls, materials for waterproofing, and provide protection for wood coverings;
- arrange the floor. If you decide to lay tiles, you should first make a concrete screed with reinforcing mesh. The next layer is waterproofing, again the mortar on which the tiles are laid;
- lighting is the last stage of bathroom installation. Halogen lamps, whose voltage is relatively low, are ideal. It is important to take into account the moisture resistance class, information about which can be read on the packaging. You can also use lighting fixtures for use in conditions with a high moisture coefficient.
Tips for choosing a box
Many cottage residents are concerned about the question of how to install a shower stall in a private house. First of all, you should familiarize yourself with the presented range of such products. This is necessary to choose a model that is suitable in size for your bathroom. Today the following varieties are found:
- standard shower;
- design with pallet;
- multifunctional hydrobox.
When purchasing a product, be sure to take into account its external and internal dimensions. Firstly, it is important that the structure fits in the space allocated for it. Secondly, you should use the product without compromising your own comfort.
The optimal solution would be to go inside the cabin and try to spread your arms there or sit down. When choosing a model with hinged doors, keep in mind that to fully open them you will need to have free space in front of the box.
As for the configuration of the models, the best option for small rooms would be corner or square products. They allow rational use of the bathroom area when placing plumbing fixtures in corners. Owners of large bathrooms can purchase rectangular or elliptical structures that are completely independent of the walls in the house and can be placed closer to the center of the room.
Corner shower stall will not take up much space
Pay attention to what functions the system is equipped with. Today you can purchase both a traditional shower without a tray and a modern hydrobox with a full bath. In addition, different models have other capabilities. The cabins are equipped with lighting, radio, various modes of water supply and hydromassage. Luxury models are even equipped with a sauna or Turkish bath. The lower the functionality of the product, the cheaper it will be. In this case, experts recommend not to save money, but to choose the option that suits you. Models in the mid-price segment have proven themselves quite well. In this case, an additional advantage of purchasing such a shower will be the presence of its own side and rear walls, and not just the front panel.
Choose products based on their functionality and convenience
Be sure to inquire about the quality of the product and ask the seller to show the instructions and certificate for it. At the same time, it is important to check that the model’s equipment actually matches what is stated in its description. It is better to refrain from purchasing cheap Chinese systems of dubious quality.
Look at the pressure indicated on the cabin itself. It is desirable that it coincides with the pressure in the house system. It is usually around 3 bar.
By following these simple recommendations, you will definitely choose a suitable and high-quality product.
Ventilation system
Ventilation in a wooden house is an interesting question. There is an opinion that wood “breathes” on its own, thanks to micropores, which is undoubtedly good, but in rooms with a high level of moisture (bathroom, kitchen, toilet) it is simply necessary to equip a ventilation system. If there is no quality ventilation in such rooms, fungus and mold will form on the surface of the walls and ceiling.
A passive ventilation system is an ideal solution for a small building. This type involves the exchange of air without the use of mechanical devices (air conditioners, fans), in a natural way. Building structures made of wood have cracks invisible to the eye through which air flows enter. The air exits to the outside through hoods, which are standardly equipped in the kitchen and bathrooms.
Moisture protection for walls and ceilings
As mentioned above, in a log house it is necessary to insulate all planes. The walls are covered with two layers of polyethylene film or any other polymer. You can apply plaster on top or build a plasterboard structure. In this case, everything depends only on the desired design of the bathroom.
Ventilation shafts can be hidden behind a suspended ceiling
In buildings of this type, experts recommend making suspended ceiling systems from hydrophobic materials, laying the same polyethylene underneath them. This design will provide reliable protection for the floors from the penetration of wet steam. In addition, you can hide the air exchange system and electrical wiring behind it, which can improve the aesthetics of the room.
As for ventilation, it would be better to focus on forced-type models. To do this, you will need to install a system for air inlet and outlet and install an exhaust fan.
Sewerage
The sewage system is an extremely important element that should be taken care of in advance before making a shower in a wooden house. Such a building has its own individual characteristics that are worth taking into account - over time, the structure shrinks, which affects the pipeline. The material for making pipes should be high-quality metal-plastic, plastic or polyethylene coating, which gives good resistance to various types of mechanical damage.
Pipe parameters for connecting to plumbing: toilet - 100 mm, sink and shower - 50 mm. All individual pipes are connected to one common riser, located slightly at an angle (tilted down). In case the floor shrinks (this is not uncommon in a wooden house), it is recommended to fasten all the pipes together with moving parts; they help to avoid breakdowns in the system.
Tools
To equip the shower you will need the following tools:
- Measuring instruments;
- Spatula and trowel;
- Containers for stirring grout, solutions and glue;
- Hammer, drill, screwdriver;
- Hammer and screwdrivers of different sizes;
- Grinder, hand saw or jigsaw;
- Spanners.
Waterproofing works
Waterproofing work in wooden and brick houses practically does not differ in technological processes. The procedure is carried out with the participation of building film materials, paints and other mixtures. The finishing of walls and floors is carried out in 2 stages - the selected material is applied tightly in two layers to the surface. A prerequisite is that one layer must be 200 mm high (minimum) and applied over the entire area of the room. The completion of the process is the top layer (a screed made of sand and cement, which is called “floating” in professional circles). The last step is insulation of the floor using technology and cosmetic finishing of the walls and ceiling.
Waterproofing
The purchased tray is sealed around the perimeter with silicone sealant. This completes the installation of the product. But there are times when a private house is made of wood, but for some reason you need to make the pallet yourself. You can read advice that waterproofing the floor in this case is carried out using impermeable film, glassine, roofing felt, polyethylene. But installing them is not the best or most durable way.
Instead, the wood should be treated with one or two layers of deep-penetrating fungicidal primer. This will prevent mold and mildew from growing. Then any liquid waterproofing suitable for wood is applied, for example, TechnoNIKOL mastic. There is no need to save on this, because falling into the underground with all your belongings is such a joy.
Some people place a sheet of stainless steel under the shower stall that is resistant to aggressive environments. Don’t forget to treat the floor underneath with a fungicidal primer. This will protect this risky area from rotting. Steel is not cheap, but it holds moisture well. In addition, compositions for metal processing can be widely found on sale.
Installing a purchased pallet can do exactly the same thing, but there will be fewer leaks.
Wall construction
How to make a shower and not damage the walls and ceilings made of wood, because in the bathroom there is always a high percentage of humidity and condensation - the most common question on construction forums and according to live statistics from experts. The answer is simple - limit the access of water to the external surface of the walls of the house. This can be done by covering the desired surfaces with a special solution that prevents rotting and drying out of the wood.
Another suitable option is to cover it with polyethylene film and insulate it with GVL sheets on top. In the cabin itself, you can stick PVC panels on top of the sheets. To keep the faucet firmly on the panel, you can attach a metal plate that will firmly fix the device in place. The advantage of PVC wall covering is the heat retention function.
Design and design options
There are a huge number of ways to design a shower room. The design and decoration are selected depending on the size of the room, the location of windows and doors, the configuration of the booth, etc.
Natural marble - a luxurious and beautiful pleasure
Mosaic tiles look beautiful and protect from moisture
Finishing the shower with two types of tiles: ceramic and mosaic
Finishing with practical and durable ceramic tiles
The unfinished shower also fits harmoniously into the shower room interior
Decoration Materials:
- Ceramic tiles are a durable, reliable and moisture-resistant material with a wide range of colors.
- Mosaic tiles - used to create images on walls, floors, and ceilings. The variety of colors, shapes and sizes allows you to realize any artistic ideas.
- Marble is a durable and beautiful material. Natural stone will add sophistication to any interior. The disadvantages of marble include its high cost and complexity of processing.
- Plastic PVC panels are one of the lightest and most economical materials. Panels are usually used to cover walls and ceilings. Other materials are used to decorate the floor.
After installation, to avoid loss of attractive appearance, the shower cabin requires proper care. Details:
Manufacturing and connecting a shower cabin
The shower cabin is connected as follows:
- shut off all risers in the house, open the water supply to reduce the pressure level;
- install compression fittings;
- connect the shower hose to the pipeline providing water pressure;
- Carefully connect all hoses to the holes inside the cabin.
When all connection procedures have been completed, it is necessary to check the sealing point: apply water pressure and carefully inspect the places where the connection was made. In case of wetness or leakage, it is necessary to use sealant.
The process of designing and installing a shower in a wooden house with your own hands is quite difficult. There are many versions that moisture (water) and wood are incompatible, but if you follow the recommendations of experts and carry out the installation correctly, you can get a cozy bathroom that is absolutely safe for the overall frame of the house and comfortable for use.
Arrangement of communications
To ensure the normal functioning of a shower in a private home or country house, it is necessary to solve 2 main technical problems: water supply and drainage.
If the house is connected to a central water supply and sewer system, then the issue is resolved simply - a tie-in is made into the existing mains. In the absence of centralized amenities, the problem will have to be solved independently.
Water supply in a wooden house
Water supply can be provided in two ways:
- Own water supply from a well or borehole. In this case, water is supplied using a pump. A mandatory element is a hydraulic accumulator or storage tank, which provides a certain supply of water to eliminate the need for the pump to depend on the use of the shower mixer.
- Tank installation. The shower can also operate when water is supplied from a storage tank located in the attic. Filling such a container can even be done manually. Water is supplied to the shower by gravity.
Sewerage in a wooden house
Your own sewerage system must ensure the removal of wastewater. Such a system can be configured in two ways:
- Storage tank under the shower. Water from the shower tray directly flows into a storage tank located under the floor. Next, water from the tank can enter the filter system or be removed by vacuum cleaners. It is important to ensure that there is no odor from the tank, for which shut-off elements (drain, siphon, etc.) are installed.
- Own sewer system. Water from the shower enters a pipe mounted with a slope, through which it is directed by gravity to special septic tanks (wells) located outside the house.
Requirements for the layout of a bathroom in a residential building
The process of planning a bathroom should be carried out taking into account ergonomics and building codes.
Minimum area:
- Restroom with toilet – 1.2 sq.m.
- A restroom with a toilet and a small sink – 1.5 sq.m.
- Bathroom with sink, bathtub and washing machine – 3.3 sq.m.
- Combined bathroom with bath, toilet, sink and washing machine - 3.8 sq.m.
Free distance:
- Between the bidet and the toilet - from 20 cm.
- Between the heated towel rail and the bath or shower - from 50 cm.
- Between shells – from 25 cm.
- In front of the shower or bath - from 70 cm of free space, ideally - from 1 meter.
- In front of the toilet - from 60 cm of free space.
- Around the toilet - from 25 cm.
- In front of the sink - from 70 cm, if it is located in a niche, then at least 90 cm.
Method of opening the door. Only outside, the entrance to the bathroom itself should be located in the corridor, the location of the door in the kitchen or living area is unacceptable.
Plumbing arrangement method:
- Linear. The equipment is located along one wall. This method is suitable for narrow rectangular rooms.
- Radial. The equipment is located along several walls. This option is applicable to rooms with a shape close to a square.
Linear arrangement of plumbing fixtures Source design-homes.ru
Radial arrangement of plumbing fixtures Source design-homes.ru
To increase the number of options for arranging appliances and furniture, you can combine a restroom and a bathroom. In this case, it is necessary to legalize the redevelopment in the BTI.