How to check the wiring in a car yourself
All electrical circuits (except for the starter and generator power circuits) are protected by fuses. The power supply circuits of powerful electricity consumers are switched through relays. When searching for the causes of a malfunction of any electrical equipment, first make sure that it is in working order:
- fuse
- relay
- reliable contact in the connectors of its circuit (the terminals of the connecting blocks may oxidize over time, in which case they need to be cleaned).
You should also check all ground attachment points.
If a lighting device (for example, a headlight or a lampshade) does not work, then you should first check whether the lamp has burned out.
Stories from our readers
“Fucking basin. "
Hi all! My name is Mikhail, now I’ll tell you a story about how I managed to exchange my two-wheeler for a 2010 Camry. It all started with the fact that I began to be wildly irritated by the breakdowns of the two-wheeler, it seemed like nothing serious was broken, but damn it, there were so many little things that really started to irritate me. This is where the idea arose that it was time to change the car to a foreign car. The choice fell on the melting Camry of the tenth years.
Yes, I had matured morally, but financially I just couldn’t handle it. I’ll say right away that I am against loans and taking a car, especially not a new one, on credit is unreasonable. My salary is 24k a month, so collecting 600-700 thousand is almost impossible for me. I started looking for different ways to make money on the Internet. You can’t imagine how many scams there are, what I haven’t tried: sports betting, network marketing, and even the volcano casino, where I successfully lost about 10 thousand ((The only direction in which it seemed to me that I could make money was currency trading on the stock exchange, they call it Forex. But when I started delving into it, I realized that it was very difficult for me. I continued to dig further and came across binary options. The essence is the same as in Forex, but it’s much easier to understand. I started reading forums, studying trading strategies. I tried it on a demo account, then opened a real account. To be honest, I didn’t manage to start earning money right away, until I understood all the mechanics of options, I lost about 3,000 rubles, but as it turned out, it was a precious experience. Now I earn 5-7 thousand rubles a day. I managed to get the car buy after half a year, but in my opinion this is a good result, and it’s not about the car, my life has changed, I naturally quit my job, I have more free time for myself and my family. You’ll laugh, but I work directly on the phone)) If If you want to change your life like me, then here’s what I advise you to do right now: 1. Register on the site 2. Practice on a Demo account (it’s free). 3. As soon as you get something on the Demo account, top up your REAL ACCOUNT and go to REAL MONEY! I also advise you to download the application to your phone, it’s much more convenient to work from your phone. Download here.
How to find a broken wiring in a car
If there is a break, the electrical circuit opens and power is not supplied to the electrical appliance. Sometimes it is difficult to detect a broken wire due to the fact that the block body hides oxidized contacts. A break may be detected when the pads or wires are swayed.
Checking the integrity of the wiring is carried out with a multimeter in ohmmeter or continuity mode. The terminals of the device are connected to the ends of the circuit being tested.
- If the circuit is intact, the multimeter will beep (in continuity mode) or the resistance will be minimal (in ohmmeter mode).
- If there is a break in the wiring, there will be no sound signal (in dial-up mode), and the resistance will be very high (in ohmmeter mode).
How to make an indicator to check the wiring in a car. How to find the positive wire in a car
How to Determine and Check Polarity Using a Multimeter
Accurate knowledge of the polarity of an electrical appliance is extremely important. After all, if you connect electrical equipment with incorrect polarity, it may either not work or be completely damaged.
In most cases, the “plus” and “minus” of wires and contacts in such devices are indicated by letters, symbols or colors (on the case near the contacts there is a “+” and “-” marker, and the wires are black for minus and red for plus) . But sometimes it happens that it is not possible to visually determine the poles. To do this, you can use either an ordinary polarity tester or improvised means.
Determining polarity with a multimeter
Sometimes it happens that a new electrical device that needs to be connected does not have polarity markings, or it is necessary to re-solder the wiring of a damaged device, and all the wires are the same color. In such a situation, it is important to correctly identify the poles of the wires or contacts. But if you have the necessary instruments, a logical question arises: how to determine the plus and minus of an electrical appliance with a multimeter?
To determine the polarity, the multimeter must be turned on in the mode for measuring direct voltage up to 20 V. The wire of the black probe is connected to the socket marked COM (it corresponds to the negative pole), and the red one is connected to the socket with the VΩmA marker (it is, accordingly, a plus).
After this, the probes are connected to the wires or contacts and the device, the polarity of which needs to be determined, turns on. If the multimeter display shows a value without additional signs, then the poles are determined correctly, the contact to which the red probe is connected is positive, and the contact to which the black probe is connected will correspond to the minus. If the multimeter shows a voltage value with a minus sign, this will mean that the probes are connected to the device incorrectly and the red probe will be a minus, and the black probe will be a plus.
If the multimeter used to measure is analog (with an arrow and a display with gradations of values), if the poles are connected correctly, the arrow will show the actual voltage value, but if the poles are reversed, then the arrow will deviate in the opposite direction relative to zero, that is, it shows a negative current value.
Determination of polarity by alternative methods
If it happens that you don’t have a multimeter at hand, but you need to find the polarity, you can use alternative and “folk” means.
For example, speaker wiring charges are checked using a 3-volt battery. To do this, you need to briefly touch the wires connected to the battery to the speaker terminals. If the cone in the speaker begins to move outward, this will mean that the positive terminal of the speaker is connected to the positive terminal of the battery, and the negative terminal to the negative terminal. If the diffuser moves inward, the polarity is reversed: the positive terminal is connected to the minus, and the negative terminal to the plus.
If you need to connect a DC power supply or battery, but there are no polarity markings on them, and you don’t have a multimeter at hand, plus and minus can be determined using “folk” methods using
How to find a short circuit in a car wiring
If after replacing a faulty fuse it blows again, there is a short circuit in the wiring. It represents an illegal connection of part of the circuit to ground or another part of the circuit. Often the cause of a short circuit is severe oxidation of the contacts in the block, or damage to the insulation of the wires.
If there is a suspicion of a short circuit in any section of the circuit, disconnect this section from the rest of the vehicle's wiring. Set the multimeter to dialing mode. We connect one probe of the device to a section of the circuit, and the other to the body (“ground”). If the circuit is closed, there is a short circuit in that section of the circuit. We find it by examining the entire section of the chain.
It is more convenient to carry out diagnostics of car wiring based on the car's electrical circuit diagrams.
Finding a short circuit in a car
In order to find the cause of the malfunction, you need to stock up on time and patience. To complete the work, prepare the following kit:
- electrical diagram for your car;
- test light or multimeter (tester);
- tools to gain access to the wiring harness.
First, find the circuit you are currently looking at on the diagram. You need to figure out where it goes, through which connectors and what color these wires are.
If you are testing a 12 volt circuit, it is best to start with the fuse of the damaged circuit. Remove the fuse and connect a test lamp parallel to the fuse socket terminals. If there is a short circuit in the circuit, it will light up at full power. By disconnecting consumers and other devices, it is necessary to determine the cause of the malfunction. If the light barely lights up when you unplug a certain device, the problem is with that device. A bright glow of the lamp is a sign of a short circuit in the wiring.
If disconnecting consumers does not help (the light is on brightly), you need to look for the cause of the short circuit in the wiring itself. In this case, you need to inspect the wiring and try to bend the harness in different places. If at some point the lamp goes out, this will indicate that you have broken the short circuit.
We will also mention 5 Volt circuits, for example those used to connect the ECU and sensors. To check them, you need to disconnect the ECU and the battery, set the multimeter to the circuit continuity check mode (“continuity checks”) and connect the probes of the device to the circuit and engine ground. Use the same elimination method to determine the approximate location of the short circuit.
Once you can find the problem area, it needs to be repaired. Before connecting the battery or installing a new fuse, repeat the test using a multimeter or test light.
Faulty or broken car wiring. DIY diagnostics
Problems with electrical wiring in a car occur quite often. For some drivers, this becomes a tragedy, so they urgently turn to the services of auto electricians. Although you can identify a broken wiring yourself with a minimum of effort. The only equipment you will need is a multimeter and basic knowledge of the electrical circuit of the machine.
Replacing car wiring
When replacing wiring in a car, be sure to turn off the power, including disconnecting the battery. Of course, this is not a precaution against electric shock, but protection of the vehicle’s electrical equipment from possible short circuits that may occur during repair work.
Sometimes the replacement can be completed in 10-15 minutes - for example, if the wires of the “battery-generator” supply circuit are damaged. If the integrity of the wiring in the cabin is damaged, there are problems with grounding, or a short circuit in the on-board computer circuit, then the work will take much more time. And the main thing here is not to make a mistake, since incorrectly connecting the wires (for example, if the polarity is reversed) can cause a short circuit, damage to expensive electrical equipment and even a fire. If you do not have experience in electrical engineering and electrical installation work, it is better to contact a specialized service for the services of a professional auto electrician.
How to understand that the wiring is faulty
Before diagnosing the electrical wiring of a car, you need to make sure that there is an existing problem in the wiring. The following symptoms will indicate that the wires are not working:
- Heavy smoke and occasional fire. This indicates a short circuit. This sign poses a dangerous threat to the life of the driver and passengers.
In such a situation, it is necessary to stop the car. Otherwise, as a result of a short circuit, the overheated wires will melt the adjacent wiring along with the insulation, further aggravating the consequences. Often this problem leads to a blown fuse, or a relay may burn out.
- Failure of some electrical parts. In this case, a wiring break occurs, which is less dangerous and with minor consequences than a short circuit.
Looking for a short circuit in the car
To quickly find a short circuit in your car, it is first recommended to check the safety elements and relays. Usually these two components make themselves felt when they fail. Having found these parts, you need to determine whether they belong to a specific node. In most cases, the description is on the fuse box cover. After which you can diagnose this node. A visual inspection of all the wires connected from the fuse box to the element will help here.
If you are unsuccessful in trying to identify a malfunction by external signs, you can use a multimeter. First of all, set it to resistance detection mode, then you need to disconnect the positive tolerance of the unit being diagnosed from the fuses themselves, as well as from the power source.
The next step is to connect one contact of the multimeter to the positive wire. The other contact is connected to ground. The absence of a short circuit will be indicated by the unit value on the device. If there is a problem, then the “plus” will touch the “minus” in a specific area.
Attempts to find a cliff
Checking a vehicle for current leakage with a multimeter involves similar manipulations as with a short circuit. The indicator of the presence of contact in this case will be the resistance measurement. If there is no contact, the resistance moves to infinity, and the device will display one. Contact presence - zero resistance.
Therefore, in order to quickly check for broken wiring in a car, it is necessary to connect our device to two contacts that are suspect in terms of breaks. Here also, the indicator of one indicates that there is a break.
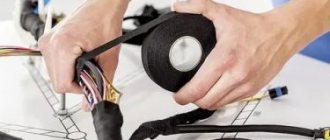
To prevent a break in the future, do not twist the wires at random. For these purposes, there is a soldering iron and specially designed heat shrink. If there is a break in the terminal, be sure to clean it.
Multimeter and battery
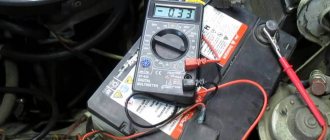
It happens that the incorrect functionality of the battery is obvious. A multimeter comes to the rescue here too. Having picked it up and set it up to measure current, you need to:
- First we disconnect one terminal, then we connect the red contact to the positive value. Accordingly, black goes to minus. A normal voltage reading is considered to be between 12.4 and 12.8 V.
Remember! Measurements are taken no earlier than an hour after the engine is turned off.
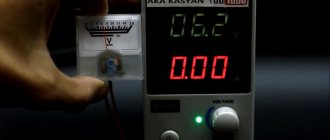
- You still need to measure the voltage under load. This means that it should be equal to a figure twice as large as the capacity.
This means that if the capacity is, say, seventy-five A/hour, the corresponding load should be one hundred and fifty amperes. A voltage drop below nine indicates a battery malfunction. This may also indicate that the battery is undercharged. When you disconnect the load, the voltage usually returns to normal within seven seconds.
By the way, it is better to carry out wiring diagnostics armed with a diagram of the electrical equipment of your car.
Wiring in a car: understanding its purpose
Did you like the article? Follow our channel for new ideas of useful car tips. Subscribe to us in Yandex.Zen. Subscribe.
Without electrical components, a modern gasoline-powered car cannot even move. But the presence of a diesel power unit will not make the car safe and comfortable to operate. And all because, thanks to wiring, all components and assemblies work as a single mechanism.
Features of automotive wiring
Indeed, all these wiring harnesses that encircle the car from top to bottom perform the only task - to ensure uninterrupted transmission of electrical impulses between the components of a particular system. And if one of the wires has poor contact, or even worse, the terminal is burnt out or oxidized, then the operation of the circuit will be disrupted or even fail.
Replacement is simple; it’s more difficult to find the location of a break or short circuit with your own hands, especially if you don’t know how to do it.
In this article we will try to answer many questions, including:
- how to test the wiring in a car to find a fault;
- how to properly repair the actuator;
- how to restore bad contact;
- how to solve other electrical problems.
What's under the hood
In the engine compartment there are many wires that perform a wide variety of functions:
- transmitting high voltage pulses from a current source (generator or battery) to the engine cylinders;
- transmitting data from various sensors;
- ensuring continuous operation of the fuel supply system, lighting fixtures, etc.
What's in the cabin
Inside the car, intended for the driver and his passengers, there are even more wires, since there are:
- Automotive system controls:
- control of external lighting devices (road lighting, maneuvering signals and rear brake lights);
- management of audio devices;
- automatic transmission control;
- control of electronic assistants (cruise control, automatic windshield wipers, navigation system);
- Control devices and sensors;
- Active safety systems:
- electric seat belts;
- driver and front passenger airbag mechanisms;
- Comfort features:
- air conditioner;
- window regulators;
- musical equipment;
- heating systems for windows, mirrors, seats, etc.
Note! Wiring harnesses run through the interior to the rear of the car. Therefore, there is a maximum concentration of electrical wiring inside the machine.
How to detect a fault
If one of the electrical devices or actuators stops working, then there is no need to rush to replace it. It cannot be ruled out that the cause of the failure is hidden in a wiring malfunction, and installing new equipment will not solve the problem.
Any factory manual for a car recommends starting the search for the cause of malfunctions by ringing the electrical wires connecting this device or mechanism to other components.
To do this you need to arm yourself with:
- multimeter;
- or a 12 Volt signal lamp with connecting wires.
How to use a multimeter
In the video in this article you can see some aspects of working with measuring equipment when carrying out work to detect breakdowns in the on-board electrical network. And the main tool of any auto electrician has been and remains a multifunctional digital device - a multimeter. (See also the article VAZ 2105 wiring diagram: description.)
For reference: A multimeter is a universal device that simultaneously combines an ohmmeter, an ammeter and a voltmeter. A voltmeter is responsible for measuring the voltage of the on-board circuit, an ammeter measures the current, and an ohmmeter determines the resistance accordingly.
Voltage check
So, if one of the electronic components in a car stops working, then the first thing you need to do is check the voltage of the electrical circuit that connects it to other devices. (See also the article Gazelle wiring diagram: how to install.)
- Switch the multimeter to voltmeter mode;
- We connect one of the probes of the device to the negative terminal of the battery (if the device being tested is under the hood) or to the ground of the car, trying to choose a place on the body with good contact;
- We connect the second probe to the supply wire in the circuit being tested, having previously removed it from the terminal of the device or instrument.
If values appear on the display, there is voltage in the wire and the wire itself is working. We carry out the operation with other wires, and when we find a point where there is no voltage in the network, we determine that the source of the fault is located in this segment.
Note! In some car electrical circuits, voltage is only present if the ignition key is set to a certain position.
Finding a short circuit
This procedure is characterized by the complete absence of voltage in the circuit.
- the fuse responsible for the circuit being tested is removed;
- the multimeter is switched to voltmeter mode;
- one of the probes is connected to the fuse connection terminals at a time when all other devices and equipment in this circuit are de-energized;
- move the wire - if values appear on the screen, then the wire is shorted.
Note! Most often this happens with wiring in places where the insulation has worn through. A similar test for finding a short circuit can be carried out with any other element of the circuit, incl. with switches.
Checking the quality of grounding
Since the vast majority of cars have a single-wire wiring diagram, and all electrical equipment receives “-” through the metal body of the car, the quality of grounding of devices and mechanisms plays a decisive role.
But during operation, body parts:
and electrical equipment connected to the housing loses electrical contact, they begin to work intermittently. To ensure their serviceability, you should check the reliability of grounding.
The algorithm for checking the reliability of connecting electrical equipment and other elements to the vehicle ground will be as follows:
- Disconnect the battery and connect one of the multimeter wires to the ground of the car;
- We connect the second wire to the grounding point or to the connection that we are checking;
- If values appear on the screen, check them with the factory parameters, and if they are close, then the grounding is in order.
Circuit continuity check
This procedure is necessary in order for the car owner to determine whether everything is in order with the wiring and whether there is a break in the circuit. (See also the article Niva Chevrolet wiring diagram.)
The procedure is as follows:
- Disconnect voltage from the circuit by removing the fuse or disconnecting the terminal on the battery;
- Check the electrical circuit for continuity by attaching multimeter probes to its ends;
- Then connect one of the probes to the vehicle ground;
- If values appear on the screen, there are no breaks in the circuit;
- If the screen remains static, there is a break somewhere in the electrical circuit.
How to check wiring
You can diagnose electrical equipment using a voltmeter, ohmmeter or multimeter, or special diagnostic stands. Computer diagnostics are also carried out, during which error codes and main indicators of the machine’s on-board network are read. To independently check circuits and troubleshoot electrical faults, one multimeter or signal lamp is enough.
We use a multimeter
Fuses in the on-board network are considered the “weakest” link in terms of durability. In case of emergency situations (for example, in the event of a short circuit), the safety elements “take the blow”, protecting the rest of the electrics and electrical equipment of the machine. Fuses cannot be restored and must be replaced during repairs.
Checking the voltage
Before checking the wiring in the car, it is necessary to measure the voltage of the electrical circuit between individual components and electrical equipment. You can call like this:
- Set the multimeter to voltmeter mode.
- Connect one probe of the measuring device to the “minus” of the battery or to the ground of the machine.
- Connect the second probe to the supply wire of the circuit.
If a certain value appears on the device display, then there is voltage in this section of the electrical circuit. You can compare the values with those required according to the vehicle's owner's manual.
Looking for a short circuit
After measuring the voltage, search for short circuits. This will require either a multimeter or a pilot light. As for the lamp, if the wiring is in good condition and there is no short circuit, it should not light up.
A short circuit in the wiring, as well as a lack of voltage (zero or infinite resistance in the electrical circuit), indicates a malfunction in one of 2 components:
- Consumer - electrical equipment, devices, fuses, blocks.
- Wiring – broken or shorted wires, poor wiring contacts at the point of connection with the consumer.
Checking for a short circuit can also be done in voltmeter mode. To do this, it is necessary to remove all fuses in the area being tested and connect the probe to the terminals of the fuse element. The value “0” on the screen indicates the presence of a short circuit in the circuit. If, when you try to move the wires, voltage appears in the circuit, then the short circuit is caused by the wiring and the wires will need to be replaced.
Checking the quality of grounding
Cars use a single-wire wiring diagram - this means that the “minus” goes to the ground (body) of the car. However, corrosion of metal parts, their oxidation and destruction, “loosening” lead to grounding failure and, as a consequence, to disruption of on-board circuit contacts.
Checking the grounding, as well as other electrical elements of the car, is carried out using a multimeter. The procedure is as follows:
- Disconnecting the battery.
- Connecting one multimeter probe to the body (metal parts) of the car.
- Connecting the second probe to the grounding element or wiring connection.
The value displayed on the device screen should be compared with the factory data (car operating manual). If the values diverge greatly, then it is necessary to restore the grounding - clean the metal at the connection point, check the reliability of the fastening.
Checking the integrity of the circuit
The connection of wires in the electrical circuit of cars is one of the most vulnerable points in the entire electrical system of the car. In addition to the destruction of insulation, loss of integrity and breaks at the connection points, oxidation of the contacts also often occurs here. Defects can be determined not only using a measuring device, but also visually. If the integrity of the circuit is broken precisely at the connection point, then soldering of wires with connectors will be required. Otherwise, you need to find the damaged area, which will require a signal lamp or multimeter.
Optional equipment
During operation, car owners often install additional electrical equipment:
- Alarm;
- More powerful lighting fixtures;
- Audio and video equipment, etc.
Integrating them adds wiring to the vehicle and also puts stress on the electrical system. Moreover, a number of “new” electricity consumers cannot be switched off, for example, alarm systems, which means that the likelihood of rapid battery discharge becomes very important.
If your car begins to have difficulty starting after a long period of parking, then you should determine the cause of the current leak. A multifunctional device switched to ammeter mode will also help you find a leak.
Tip: Don’t forget to set the measurement range to 10 Amps, since the current in the car’s on-board network is constant.
How to check current leakage on a used car with a multimeter
The check includes:
- Turn off the engine, remove the key. Close the doors, but open the windows - the battery will not work continuously, and the car may be locked with a central lock.
- Make sure that the additional lighting and radio are turned off.
- Remove the negative terminal from the battery.
- Place one probe between the negative terminal and the negative terminal of the battery - the device will show the leakage current value.
The normal value is 15-70 mA. If the numbers are higher and you and the seller have time, try to find the reason. To do this, also connect a multimeter, then start removing the relays and fuses one by one.
The readings have returned to normal - you have found the cause of the current leak. Perhaps further repair or replacement of a part, or even the entire wiring, will be required. You can confidently ask the car seller for a discount or refuse the purchase altogether.
There may be several reasons for the leak. The following may be involved:
- battery;
- sensors;
- high voltage wires;
- generator.
Each element can be checked using a multimeter.
How to find opens and short circuits in car wiring
The electrical network (wiring) of modern cars is single-wire, the second conductor is “ground” - the car body and the engine. During the operation of the vehicle, you may encounter some wiring faults (for example, a short circuit or break). Next, let's look at the instructions on how to find them yourself.
All electrical circuits (except for the starter and generator power circuits) are protected by fuses. And the power circuits of powerful electricity consumers (headlights, power windows, heated mirrors or seats, etc.) are switched through a relay. Therefore, you should start troubleshooting the electrical wiring in the following sequence:
- if a lighting device does not work (for example, a headlight or a lampshade), then first we check whether the lamp has burned out;
- check the serviceability of the fuse;
- check the serviceability of the relay;
- check the reliability of the contacts in the circuit connectors (they may oxidize, in which case they need to be cleaned).
It is also recommended to check all ground attachment points.
Relay and fuse diagrams for LADA cars:
Checking vehicle electrical systems
How to check a car's electrical system before purchasing
When checking the engine, body and other components of the car, it is not a bad idea to make sure that the electrics are in good working order. Not only the absence of light in the cabin, but also the serviceability of the ignition system depends on its performance. The electrical system may include different components, so check which of them are installed by the manufacturer and which are additional.
Checking the ignition system
You should take the time to check the contacts of the ignition system, how correctly they are connected to each other and whether current flows normally through them. When there is no spark at the spark plugs, one of the ignition coil circuits has failed. If there is a problem with the wire or spark plugs, there is no spark on one of them. If it is not on both spark plugs, the inductive pulse sensor or the ignition coil itself is not working.
Checking outdoor electrical equipment
Check the tightness of the headlights and side lights. Turn on the low and high beams to make sure they are working properly. If the light is not clear, but flickering, then there are problems in the electrical system that will need to be corrected in the future.
Checking the dashboard
Inspect each dashboard indicator and make sure the speedometer is working properly, which when not working does not accurately indicate the vehicle's mileage. It is important that warning signs do not light up on the panel.
Alarm test
In a situation where there is no or poor power supply to the alarm system, the vehicle can be stolen without any problems. It is necessary to check, using a tester, the current that is used in the armed and unarmed modes. From the data obtained, we can say that there are problems with the power supply of the alarm system and the machine as a whole.
Checking the air conditioning and heating system
If the slightest suspicion arises during the operation of the stove or air conditioner (bad smell, failure to turn on, etc.), then it is likely that either they or the car wiring as a whole will have to be changed.
Checking the power windows
In cars with electric windows, be sure to check their functionality. If there is a power outage, they will have to be replaced, and this is an expensive procedure. Also check that the wipers and windshield washers are working properly.
Other additional equipment
If your car has an audio system, check how it works and whether the sound is distorted. The vehicle can also be equipped with parking sensors, rear view cameras, heated seats and much more. If there is something similar, check its functionality so as not to overpay for fictitious or non-working elements.
Devices for troubleshooting electrical wiring
To find a short circuit or broken wiring, you can use a multimeter.
If you only need to determine the presence or absence of voltage on a section of the circuit, then you can use a special 12 V light indicator. A test lamp that you can make yourself is also suitable. To do this, two wires with a length of at least 50 cm should be soldered to a car lamp (no more than 4 W).
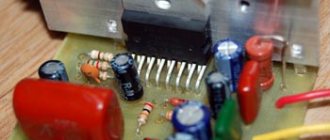
Troubleshooting tool.
To troubleshoot a car's electrical wiring, you must have a probe, a jumper with a fuse, an ohmmeter and a voltmeter. In addition, you need to know or have a schematic diagram of the connection of the electrical equipment of this car. As a probe, you can use a simple device, a lamp with two wires of sufficient length soldered on. The lamp power should not exceed one ampere. An instrument cluster illumination lamp or a 5W side light lamp are well suited for this purpose. The easiest way to purchase a voltmeter and ohmmeter is to purchase an electronic multimeter. Its cost is about 200 rubles and is sold in many stores, including automobile stores.
How to find a broken wiring in a car
If there is a break, the electrical circuit opens. Often the cause of lack of voltage is poor contact in the circuit connector. The block body hides oxidized contacts, so troubleshooting can take a long time. A break may be detected when the pads or wires are swayed.
To find a break in the test, you need to set the multimeter in ohmmeter or continuity mode. The terminals of the device are connected to the ends of the circuit being tested:
- If there is no break, the multimeter will beep (in dial mode) or the resistance will be minimal (in ohmmeter mode).
- If there is a break in the wiring, there will be no sound signal (in dial-up mode), but the resistance will be very high (in ohmmeter mode).
How to find a current leak in a car
Sometimes after the car has been parked for a long time, when you turn it on, you can only hear the clicks of the relay, or the starter still turns on, but turns weakly. All these symptoms indicate that the battery has been completely or partially discharged while parked.
Often the cause of the discharge is headlights or side lights that are not turned off.
This cannot be explained by self-discharge - a serviceable battery takes a long time to discharge, several months - which means that a current leak has occurred, or there is a malfunction in the battery charging system, and the driver, when parking the car, did not know that the battery was not well charged.
Common Causes of Current Leakage
When diagnosing the cause of premature discharge, it is necessary (and this is a general rule for diagnosing any malfunction in a car) to cut off causes that do not indicate a malfunction. Or rather, about inattention to the car. For example, the battery may be old and expired, the terminals may be covered with scale, or the wires may be in poor condition, etc. Often the cause of the discharge is headlights or side lights that are not turned off. If there is no reason to think that the cause of the discharge was one of the above or similar factors, we can establish the presence of a wiring fault and begin searching for the leak.
Acceptable battery current consumption limits
The car has a number of “authorized” permanent consumers of electricity. This could be a clock, memory of an electronic engine control unit, an alarm system, etc. All of them are constantly powered, since, for example, it is not recommended to erase the ECU memory, otherwise the unit will be retrained, remembering the current settings again, and the alarm generally works just at those moments when the engine is turned off and the car is standing still.
It follows from this that current consumption in a parking lot is normal and should have some kind of constant value that can be calculated by adding up the consumption of all consumers. For example, an alarm system can consume about 20 mA, a clock memory - 1 mA, a radio tape recorder - 3 mA, and so on. The total consumption should fluctuate between 50 - 80 mA. This is a small consumption (for example, even one switched-on lamp consumes around 500 mA), and a modern battery cannot be severely discharged by such leaks, even in winter.
If, based on the measurement results, it turns out that the average value of constant consumption is significantly exceeded, it means that there is a leak in the on-board network and it must be eliminated.
How to independently determine the presence of current leakage
There are two main reasons for an intense discharge - the presence of an “unauthorized” current consumer, or a short circuit in the on-board circuit. You can detect the leakage of current absorbed by a constantly working consumer by using a household appliance called a multimeter.
Multimeter
To troubleshoot the problem, the multimeter must be switched to ammeter mode, not forgetting that the current in the on-board network is constant, and the measurement range must be set to 10 Amps.