Repair of light switches in an apartment
installation
Preparation
You need to warn everyone about the repairs being carried out and ask them not to touch the switch. You need to prepare the following tools:
- fine-grained sandpaper;
- marker;
- a slotted screwdriver with a tip of a suitable size;
- indicator screwdriver or multimeter.
Attention If you have no experience in repairing electrical appliances or have doubts about reassembling the switch, then it is best to use a digital camera on a phone or other device. Using the photos taken during the repair, it will be possible to put everything back together and install all the parts correctly.
Dismantling
Removing the old model switch:
- On the front side of the device there is a pair of screws located below and above the key. They need to be unscrewed and placed in some shallow container.
- Remove the decorative panel, and you don’t have to remove the switch key; it shouldn’t interfere with repairs.
- To remove the switch from the socket, unscrew the screws of the clamps that hold the device in it.
- A special bracket is removed to remove the conductors from the holes.
Dismantling a single-key switch:
- Using the tip of a knife or screwdriver, pry up the key and remove it from the device. If such a part is held by a fixing plate, remove it too.
- Remove the decorative panel.
- The switch is secured with a pair of screws, so they must be unscrewed and left in the case or placed in a separate container.
- There are holes on both sides into which electrical wires are inserted. In single-key models there is only one wire that needs to be disconnected.
Removing the two-key switch:
- Use the tip of a screwdriver or knife to pry up and remove the decorative panel.
- Under the buttons there are screws that need to be unscrewed and placed in a container.
- To remove the device from the wall, unscrew the fasteners.
- Before removing the switch, you need to mark its location so that there is no inconsistency during installation after repair.
- The wire that is responsible for the voltage in the network and is connected to the main terminal must be marked with a marker.
Attention The new type of switches has a recess for removing the panel, which allows you to remove the cover without additional tools.
Cleaning contacts
The most common breakdowns are loose, burnt out or destroyed contacts. Replacement Contacts must have a characteristic metallic sheen,
Assembly
- The wires are connected to the corresponding holes and secured with screws.
- In the cavity of the socket box, the device is fixed with clamps, and adjustment is also made relative to the marks on the wall.
- When all the mounting screws are tightened, the decorative panel is installed in place.
- The keys are attached.
- The device is turned on to check the success of the repair.
Connecting a two-gang switch
Installation of this type of switch is used in the following cases:
- The chandelier shades are divided into sections to regulate the level of illumination, each section is connected to a separate switch button.
- The switch is connected to autonomous lamps.
If with a single-key switch everything is clear and simple, then connecting a two-key switch seems much more complicated: the terminal box is different and there are more wires. In fact, this should not cause any big difficulties, the connection algorithm is the same. The device is not much different from a single-key device.
- Disassemble the switch. The mechanism is somewhat different from the single-key mechanism. But there’s nothing wrong with that: in modern switches, all contacts are marked. L - contact for the supply phase, outgoing contacts are indicated by downward arrows.
- Having cut off the insulation from the wires at the point of their connection, we connect the wires to the corresponding contacts of the mechanism.
- When installing internally, secure the mechanism in a special box in the wall and put on the previously removed frame. For outdoor use, mount it on the wall and install the switch housing.
- Set keys.
Dismantling tools
If the problem is still in the light switch, you need to prepare the tools for the job.
You will need the following tools and materials:
- screwdrivers (phillips and flathead);
- pliers with insulated handles;
- knife with plastic handle;
- voltage indicator;
- insulating tape.
There is a lot of dust inside electrical structures. To avoid staining interior items, it is recommended to move them away from the switch or cover them with plastic wrap.
Power outage
Before dismantling the switch, you need to turn off the power supply in the apartment or house. This is done in the electrical panel. Usually the shield is located on the staircase or inside the apartment - at the front door. If you are not sure which switch belongs to a particular room, it is better to turn off all the existing ones. Otherwise, there is a high risk of electric shock.
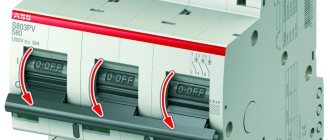
The lever is automatically turned to the lower position. When the power is turned off, you should double-check the presence of voltage with the indicator.
Removing the key
The process of removing the switch begins with removing the key. Without this, it will not be possible to continue dismantling work.
Removing the key is not difficult, but the specific steps may vary depending on the design of the switch, so you should carefully study the mechanism of a particular device.
The easiest method for removing a key is to pull it towards you. This is usually enough to remove the button.
In some models, simply pulling the key will not help. Dismantling of such switches is carried out by prying with a screwdriver the special connectors available on the side parts of the device.
Removing the frame
When disassembling the switch, you will need to remove the frame. Among the most common types of frames are:
- Screw. Usually held on by screws. Removable with a screwdriver.
- Clamping. These models have special clamps. To remove the frame, just bend the clamps. It is recommended to remove the sides of the frame one by one, and not all at once, so as not to damage the structure.
Switch disassembly
Next, proceed to dismantling the switch housing. To do this you will need a screwdriver. The type of tool used depends on the design of the screws on the frame.
Disconnecting wiring
On many types of switches, most of the wires are held in place by the use of bolts. To disconnect the wires, you just need to loosen the wires and pull the switch in your direction.
This completes the removal of the switch. You should remember the sequence of operations performed: if the internal mechanisms are in order (parts are not melted), the device will need to be assembled in the reverse order. If mechanical damage is found, there is no point in restoring the switch - it’s easier to go to the store and buy a new one.
Fault diagnosis
Has the light gone out in your house, garage or shed? Before you take a screwdriver, you need to find out the possible cause. There may be several of them, identifying them is not difficult:
Burnt out incandescent lamp. Sometimes in such cases, when turned on, it may flash, blink or burst, and only then go out. If this happens, then there should be no doubt - the lamp requires replacement. You should turn the switch to the “off” position, carefully unscrew and replace the burnt out bulb with a working one. If the lamp simply does not turn on, then to diagnose it you will also have to unscrew it from the socket, see if the tungsten filament is intact, or simply try to insert a new lamp in its place. If after the manipulations the light turns on, then everything is in order and nothing else needs to be done.
Dismantling the switch
All manipulations must be performed without excessive force.
The body of a modern switch is smooth, the fastening elements are hidden from view.
The material used for most parts is various types of plastic, metal parts are installed in the most necessary components, and sometimes ceramics are present.
All disassembly operations are performed without excessive force.
- The fasteners are hidden under the keys, so they need to be removed. Usually the force of your fingers is enough (press from below and bend the top edge), but you can help yourself with a flat-head screwdriver, carefully so as not to crush the plastic.
- In the opened niche there are either 2 screws for fastening the front panel (external housing) or a polyethylene frame with 4 latches. The fasteners are removed using a screwdriver.
- At this point, suitable wires become available. The indicator checks the absence of voltage on each of them.
We advise you to study Dust and waterproof lighting products for any needs
Overhead models are fixed with spacer tabs
Current-carrying wires are connected to the switch with a certain length reserve (loop). To conveniently work with terminal connectors, you need to separate the mechanism housing from the wall. For overhead models, the screws are unscrewed, hidden modifications are located in boxes Ø67 - 70 mm and are fixed with curved spacer tabs. By loosening the screws at one end of the leg, the pushing force at the other, serrated end is removed. After this, the body is easily pulled out by hand. There are models with the core fastened with 2 screws to the front panel of the box. The final phase is disconnecting the wire from the terminal connector.
Contact density is ensured in 2 ways:
- screw clamp (unscrew and remove the current conductor);
- self-clamping terminal (press the lever and pull out the conductor).
If the contact overheats during operation, the metal parts may burn and the adjacent insulation may become charred. You can bite off the burnt section of the wire and not waste time and effort trying to tear off the soldered thread. The damaged part of the core must be removed in such a way that the remaining length is sufficient for a new connection. For detailed instructions on how to properly remove the switch, watch this video:
For the convenience of subsequent installation in place of a new switch, the ends of the wires can be immediately marked (phase, neutral, jumper). If the new device is not installed immediately, the exposed ends must be insulated.
How to determine a broken wiring in a wall
Seal the grooves with your own hands
Installation of electrical wiring under plaster
Precautionary measures
After turning off the electricity, use a tester to check the presence/absence of voltage at the output
When working on electrical devices, careful precautions must be taken to prevent injury from electric shock. You should completely de-energize the entire electrical appliance connection circuit and take measures to prevent accidental switching on of electricity.
How to disassemble a switch
Disassembly tools will require a flathead and Phillips screwdriver. Most models use flat mounting screws, but sometimes you can find cross-shaped ones.
Switches come with one, two or three keys. Without removing them, the device cannot be disassembled, since the fastening elements are hidden inside.
The devices vary in design, and disassembly methods may vary:
- The key is pressed against the wall with your thumb on one edge and is removed if you pull the other one towards you (Fig. a). You should not pick it with a screwdriver or knife, as scratches will remain on the surface. Some keys fit tightly and can be pryed off by the edge with a screwdriver.
- The key is pressed on the sides with your fingers, the fastenings are recessed, and it moves freely.
- If there are connectors on the sides, pry them up with a screwdriver and gently pull them towards you, after which the key comes off.
Removing the keys (a) and frame (b) from the switch with your own hands
Double and triple keys are removed in turn. Then you need to remove the decorative frame, which is pressed against the mechanism by an insert located in the middle and held by latches. It should be removed by prying the edge with a screwdriver (Fig. b).
Afterwards, the fastening elements for the wiring and the switch mechanism will become accessible.
Switch mechanism with wire fastening elements
The frame may be secured with screws that need to be unscrewed. Most often it is fixed on the side latches. The plastic fasteners bend one by one and the frame comes off.
Before dismantling the mechanism, you need to find the core through which the phase is connected to the switch. To do this, voltage is applied to it, and the indicator checks the presence of voltage on both contacts. Then the key switches to the next position and the test is repeated.
If in all cases voltage remains on one contact, it means that the supply phase conductor is connected to it. The other core will go to the lamp. The phase for two- and three-key switches is found similarly. The home handyman should not be concerned about the number of wires connected. Among them there will be only one wire through which the supply voltage is supplied. The power supply is then switched off again and operation continues.
The fastening screws hold the spacer tabs that rest against the side walls of the mounting box. If you loosen the screws, the mechanism will freely come out of the wall. If it is secured to the box with screws, they should be removed.
Then unscrew the screws securing the wires and remove it from the wall recess. Check the absence of voltage on the mechanism using an indicator screwdriver. The input conductors can be secured with self-clamping terminals. To easily pull the wires out of the connector, press the locking levers. First, the phase wire is disconnected and insulated. Subsequently, it is reconnected to the phase contact of the new or repaired switch. If the pins are marked “L” and “1”, the connection is made to “L”. When they are designated “1” and “2”, the phase is connected to contact “1”.
We advise you to study Conductive glue Kontaktol
Designation of contact L of the supply phase
In two- and three-key switches, the contacts are designated in a similar way:
- two-key – “L”, “1”, “2” or “1”, “2”, “3”;
- three-key – “L”, “1”, “2”, “3” or “1”, “2”, “3”, “4”.
In all cases, the devices have one common contact with the connected supply phase and outlet contacts to the lamps.
The phase connection must be to a fixed contact, and the outlet wire to a moving one. If everything is done correctly, the key will be pressed from above in the “on” position and from below in the “off” position.
After disassembly, the switch in a particular case looks as shown in the figure below (LEZARD brand). It contains 3 main elements: mechanism, frame and key.
What does a disassembled switch look like?
Switch assembly
After you clean the light switch contacts you will need to reassemble it. Assembling a light switch does not take much time if you know how to go through the process. If you don't know how to assemble it, then it's better to look at the photo you took while disassembling it.
First, you need to connect the common phase wire to the common terminal. After this, you can secure other conductors in their places. After the switch body is installed in the socket box, its frame can be secured. Sometimes situations arise when it is quite difficult to attach the cover to the switch body. To complete this process, you will need to loosen the fasteners. If the case is fixed correctly, then the cover on the switch will fit without problems.
After these processes are completed, you can turn on the voltage. If it works, then you did everything right. As you can see, light switch repair can be done by anyone.
Read: remote switch.
How to fix a light switch
If your light switch suddenly stops working, you should not immediately add to your diary the purchase of a new one. It is quite possible that the switch can be repaired and will serve you for a long time. At the same time, it is not at all necessary to look for the phone number of a specialist who will take care of fixing the breakdown, because you can easily fix the fault with your own efforts. The cause of failure is most often carbon deposits that cover the contacts - a completely normal phenomenon during operation. Of course, it may turn out that when making repairs, you purchased a low-quality switch. In this case, you will still have to spend some money on purchasing a new one. However, let's try to solve the problem of repairing the switch based on the first reason.
How to transfer - instructions
Suppose we are faced with a different kind of task - for some reason, it is necessary to change the location of the device that activates the lighting in the room. Then, first of all, you need to think about the fact that in addition to a screwdriver, you will need some other tools.
First of all, this concerns wiring hidden in the wall. Relocating the switch here involves chiseling a channel for the cable and drilling a new socket for the device. Therefore, you will additionally need a hammer drill with a channel blade, as well as a concrete crown for the hammer drill. You will also need a new cable, two-core with a wire cross-section of 1.5 mm, as well as a stationery knife for removing insulation. Well, in the end, putty will be useful for sealing the channel. Let's make a list:
- hammer drill with blade and crown,
- cable 2x1.5 mm (meterage depending on transfer length),
- stationery knife,
- putty and putty trowel.
Having prepared everything you need, we begin the process.
- We remove the switch according to the previously described algorithm.
- We mark the new location that we have planned for our device, and also draw a cable line along the shortest path. For these purposes we use a simple pencil.
- Using a hammer drill, we make a channel for the wires.
- Drill out the socket for the switch.
- We take out the glass under our device from the old place and insert it into the new one.
- We connect a new cable to the freed ends of the old wires, while the machine must be turned off.
Here it is necessary to take into account that one supply phase wire from the panel always approaches the switch, and the same one goes out to the lamps. Therefore, you need to connect a brown wire to the power line, and a blue wire to the lamp line, so as not to get confused.
- We lay the cable in the made channel. Cover with putty.
- We install the switch according to the previously described algorithm.
When connecting the device to a new location, we use the brown wire as the input wire, and the blue wire as the output wire.
In the case of open wiring, everything is much simpler: after disconnecting the power supply, the switch is unscrewed from the wall, disconnected from the cable and attached in another place. Then the missing cores are carried out. The cable is usually hidden in a decorative box. At the end of the process, the wires are connected to the switch.
The box is matched to the color of the wall
How to properly dismantle a socket
So, having examined the main technical characteristics of sockets and their types, you can proceed to the main thing, how to remove the socket from the wall. To do this you should need:
- small screwdriver with plastic handle,
- insulating tape,
- latex gloves,
- tester.
Here are the step-by-step instructions:
- The first step is to turn off the power to the apartment. In this case, you should check several times that the electrics are actually de-energized. You can use a tester for this.
- Depending on the type of outlet, the decorative cover is removed. It can be secured with screws or latches. Domestic sockets use a screw.
- Then the socket fastenings are unscrewed. If the legs are movable, then when the screw is unscrewed, it will become accessible for removal.
- Carefully pull out the entire socket structure and see how it is secured
If you want the wallpaper to look beautiful on the wall, then before pasting the surface, remove all sockets and switches from it. No amount of precision will help you get around the fixtures without removing them - the wallpaper around the perimeter will be uneven, and after the repair there will be a bitter aftertaste.
Below is a brief instruction with a photo; after spending 5 minutes on it, you will not receive an electric shock, and the wallpaper will look beautiful in the interior of your apartment.
Nuances when disassembling various types of switches
To power a large number of spotlights, ceiling lighting and other lighting fixtures, three-key switches are often used. The design of such models is distinguished by rather thin keys. But, as for two-key switches, dismantling a three-key switch begins with removing each of them one by one. To simplify this procedure, many models are equipped with a small rectangular hole at the bottom of the keys, into which a screwdriver can easily fit. If you want to disassemble the dimmer (adjustable switch with rotary knob). Its dismantling is fundamentally no different from the classic model. The only difference is that instead of keys, you first have to remove the control knob. The touch switch is disassembled by removing the outer panel. For this purpose, you can use either a regular screwdriver or a special pick, which you can make yourself from wire if it is not included in the kit.
We advise you to study the principle of operation and features of uninterruptible power suppliesIn this case, special care must be taken to avoid cracking the glass. If the switch is paired with a socket, then to dismantle the first one you will need to remove the socket along with it
In this case, the socket cover will have to be removed, since one of the fastening bolts is often hidden under it. Pass-through switches have the same design as conventional ones, and, accordingly, the same disassembly procedure
The only difference is the number of wires, since the phase connection is made in several positions at the same time.
This is interesting: Pass-through switches or bistable relay
How to remove a switch from a wall
In this article we will give you step-by-step instructions for disassembling switches. Remember that you shouldn't go into the switch if you don't fully understand what to do. Read the instructions below. Good luck!
When your switch fails, it becomes necessary to disassemble it. Instructions for disassembling switches, as a rule, are a standard procedure where all actions are the same, regardless of the manufacturer. However, many modern manufacturers, producing interesting designer switches, go to various lengths, which result in the fact that many elements of the switch are disassembled in a non-standard way. If you have designer switches, then it is advisable if you use instructions for disassembling them, specifically from the manufacturer. We will tell you about the classic method of disassembling switches.
Another small digression. If you decide to disassemble the switch yourself, then first of all, turn off the electricity so that you do not get an electric shock. Never disassemble switches or sockets with the switch on.
2 Removing the switch - how to remove the hidden wiring switch without damaging the wires?
Before proceeding with the dismantling of lighting equipment, it is necessary to turn off all circuit breakers located in the distribution panel. Now the risk of electric shock is virtually non-existent.
Older models are somewhat easier to remove because the screws are on the front side, like on sockets. In modern devices, you can change the switch only by first removing the keys, since the bolts are located precisely under them. Removing the buttons is simple; just carefully pry them off with a flat-head screwdriver. After removing the keys and screws, the switch itself is located, which is firmly fixed in the cylindrical frame.
We first turn off all the machines in the panel for reinsurance
After checking the contact with an indicator screwdriver for the absence of voltage, you need to unscrew the screws of the sliding strips, through which the frame is mounted into the recess of the wall. Now all we have to do is free the wires, for which we unscrew the bolts on the terminals. Be sure to mark the phase wire so as not to mix it up when installing a new switch. You can mark it with electrical tape or just bend it a little.
Surface-mounted light switches are even easier to remove, since they do not have sliding strips or a fixing frame. In any case, after removing the device, all we have to do is install new equipment - the most critical stage of the entire process.
Relieve stress from the workplace
Using an indicator screwdriver, check that there is indeed no voltage at the workplace. How to do it right? First, test the operating condition of the indicator screwdriver in an area known to be live, such as an on-site distribution panel. When it comes into contact with a phase wire, the indicator window lights up, which means the screwdriver is working. Now go back into the room and check that there is no voltage in the junction box by touching the power supply wires. The indicator screwdriver does not light up, which means everything is in order, you have secured the work area and you can safely remove the switch from the wall.
Replacing a single-key switch
Experts consider it the easiest removal/installation option. The diagram for connecting the lamp via a single-key switch is shown in the figure.
But it is still important to take into account a number of actions, and the topic of the day, how to change a switch, will disappear by itself. To dismantle the light switch, you must sequentially perform:
removing keys using a screwdriver;
removing keys using a screwdriver;
- removing the decorative overlay frame;
- unscrewing the screws securing the socket box;
- removal of the released interior of the switch with wires;
- Disconnect the wires from the old switch by unscrewing the screws and removing the switch wires.
Installing a new switch to replace the old one is carried out in the reverse sequence of the above steps.
- The place of work must be de-energized;
- We check the integrity of the insulation on the wires;
- We prepare a new switch for installation;
- We adjust the required length of wires;
- If necessary, we strip the wires of insulation;
- We connect the wires to the switch;
- We check the quality of contact tightening;
- Once again we check the correctness of the assembled circuit;
- We install the insides of the switch into the socket box;
- We set the switch to the level;
- We screw the switch using screws to the socket box;
- We install the decorative trim and switch keys in place.
After installation, we check the work done by turning on the electricity supply.
Features of connecting the switch
A switch is a switching device for closing and opening an electrical circuit by breaking a phase.
Therefore, it is the phase wire that must pass through the switch, not the neutral wire, which must pass to the installation site of the lamp directly from the junction box.
In some apartments, incorrect connections sometimes occur. This is fraught with the fact that when the light is turned off while replacing the light bulb, an electric shock may occur, since instead of a phase, zero is disconnected, and the light bulb socket is energized.
If such an incorrect connection is detected, the phase phase of the wires should be changed. To do this, you need to change the circuit in the distribution box to the correct one.
When installing this device, the question arises at what height to install it, are there any rules and standards. According to the rules for electrical installations:
- It is recommended to install switches on the wall on the side of the door handle at a height of up to 1 m; they can be installed under the ceiling with control using a cord.
- Any switches and sockets must be located at a distance of at least 0.6 m from the doorway of the shower stall.
- The minimum distance from switches, sockets and electrical installation elements to gas pipelines must be at least 0.5 m.
In Soviet times, there were slightly different requirements for what height to install switches in an apartment. The standard height was 1.6 m. Therefore, in many apartments they are still located “at eye level”.
Dismantling sockets
Logically continuing the topic, let's figure out how to remove the socket from the wall.
How to install a multi-key switch with a socket?
For this work you will need a regular or Phillips screwdriver. Be sure to first turn off the electricity in the room in which the outlet is located.
Important! In the electrical panel, the toggle switch of the circuit breaker should be lowered down, the “green screen” is a signal that it is safe to work. To disassemble a household socket, first unscrew its plastic casing; it is usually held on by a bolt in the center
Remove it and set it aside
To disassemble a household socket, first unscrew its plastic casing; it is usually held on by a bolt in the center. We remove it and put it aside.
Let's get down to the mechanism itself. By analogy with a switch, the socket is attached to the socket boxes with two bolts: either on the sides, or in the upper and lower parts. We unscrew them. There are also devices with spacer mechanisms. They are held in the wall by means of special ears. If you loosen them a little, the socket will easily come out of the mounting box.
Next, disconnect the electrical wires. Three wires are connected to the device: “phase”, “zero”, “ground”, here the bolts are easily unscrewed from special fasteners. Then we pull the wire in our direction. Thus, the socket was disassembled, the procedure is actually quite simple.
Switch replacement
Burnt contacts, melted insulation and simply a lack of response to your actions indicate that it is better to replace the switch. After disconnecting the wires, under no circumstances leave them hanging out of the wall, even for half an hour. This is a familiar place on the wall where households automatically place their hand to turn on the light. Cover exposed wires with electrical tape while shopping. The situation will be a little more complicated in large rooms with different lighting intensities. However, the sequence of actions on how to disassemble a two-key light switch is no different from working with a single-key one. The only caveat of a multi-key switch is that you need to mark the ends of the wires in the wall if it is necessary to replace the element. You can, of course, experimentally determine the connection sequence, but this will take extra time and is not very safe.
Repair features
When all the preparatory work is completed, you need to disassemble the light switch and carefully examine it. If the contacts are oxidized, they need to be cleaned. Oxidation can also prevent the passage of electrical current, so if there is severe contamination of the contacts, then most likely that is why the mechanism did not work. After cleaning, you need to connect all the wires , mount the device back into the hole in the wall and secure the frame and keys in place.
To check its operation, electricity is supplied. If the contacts of the switch are melted, this indicates that a short circuit has occurred, as a result of which the mechanism overheated and became deformed. In this case, only replacement will help ; such a switch can no longer be repaired. In order for the new device to fit, you need to take the old one with you to the store, then there will be no problems with choosing accessories.
Installation with two buttons
Replacing a single-key switch with a two-key switch is carried out using the same algorithm as in the case of a single-key switch.
There is a difference: you will need to connect three phase conductors to terminals L1, L2 and L3. For a three-key device we use four conductors: one to the phase, and one to each contact.
Not in every case, wires of the usual colors are used: red for phase, black (blue) for zero. In older buildings and private homes, the color scheme often differs. Single-color wires are also available. It is recommended to search for the required wires using an indicator.