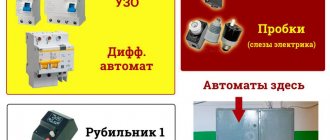
Application of cotton switch
An acoustic (or clap) switch is designed to control electricity in various rooms remotely, that is, without directly touching the toggle switch. This device works by clapping your hands. In addition to lighting sources, the acoustic regulator can activate contactor coils, current converters, climate control systems and other electrical and electronic equipment - the main thing is that there is enough power.
Acoustic switches in residential areas
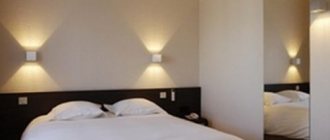
Sound switches are optimal for relatively quiet rooms in the house: bedrooms, libraries, offices, pantries, cellars. Installing such a device in the bedroom will allow you not to get out of bed to turn off the lights after you read your favorite book at night and get comfortable under the covers. To make the room plunge into cozy, enveloping darkness, you just need to clap your hands.
Installing a cotton switch in the bedroom allows you to avoid getting out of bed to turn off the lights
It is not advisable to install such devices in noisy places and rooms, since extraneous sounds will regularly provoke unauthorized activation of the device. Therefore, the sound switch is not suitable for office and work areas, kitchens, dining rooms and living rooms.
The cotton switch is very useful in everyday life for people who use a wheelchair, and it will also be useful for children. As a rule, for safety reasons in children's rooms, electrical devices are placed at a height of 1.7 m. In order to independently turn on or off the light, the child has to stand on a stool, and this is also unsafe: the baby may lose his balance and fall. If you install a cotton switch, the child will not ask you to turn on or turn off the light every time. He will simply clap his hands and this will make the light come on or go out.
Interfloor space lighting
Using a clap switch, you can control the light on the area between floors. To do this, it must be equipped with a photo relay. The sensitivity of the motion sensor is controlled by a voltage divider with a resistor creating a photodiode. If using the motion sensor is not essential, you can disable it. To do this, you need to set the resistor to the lowest value.
Using a clap switch, you can control the light on the area between floors
When lighting the interfloor space, you can use the K176LA7 microcircuit. When using it, the automatic electricity activation device does not rattle at the upper and lower levels. Using an electret microphone, an acoustic wave is received and transformed into an electrical impulse. Then, through the use of three-electrode transistors, the pulse is received by the logical sections of the microchip, producing a signal lasting up to 10 seconds. During these 10 seconds, the lamp is in an activated, i.e., on state. To turn it off during daylight hours, you need to send a signal from the element’s output.
Advantages and disadvantages
The sound or clap switches are quite unique devices in themselves. Their main advantage over standard models is that a person does not need to make an effort every time to turn off or turn off the light. In addition, this can be done from any part of the room. All the advantages of such switches become intuitively clear from the name alone. Throughout their existence, voice and cotton models have been an integral part of any smart home, and a pleasant addition to an ordinary apartment. Their main disadvantage for radio amateurs will be the difficult-to-reproduce circuit. Still, the design of such devices is much more complex, which means making them with your own hands is far from so easy. If you find and use simple schemes, then this drawback gradually fades into the background. In addition, the clap switch, like the sound switch, has a number of small disadvantages that will be noticeable to absolutely everyone:
- They can react to similar sounds, especially the vocal version. Naturally, if you say a code phrase in the context of, for example, a normal conversation, the light in the room will react to it.
- Minor defects can cause a “slow” reaction in these devices. This often occurs when an acoustic switch, whose design is somewhat more complex, was made by hand. So, you should pay special attention to this factor before you start reproducing any circuits.
- If the signal - clap or command - is not loud enough, then the device most likely will not respond. The low sensitivity of such switches is needed so that people are less likely to encounter the first problem on this list.
In principle, it is possible to combat these disadvantages, but even a professional is unlikely to be able to completely eliminate them - because if, for example, you increase the sensitivity, the acoustic switch will begin to respond to “false” commands much more often.
"Сlaps" device
One of the newest developments is the “Claps” cotton switch model. In this device, the sound is processed using a microprocessor; it does not react to any extraneous noise, but is tuned to several claps in a row (this is the most important operating condition).
It is permissible to install several such switches in one room, each of them will react to a certain number of claps, and accordingly turn on the light, humidifier, fan, TV or stereo system. This switch model is suitable for any household appliances that have an electrical cord.
Perhaps to some, the clap switch may seem like a toy or a completely unnecessary device. Others, on the contrary, are passionate about the idea of creating their own “smart home” so that lights and electrical appliances turn on and start working on command or clap. Arrange your life the way you want, but at the same time make it as comfortable as possible.
Operating principle of an acoustic dimmer switch
An optical-acoustic switch is used for dimmer switching on electricity. It works as follows:
- The sound signal (in our case it is a clap) arrives at the sensitive membrane of the microphone. There the sound is converted into an electrical impulse. When passing through the operational amplifier, the pulse power increases and the capacitor is charged. When the charge reaches a higher value than on the capacitance, the comparator switches. In this case, the zero at the output is replaced by a pulse from the logical section.
- Such a chain is sequentially activated in the switch after receiving an acoustic signal from the microphone. Then the transistor generator is started, directing the electrical impulses, and the triac opens. Through it, power is supplied to the light source.
- After some time, the capacitor loses voltage level. In this case, the triac receives control electrical signals with an ever-increasing phase delay, as a result of which the light turns off smoothly. With optimal selection of values, the light source turns off with a pause of up to three minutes.
An optical-acoustic switch is used to switch on electricity by dimmer
Sensor types
The modern market offers the following options:
Direct connection. They are given a sound to which they must respond by turning on the light. Repeated sound will cause disconnection. Most often they are mounted in parallel with the switch. The disadvantage is that when you turn on the light with a regular switch, the sound will not be active.
Combined with a timer (or light sensor). In this case, the light is turned on for a certain time. They cost very little and have become very popular for state houses.
Equipped with intelligent blocks. They can rightly be called a mini-computer. It is possible to configure for various actions. Using such a unit, it is possible to simultaneously control sound and motion sensors.
Cotton switches. They are used in alarms and video surveillance. In addition to turning on the lights, they can automatically start recording for surveillance cameras.
On the Internet you can find a huge variety of photos of types of acoustic switches.
Check it out here too!
Crochet a crop top: patterns and ideasHow to make a homemade metal detector - the best diagrams, instructions. Review of proven options for creating a simple do-it-yourself metal detector
How to choose a washing machine: advice from professionals, the main subtleties of choosing a reliable and high-quality machine. Types, types, programs and functions
DIY cotton switch
All acoustic or cotton systems have a microphone, which is used to record sound. In addition, the circuit is supplemented with a time relay or trigger that controls the power relay. In a standard circuit operating with a voltage of 220 V, the signal coming from the microphone is amplified by transistor T1. Next it passes to the resistance matching unit and the emitter follower of transistor T2. A digital chip is used to assemble the trigger and signal comparator.
Drawing up a diagram will be more convenient if you highlight certain zones on it. They include a transistor microphone amplifier, a comparator on a microcircuit, a trigger, and a transistor that controls a power relay.
By changing some of the adjustment parameters of the sound relay, you can fine-tune it. Wiring is connected in the same way as in standard circuits. All that remains is to set the protective threshold against false alarms and interference, and the device is ready for operation.
Connecting a light switch with one key
Twilight Switch
Schematic diagram of a touch switch
How to connect a switch with a dimmer
Illuminated switch diagram
How to remove a switch from the wall, what is needed for this
Principle of operation
A primitive model of an acoustic device that can be assembled by hanging installation with a test light and an 8-volt power source. The following are used:
- powerful direct bipolar transistor type KT818, or foreign analogues,
- push-pull microphone amplifier,
- a regular microphone (for example, from a tape recorder or headphones)
Such an acoustic switch device allows you to clearly trace the mechanism of converting a noise signal into an electrical one. The microphone receives the wave signal and transmits it to the amplifiers, after which a transistor is triggered through the base of the switch, starting the current connection.
Acoustic switch circuit
The acoustic switch consists of:
- microphone amplifier on transistors VT1 and VT2;
- single-shot trigger DD1.1;
- trigger DD1.2;
- switching circuit consisting of transistor VT3 and triac VS1.
A small-sized loudspeaker 0.25GDSh-2 with a voice coil resistance of 50 Ohms is used as a sound sensor. Instead, you can use a DEM-4M capsule or a telephone capsule. Capacitor C2 limits the high-frequency component of the signal, improving the noise immunity of the acoustic switch. The amplified signal from the microphone amplifier is fed to the input of trigger DD1.1, operating in single-shot mode, which produces a single pulse with a duration of about 0.5 s.
This pulse is supplied to the input of trigger DD1.2, which has two stable states. After each input pulse, the trigger changes state to the opposite. The signal from the trigger output controls transistor VT3, which, in turn, unlocks triac VS1, in the circuit of which the load is switched on.
Construction and details
Instead of transistors VT1-VT3, you can use any pnp transistors (the sensitivity of the acoustic switch will depend on the gain h2l3 VT1-VT2, if it is less than 40). Zener diode VD2 - any of the D814A-D814D series, or other series, with a stabilization voltage from 8 to 12 V. Capacitor C7 must have an operating voltage of at least 400 V.
The power of resistor R10 is no more than 0.25 W, it performs a protective function; in the event of a breakdown of C7, the resistor burns out, protecting the circuit from damage. Instead of capacitor C7, you can install a 7.5 kOhm 7.5 W resistor, as shown in Figure 2, while diode VD4 must be excluded. In the absence of such a powerful resistor, it can be assembled from four OMLT-2 1.8 kOhm resistors connected in series.
Instead of a triac, you can use a thyristor, in which case the switching circuit will have a different appearance (image 2). In this circuit, it will not be possible to use a quenching capacitor instead of a resistor due to the presence of a diode bridge in the power circuit. Bridge diodes are selected depending on the load current. For KD105 diodes, the load should not exceed 60 W. Due to the large scatter in the parameters of the KU208 and KU201 devices used in the circuit, the triac or thyristor must be selected according to the minimum control turn-on current (maximum sensitivity).
You can determine sensitivity by measuring the resistance of the control junction with an ohmmeter; the higher the resistance, the more sensitive the device. If the sensitivity of the power device is low, the control current generated by the circuit will not be enough to unlock the device. To increase the control current, it would be necessary to reduce resistor R8 in circuit image 1 and increase capacitance C7 (reduce R9 in circuit figure 2), which would lead to an increase in power consumption.
The acoustic switch is assembled on a printed circuit board measuring 100×40 mm (image H). The printed circuit board is designed to install the KU208 triac. When working with an acoustic switch, do not forget that the circuit is under mains voltage 220 V / 50 Hz, so safety precautions must be observed; any actions must be performed only with the device disconnected from the network!
Instructions for making an acoustic switch
First you need to make a printed circuit board. The printed circuit board has special holes for the VD1 diode. The diode is necessary to protect transistor VT3 from the EMF of the relay coil. If you want to connect a light load to the switch, you can replace it with a jumper.
After making the board, you need to drill holes and tin it. Next, open the signet in the sprint-layout 6.0 program and follow the location of the parts and solder them in place.
Note!
Why do you need interior dolls?- How to choose shoes that don't go out of fashion?
What you need for a hike in the mountains in summer
Looking at the photo of the finished acoustic switch, we see a compact sensor that is easy to install. It is a small board with soldered parts.
When assembling, it is necessary to observe all the ratings of the parts; even a slight slope can lead to incorrect operation of the switch. The device responds not only to pops, but also to any low-frequency noise.
Power comes from a DC source with a voltage of 5 to 12 volts. It is necessary to use stabilized constant voltage sources; when using switching power supplies, the device may not work.
In order to make an acoustic switch with your own hands, you need parts; they can be purchased at any radio store; they are available and inexpensive.
You can use parts soldered from old boards. The circuit is very simple, and even people with little knowledge of radio electronics can assemble this device using this circuit.
Acoustic device test
The acoustic sensor for turning the light on and off is tested for the likelihood of activation from any sharp sounds and noises, except pops. As an experimental device, we will consider the domestically produced Claps Max switch. Let's check whether it will respond to sounds - from a hammer hitting a board, a switched-on impact wrench, a jigsaw and grinder, or the clicking of a screwdriver on metal. Such sounds may trigger the activation of the device.
Video: testing the Claps Max acoustic switch
In our version, the device did not respond to the sound of power tools turned on, nor to the sound of a hammer, nor to the clicking sound of a screwdriver. At the same time, it continued to respond to clapping its hands. This can be called an excellent result.
Self-assembly and installation of an acoustic (or cotton) switch should be carried out in compliance with safety standards. After testing the device for susceptibility, you can make adjustments to its settings.
Where is the switch installed?
A cotton or acoustic switch created using a microcircuit is best installed on the walls - where the standard model was usually located. A do-it-yourself option will most likely have very low sensitivity, unless, of course, you undertake to implement complex circuits.
A voice switch purchased at a special store can be installed anywhere - even on the ceiling. Just before this, you need to familiarize yourself with its technical characteristics, and, again, pay special attention to sensitivity. In this case, the rule most often applies is that the more expensive and technologically advanced the model, the greater its functionality.
It is important to consider that a voice or clap switch purchased on a Chinese website for two pennies is unlikely to work properly. So, in order to save on this purchase, it is better to make it yourself using the necessary parts. So, if all these characteristics and nuances completely suit a person, then he can easily afford to install a cotton or voice switch in his apartment. These models are easy to use, do not require frequent replacement and, moreover, add manufacturability and uniqueness to any room, since they are rare.
Technical characteristics of the cotton device
Light switches that are activated by clapping sounds can be found commercially or you can make your own. Let's consider the device "Ekosvet-X-200-L", produced by the Belarusian company. It has the following technical characteristics:
- load power - up to 300 watts;
- sound intensity - 30–150 decibels;
- mains voltage - 220 volts.
Cotton switches "Ekosvet-X-300-L" are designed to turn lighting on and off using a loud and ringing sound
In addition to the switch itself, the kit includes a box and installation instructions. The price of this switch in comparison with similar devices from other manufacturers is quite affordable. The switch is produced in a protective housing class IP-30. It can operate at temperatures from -20 °C to +40 °C. This device can be combined with virtually any lamps: halogen, fluorescent, energy-saving, LED and standard incandescent lamps. The device is no larger than a matchbox, so it can be easily placed at the base of any light source. The switch is attached using double-sided construction tape or self-tapping screws.
Components of a sound switch
You can mount the acoustic switch yourself. Let's give an example using domestically produced KT315 transistors in a microphone amplifier. The final stage uses a high-power transistor switch based on the KT818 bipolar transistor. If you intend to control lamps with a power supply above 12 volts, then a relay is needed in the circuit. If the expected loads are less than this value, then the relay can be deleted. Copper wires are connected using Wago 222 terminals, which have their pros and cons.
Copper wires can be connected using Wago terminals
Advantages of Wago terminal blocks:
- speed, accuracy and ease of connecting wires;
- electrical safety;
- no need to use special electrician tools;
- reliability;
- aesthetics and beauty.
Disadvantages of Wago terminal blocks:
- high price;
- The location of the nest is not very convenient.
Varieties of acoustic switches and circuits for DIY assembly
If you are a fan of non-standard ideas for the home, then you have heard about an acoustic switch and probably wanted to buy it or make it yourself. The finished device is expensive and often of poor quality. How to make such a miracle technique yourself without spending a lot of money and time? This article describes in detail how to make a switch, provides connection diagrams and corresponding explanations.
Ecolight switch
The Ecosvet device is designed to work with 220 Volt light bulbs.
Main parameters of the device:
- load - 300 Watt;
- sound signal spread - from 30 to 150 decibels;
- housing protection level - IP30;
- permissible temperature range - from 20 degrees below zero to 40 degrees above zero;
- cost - from 350 rubles.
Connection diagram and DIY installation
The electrical connection diagram for a cotton switch is no different from the connection diagram for a single-key switch. Only in series (or instead) the clapper switch is switched on in the open circuit.
Step-by-step instruction
The acoustic module itself is glued with tape from the inside to the chandelier or the body of an electrical appliance; connections are easier to make with Wago-type terminal blocks:
- de-energize the network, break the power circuit going to the key switch, remove the insulation and strip the ends of the wire;
- a pair of white wires from the acoustic module are connected to the phase and neutral coming from the shield or junction box;
- The two remaining black wires are similarly connected to the terminals of a lamp or household appliance.
All that remains is to move the button of the conventional switch to the “on” position, the system is ready for operation.
Tests and experiments (video)
Let's check this switch for the following extraneous loud and ringing sounds from:
- hammer blows
- working vacuum cleaner
- phone ringing
- hammer drill operation
- knocking of dishes (mug with spoon)
Let's try to provoke false alarms by exposing the switch to sounds from the above-mentioned instruments and devices. I filmed the operating algorithm of the switch, as well as the experiments I carried out:
Let us draw a conclusion from the experiments: the switch falsely reacts to sounds from the operation of a hammer drill and to very loud sounds from a spoon knocking on a mug. In other cases, no false positives were observed.
After an hour of work, I checked the heating of its case. I can please you - the case is slightly warm, which is safe from a fire standpoint.
How does an acoustic switch work?
A microphone or acoustic sensor converts sound vibrations into an electrical signal. After the audio frequency amplifier, the AF signal is detected, and a constant voltage is supplied to the base of the transistor switch, the load of which includes the relay winding. After exceeding the threshold level on the base, the key is activated and the relay closes the 220 V power contacts of the electrical receiver. When the sound command is repeated, the circuit automatically turns off and the current flow in the lamp or electrical appliance stops.
Specifications
Typical technical characteristics of an acoustic device for use in a residential building:
- net weight (without packaging) 30 – 60 g;
- overall dimensions 40*40*15 –86 *86 *26 mm;
- household voltage 220 V;
- maximum load current 5A;
- load power 200–1100 W;
- sound sensitivity adjustment 20–150 dB;
- housing protection class IP30 – IP34;
- relative humidity from 20% to 60%;
- operating temperature from 0°C to +40°C;
- Product warranty period is 12–24 months.
Components
A standard acoustic switch consists of the following parts, soldered on a printed circuit board:
- transistors and diodes;
- diode bridge and zener diode;
- trigger and comparator microcircuits;
- resistors and capacitors;
- microphone and relay.
The board fits into a sturdy plastic case with latches.
Differences between clap and sound (voice) switch
Voice control devices are more complex than slam switches. They use special active filters on microcircuits that perform the functions of a command decoder. They recognize a sequence of vowel sounds of a certain frequency and duration, ignoring acoustic interference.