Features, application and instructions for making a light diffuser for LED strip
To give the light flux uniformity and directionality, it is necessary to attach a characteristic optical design to the lamp. For an LED strip, its role is played by a special diffuser. However, as a rule, ice strips are not supplemented with such devices when sold - they need to be made independently or ordered separately, depending on the conditions of use and the parameters of the lighting device based on them.
Let's consider what the operating principle of such a device is and what its function is, what types exist and where they are used, as well as how to make them yourself and what materials are required for this.
What and how to make a reflector from?
To make a reflector, it is important to determine not only its dimensions. The number of planes from which the rays will be reflected plays a certain role. The main difficulty is precisely to form them.
The basis can be any moderately pliable, but quite durable material. There are quite functional reflectors made of plastic, laminated plywood or non-woven fabric. How the fixture will be formed depends on the type of housing. Sometimes polygonal crystals (found in some types of old lamps, or for small reflectors, beads used in jewelry making) may be needed to give the refractor the desired properties.
It is important not only to give the material the desired shape, but also to make it reflect the light supplied by the LEDs.
An excellent option for external coating is chrome paint, which is sold in cans. You don’t have to apply a reflective coating, but entrust this procedure to specialists from a specialized workshop.
When designing any optical systems, it is important to maintain a balance between the final cost of assembly and the correct placement of elements. In this case, the following pattern should be taken into account: the higher the efficiency of the element, the greater its sensitivity to the installation site.
The components of the system can be secured not only with glue and adhesive tape, but also with the use of pins and hooks with fuses that pass through the board.
Function and principle of operation of the diffuser
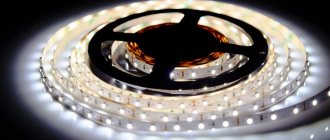
The peculiarity of the LED strip is that the luminous flux from it extends to an angle of no more than 120 degrees. This significantly impairs their practical usefulness. To correct the situation, it is necessary to place a material that refracts and scatters light in close proximity to the lamps.
This is exactly the function that the LED diffuser performs. Its internal structure is based on a disordered arrangement of particles of matter. As a result, light, when passing through such a material, deviates significantly from its original trajectory - and in different directions. As a result, the light flux simultaneously weakens somewhat and expands evenly.
Note! You can see and understand the operating principle of a diffuser for an LED lamp using the following example. You need to put a small piece of matte cellophane on top of the led tape. The luminous flux from such a scattering film will immediately become slightly muted and evenly distributed over the entire illuminated area.
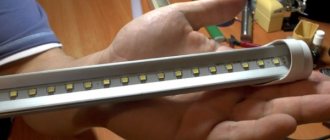
The diffuser or diffuser used for LED strips consists of two main elements - a housing and a light-transmitting plate. In modern models, the first part of the device is presented in the form of a plastic, aluminum or stainless steel profile of the following shapes:
Its geometry is determined primarily by the place where the diffuser is used, the types of brackets for it, features and operating conditions. An LED strip is glued to the base of the profile, and then the top is covered with transparent or matte material. The former are used when strong illumination of any selected areas is required - for example, display windows in a store, the latter - when it is necessary to create general unobtrusive lighting, for example, in a restaurant.
There is also a flexible profile for LEDs. Essentially it is a silicone tube with the ability to place an LED strip inside it. Due to their high plasticity, they can be given any shape, which is important when designing complex figured decor, advertising signs, and trees.
Light transmittance of materials (transparent)
What percentage of light does each of the materials transmit
? You could buy a ready-made material with a matte tint, but this will not always give an acceptable result. Even factory diffusers have light transmittance in the range of 60-90%. This is caused by the reflection of light. The thicker the diffuser, the higher the likelihood that light will fall “inappropriately”.
Reducing the thickness of the material will not have the best effect on strength and durability. You can make a reliable light diffuser for LEDs with your own hands from transparent materials by creating a matte texture on one of the surfaces.
How to get a matte surface
A matte surface structure is obtained by matting. There are two types of matting:
- Chemical;
- Mechanical.
With the chemical method
A special paste is applied to the surface. It destroys the crystalline structure of the material, forming a uniform matte layer.
Advantages of the method:
- Minimum time spent;
- Homogeneous surface structure
Disadvantages of the method:
- Relatively high cost of pastes;
- When matting, toxic substances are released.
Mechanical method
involves treating the surface with an abrasive material, usually fine sand.
Advantages of the method:
- Fast, uniform processing.
Disadvantages of the method:
- Sandblaster required;
- Unsuitable for home use.
The easiest and most affordable way to make a matte surface is to sand the glass with sandpaper. This method is not suitable for silicate glass due to the high strength of the material, but polycarbonate and acrylic glass lend themselves well to such processing. We use only fine sandpaper as an abrasive; coarse grains may cause scratches.
For home lamps based on low-power elements with low heat release, it is possible to use ordinary compress paper glued to the inner surface of the glass as a diffuser.
In most cases, the brightness of a lighting fixture can be increased by applying a reflective coating. Silver has the highest reflectance, followed by aluminum. It is from this that the reflective layer for mirrors is made. These coatings are not particularly inferior to ordinary food foil and white paint.
You can make a reflector for an LED by covering the circuit board for LEDs or the inside of the lamp with these materials yourself. This simple method will allow you to increase light output by 10-15% without much expense.
To give the light flux uniformity and directionality, it is necessary to attach a characteristic optical design to the lamp. For an LED strip, its role is played by a special diffuser. However, as a rule, ice strips are not supplemented with such devices when sold - they need to be made independently or ordered separately, depending on the conditions of use and the parameters of the lighting device based on them.
Let's consider what the operating principle of such a device is and what its function is, what types exist and where they are used, as well as how to make them yourself and what materials are required for this.
The peculiarity of the LED strip is that the luminous flux from it extends to an angle of no more than 120 degrees. This significantly impairs their practical usefulness. To correct the situation, it is necessary to place a material that refracts and scatters light in close proximity to the lamps.
This is exactly the function that the LED diffuser performs. Its internal structure is based on a disordered arrangement of particles of matter. As a result, light, when passing through such a material, deviates significantly from its original trajectory - and in different directions. As a result, the light flux simultaneously weakens somewhat and expands evenly.
Note!
You can see and understand the operating principle of a diffuser for an LED lamp using the following example. You need to put a small piece of matte cellophane on top of the led tape. The luminous flux from such a scattering film will immediately become slightly muted and evenly distributed over the entire illuminated area.
Application
The scope of application of LED diffusers is quite wide:
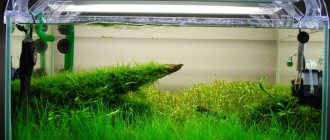
- Specialized lighting in living spaces for bookshelves, kitchen work areas, aquariums, and interior elements.
- Additional lighting of special areas in stores, shopping and exhibition centers.
- Highlighting important areas in street design, billboards, decorating squares and gardens.
- Creating a general background glow in public institutions.
With the help of colored diode strips and software control of their parameters, rooms, shop windows, interior and exterior elements, buildings and structures are decorated in honor of various events, events and holidays.
Materials for making the diffuser
A modern range of ready-made optical materials allows anyone to make their own diffuser for an LED strip. Among the most suitable options are:
- Acrylic and plexiglass.
- Polystyrene.
- Polycarbonate.
Let's consider their main characteristics and application features.
Acrylic and plexiglass
Types of plastic such as acrylic and plexiglass are characterized by the same light-scattering abilities as traditional glass (they transmit about 90% of radiation). At the same time, they are characterized by maximum anti-vandal characteristics and do not crack from constant changes in climatic conditions, sudden changes in temperature from plus to minus sixty and mechanical influences.
- Light weight.
- Possibility of processing.
- UV resistance.
- Waterproof.
- Non-toxic.
- Not susceptible to aging processes.
Interesting! Among the disadvantages are flammability in direct contact with fire and low resistance under high impact loads.
Polystyrene
One of the thermoplastic polymers is characterized by high light transmittance, greater than that of standard glass (about 98%). Polystyrene is versatile and easy to process, resistant to thermal changes and localized strong impacts.
Its main advantages are low cost and significant color variety - from completely transparent to rich, bright shades. However, in general, a plate of such material is quite fragile and can ignite when exposed to open fire.
Polycarbonate
The characteristic properties of polycarbonate are strength, light weight and good light transmittance. In practice, a diffuser for LED strips made of such material is not afraid of contact with open fire, strong winds, heavy rain, hail and attacks from vandals. Moreover, in structure it differs into two subtypes:
Making a diffuser with your own hands
You can quickly make an inexpensive diffuser for an LED strip with your own hands by following the following instructions:
- A metal or plastic profile of suitable length and width is selected. For example, you can take a plastic box for wiring.
- The specified segment is cut.
- A plate of one of the materials discussed above is cut according to the dimensions of the profile.
- Its surfaces are cleaned with sandpaper to give them a matte structure (if the diffuser is needed transparent, this step is skipped).
- The profile box is drilled for fastening, and an LED strip with already soldered or connected wiring is glued inside.
- The profile is mounted on a tripod, wall, ceiling, shelf and other destination.
- Next, the diffuser itself is glued with superglue (alternatively, it can be screwed onto small screws through pre-drilled holes). In this case, the edges of the box can be pre-bent to increase the contact area and the reliability of fastening the glass or plastic.
You can increase the light output of a lamp with a diffuser based on an LED strip by painting the inner surface of its profile with white or silver paint.
Main conclusions
The diffuser makes the LED strip illumination more uniform and improves the practical and aesthetic effect of the lighting. The device consists of two main parts - the housing and the light-transmitting plate. For the first, metal or plastic profiles of the L-, U- and C-shaped type are used, for the second, acrylic, plexiglass, polystyrene and polycarbonate are used. Each of them has its own characteristics.
The scope of application of the diffuser for LED strips is wide:
- Residential lighting.
- Lighting of public institutions.
- Highlighting shop windows and billboards.
You can make the device yourself. To do this, you will need a plastic or metal box, an ice strip, wiring and one of the considered light-scattering bases.
If you know another interesting diffuser option for LED strips and a method for making it yourself, be sure to share it in the comments.
Source
Kinds
The diffuser or diffuser used for LED strips consists of two main elements - a housing and a light-transmitting plate. In modern models, the first part of the device is presented in the form of a plastic, aluminum or stainless steel profile of the following shapes:
- Corner.
- U-shaped.
- S-prominent.
Its geometry is determined primarily by the place where the diffuser is used, the types of brackets for it, features and operating conditions. An LED strip is glued to the base of the profile, and then the top is covered with transparent or matte material. The former are used when strong illumination of any selected areas is required - for example, display windows in a store, the latter - when it is necessary to create general unobtrusive lighting, for example, in a restaurant.
How to make light diffusers for lamps
Today, many lighting fixtures are equipped with diffusers. With their help, the formation of a luminous flux of the required quality is ensured.
Many lamps sold in lighting stores today are already equipped with such elements. But if desired, anyone can try to make such an element with their own hands. This way you will not only spend time with interest and benefit, but you will also be able to equip any home lamps with this kind of addition. And you won't have to run to the store.
What are modern reflectors like?
Manufacturers are constantly expanding their model range, significantly expanding the possibilities of light tuning. Refractors are available for a wide variety of LEDs and their combinations. Now you don’t have to limit yourself to just one shade.
The devices reflect light in the forward and reverse directions, thereby making the distribution of rays more uniform.
Reflectors can be designed for installation with an acrylic rod, and they will help to neatly hide the LEDs for their most effective use in the rear lamps of automobiles.
Refractors can correct and redirect LED illumination. They are designed to operate at right angles to the diode axis. When selecting a reflector, it is important to take into account all the parameters of the light sources. Case types and designs are constantly being updated, so it’s worth regularly monitoring new products so as not to miss out on the most interesting optics options.
Reflectors significantly improve the properties of the flow produced by LEDs. They are equally needed for tuning car optics and for assembling flashlights and lamps. You can try to make simple models with your own hands, but in some cases it is simply pointless to compete with manufacturers.
Useless detail
Any lighting devices create a certain level of luminous flux. But it can be changed. For these purposes, the diffuser was invented. With its help, you can simulate the luminous flux and make the lighting softer. Most often, a diffuser is used to modulate the lighting emanating from modern energy-efficient light bulbs (LED, fluorescent, halogen, etc.) screwed into lamps.
LED lamp with diffuser
Particular attention should be paid to LED lighting fixtures. LED produces highly focused and pure light. Therefore, it will not be very comfortable to look at him. Therefore, this situation must be corrected with the help of diffusers. This must also be done because such recommendations are prescribed in SNiP.
Note! The only exceptions in terms of modulating the luminous flux to the optimal level are street lamps, as well as the lighting of architectural structures.
The diffuser in LED lamps must perform the following functions:
- ensure protection of LEDs (or other light source) from environmental influences;
- create a comfortable and correct distribution of the light flux emitted by the light bulb for the eyes;
- increase the durability of the lighting product;
- increase the resistance of the device to various types of chemical influences.
As you can see, it is impossible to simply replace a fluorescent light bulb with an LED light source. Here it is necessary to additionally install a diffuser. As a result, you will receive with your own hands an economical, modernized and harmless lamp, the light of which is suitable for a comfortable stay in the room during its operation. For many lamps (for example, brands Armstrong, Opal, etc.) this element is made of plexiglass. It is quite possible to make a diffuser from the same material with your own hands at home.
Material for work
Today, there is a wide variety of materials from which you can make an element such as a diffuser with your own hands. As a rule, it must be done for LED lamps of the Armstrong, Opal, etc. brands. The list of materials suitable for the manufacture of a diffuser includes:
Note! Resistance to aging is very important for LED lamps, since this light source also has one of the longest operating periods (over 50 thousand hours). Such diffusers are especially common on Opal and Armstrong lamps.
All of the materials listed above are alternatives to standard silicone glass. They are successfully used as a diffuser for all LED-type lamps (Opal, Armstrong and others). With the right approach, you can make a high-quality diffuser with your own hands from any of the materials listed above.
What you need to know
If you decide to build a diffuser with your own hands for an LED type of lighting fixture (Armstrong, Opal, etc.), you need to choose not only the material for manufacturing, but also decide on other parameters:
A do-it-yourself lamp diffuser will have various design options, differing in color, shape and structure.
These luminaire design elements may vary depending on the type of installation:
- on the overhead lamp housing;
- on suspended ceilings;
- universal.
In addition, a separate group consists of light diffusers intended for installation on the headlights of various vehicles, as well as non-standard lighting devices. The design of light diffusers can be as follows:
- with a matte surface. This is the most expensive model. Their feature is that they transmit a little more than half of the light flux (approximately 60%). As a result, the light becomes softer and warmer, which increases its comfort for the eyes;
- with a prismatic structure. Here almost the entire light flux is transmitted (up to 90%). This is possible thanks to the corrugated surface and transparency of the material. As a result, light is refracted on the corrugated surface, which allows light to be diffused throughout the entire space of the room.
Now that we have clarified all the important aspects of the structure and operation of the light diffuser, we can begin to describe its manufacture.
Opal
Thanks to this diffuser, the light acquires a yellowish tint. This assistive device is quite popular.
The surface is matte, which is why some manufacturers of such designs call them opal matte diffusers. In this case, the luminous flux decreases by 100 units (approximately).
This must be taken into account when calculating the general lighting of the room. For example, if it is stated in the instructions for the lamp that the luminous flux is 3000 Lm, then in fact it will be only 2900 Lm due to the use of a diffuser with a matte surface.
By the way, this design is ideal for any interior. The thickness of the material used is 0.25 cm, and transmits light - 65%.
Do it yourself
To make a light diffuser, you will need the starting material from the list above. In addition, you will need the following tools:
- cutter;
- glass cutter;
- nichrome thread;
- drill with a set of drills for working with various types of glass;
- construction hairdryer
Note! The choice of material and tools depends on the end result you want to achieve.
You will also need a constant light source to check the finished homemade product. The manufacturing procedure consists of the following sequential operations:
- choose frosted or transparent glass;
- We cut out a light diffuser of the required diameter from the original material. The size of this element is determined by the dimensions of the lighting fixture. And to be more precise - a lampshade and a light source;
Glass cutouts
Now all that remains is to attach the light diffuser to the lamp. For large lamps, such as Armstrong, this element is attached to aluminum profiles. The profile frame can have a round or rectangular shape. The first type is often used for home lamps and car headlights, but the second option is for office spaces and corridors.
For street lamps, it is important to make a diffuser so that it can withstand the different climatic conditions of the place where it is used. As you can see, making a light diffuser for LED lighting fixtures is not so difficult. The main thing here is to decide on the type of source material, as well as the final result, what kind of light you need to make - diffused or dim. After this, the matter remains small.
Source
Principle of operation
The principle of operation of the diffuser for LED strip is to increase the angle of light distribution due to a special design made of light-refracting material. Its own geometry and location relative to the light source is designed in such a way that the luminous flux falling on it is effectively distributed over its entire area and passing through the body of the diffuser, ensuring uniform illumination of the entire room.
Structurally, it consists of a metal or plastic profile of various shapes and, directly, a removable diffuser made of polycarbonate, polystyrene or methacrylate. This is advisable, since these materials are quite strong, but do not weigh down the structure much. The main profile shapes that are used are:
The profile shape is selected depending on the planned installation location. A tape is attached to the profile, and the diffuser cover itself is snapped on top. It comes in two types:
Before you make a purchase, you need to think about what your lighting goals are. If we are talking about illuminating a shop window in a retail space, then most likely a diffuser with a transparent surface will be more suitable for you. If you want to give a casual atmosphere to a cafe-bar, then you should give preference to matte.
Conical reflector-radiator for ultra-bright LED
Improving the previous design of the reflector-radiator, I wanted to focus the light flux of the LED more towards the center. The conical shape of the reflector suggested itself, since it almost completely corresponds to the shape of a parabolic mirror. After some calculations and experiments we have the following design
To make such beauty you will need: - an aluminum (can be copper or tin) scratch-free plate up to 1 mm thick and 40x35 mm in size - a single-layer foil-coated textolite plate 20x15 mm in size - a super-bright LED, a soldering iron, two contact wires, one or two paper clips - a little thermal paste - pliers (round nose pliers), hacksaw (scissors) for metal, needle files, compass, small drill - straight hands for obtaining correct curved surfaces
The theory is still the same. In order to obtain a parallel beam of light, it is necessary to install the LED crystal exactly at the focus of the parabolic mirror. Here is a picture from a previous article
It was decided to leave the dimensions the same, but now the size of 24mm is the diameter of the circle. It turned out to be easier to obtain the cone shape by bending two half-cones from the workpiece, therefore we have the lengths of the arcs of two half-cones. Also from the figure we have the radii of these arcs. As a result, we get the following development:
It turned out to be even simpler than the previous one, the only difficulty is to give it the correct shape, since the accuracy of focusing the light beam depends on this.
Here is an example of marking a workpiece on an aluminum sheet:
There is nothing complicated about the markup. There is no need to calculate degrees, arc lengths, etc. First, all straight lines are drawn, and then two arcs with a radius of 28 mm are drawn until they intersect with the straight lines and the marking is ready.
The material for the reflector-radiator can be aluminum, copper, or tin from a tin can. Copper and tin are even more preferable because they can be soldered. The thickness of the material must provide sufficient structural strength. For aluminum this is no less than 0.5mm. Now the workpiece is cut and bent. It is advisable to cut it with a hacksaw, but if you are very lazy, you can also use metal scissors, as shown below. Then the edges will have to be aligned with a file.
The reflector must be bent carefully so as not to scratch the reflective surface with the tool. After all these procedures we get the following:
The workpiece still has “ears” - two rectangular strips. They can be cut off only after the reflector is bent. Or they can be bent under the LED, as shown below:
Next, part No. 2 is cut out - a rectangular contact pad made of single-layer foil PCB. It is exactly the same as in the previous version of the reflector. Its dimensions are 20x15 millimeters, 4 holes with a diameter of 1 mm are drilled into it for fastening and two holes for wires. Excess copper is removed with a knife or a needle file. It would be a good idea to tin the contact pads. After which the reflector and PCB are glued and twisted together. A paper clip can serve as a twisting wire. The diameter and strength of the material are suitable, you just need to not pinch it when twisting it, otherwise the wire can easily break. In addition, it is easy to tin and solder. This may be useful for making a radiator reflector mount.
It is clear that the LED contacts should not touch the radiator housing.
Well, that's all. The final touch is to secure the two halves of the cone together. If the radiator material was copper or tin, the halves are simply soldered together. If, as in this case, the radiator was made of aluminum, the halves are glued together by applying glue to the outside of the reflector. This seemingly small detail is very important, since the strength of the case will now increase significantly.
Now connect (observing polarity) and enjoy the result. The scope of application of this design is very diverse, from tabletop mini-lamps and backlights to homemade flashlights
Become the author of the site, publish your own articles, descriptions of homemade products and pay for the text. Read more here.
Flexible
There is also a flexible profile of LED diffusers. It is fundamentally different from the designs described above. This type of component product is a silicone tube in which an LED strip is placed.
To choose the right diffuser for an LED strip, you need to consider the conditions. This includes a study of the surface to which you will attach the system, the overall dimensions of the LED strip itself and the climatic conditions of the room (or outside it, which is also possible).
It should be noted that despite the fact that diffusers are often made of fusible materials, there is no need to worry about their toxicity. During operation, the LED emits a very small amount of heat, which practically does not heat the surface of the diffuser.
Which diffuser to choose: recommendations
Firstly, when choosing a diffuser for LED lamps, you need to pay attention to the light transmittance. The higher the indicator, the more light flow will pass through the material. As a result, the lighting in the room will be brighter.
By the way, the higher the indicator, the higher the cost of the light diffuser. Although the use of expensive structures is not always required. For example, in offices it is recommended to use LED devices with a prism-type diffuser. In this case, the material is not of primary importance.
If it is important to properly decorate the room, then when choosing a diffuser you need to pay attention not only to the transmittance of light, but also to the appearance of the structure. The ideal option is LED devices with an opal-type light diffuser.
If the device is exposed to significant mechanical impact, it is recommended to enclose it with a special reflective grille. Diffusers such as “honeycomb”, “crushed ice”, and “prism” save you from moderate impacts. The latter option is considered more durable.
As for reflective grilles, they can be used without diffusers. Such designs are used in rooms with high ceilings (at least 2.5 m). Grilles improve lighting efficiency. In any case, when choosing, you need to focus on the purpose for which the light flux diffuser is purchased.
Fastening
The profile can be attached in an overhead manner to any surface. For this, self-tapping screws, liquid nails or even double-sided tape are used. There are options when special “ears” are attached to the wall, into which both rigid and flexible profiles are subsequently ideally fixed. Built-in installation of the diffuser profile is carried out using a pre-cut groove in chipboard or drywall. In the second case, you can create very sophisticated lighting in furniture. And if you use a flexible profile for an LED strip with a diffuser, then you will not have problems mounting it on curved surfaces, arches, and the like. In any case, all fastening methods are completely simple and are accessible even to a non-professional.
Application
The potential for application is enormous. Illumination of bookshelves and kitchen cabinets, display cases and aquariums. At home and in the office, in a store and a cafe - the use of LED strips with diffusers will be appropriate and attractive. And dust and waterproof ones allow you to use such lighting for outdoor advertising and any decoration on the street.
Don't forget about the possibility of using strips with LEDs of different colors and those that can change them. This will give a unique atmosphere of celebration and comfort.
How to make it yourself
I would like to immediately add that there is an alternative to buying a ready-made LED diffuser - this is to make it yourself. What to make a diffuser for an LED strip from? Actually, this is not at all difficult; you can use a regular plastic box as a profile, which is used for laying wires in a groove, and polycarbonate or plexiglass as the diffuser itself.
To obtain a matte surface, you can use a mechanical or chemical method. The chemical method involves applying a special paste to the surface, which will destroy the crystalline structure and give an excellent matte effect, but at the time of application you need to be very careful, as the paste releases toxic substances. The mechanical method is much less harmful, since it involves treating the surface with an abrasive material, for example, emery, but it requires great physical effort.
The video shows a quick, easy and cheap way to create a homemade LED strip diffuser.
To summarize the above, I would like to draw your attention to the fact that the diffuser for an LED strip is an important, multifunctional component. Also, you see that the variety of design options will certainly be able to satisfy almost any conditions. Comfortable and original lighting is always a huge plus in creating a stylish, themed interior. It can be a classic style or a high-tech style, minimalism or kitsch, loft or avant-garde - the use of LED strips with diffusers will always highlight the best design ideas and leave a pleasant impression of the time spent in such a room.
Source
How to make a diffuser for LEDs with your own hands
This method, in my opinion, is quite effective, since it allows you to make a diffuser for LEDs of any shape, size and light transmittance.
-To make it, we will need jewelry epoxy resin PEO-510KE-20/0, since it is crystal clear and does not turn yellow over time.
As a scattering element, we will need Diffusant DF-151 powder. It dissolves perfectly in epoxy resin, giving it that same milky tint and incredibly high-quality dispersing properties when hardened.
Also, for this resin there is a huge number of dyes, any colors, fluorescent and phosphorus.
Well, the mold itself for casting, I usually use silicone for molds or for casting.
Here are a few samples where I experimented with adding Diffusant DF-151; as you can see, the quality of dispersion can be easily adjusted and the desired result can be achieved. The mixing ratio of epoxy resin and Diffusant is 100 to 1. This is how I created it.
And here is how the “sample” with connected LEDs scatters light. The dispersion is perfect, the dots from the LEDs are not visible from any side or angle. The experiments turned out to be extremely successful, so I went further and made a full-size diffuser to be installed in the headlight, so it shines at maximum brightness, very brightly and evenly.

