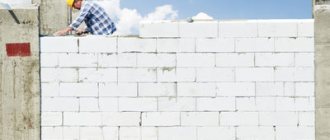
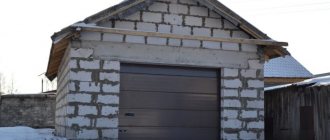
Working with piece building materials has a general methodology, similar for all types. However, the laying of aerated blocks has its own specifics, due to the characteristics of the material.
Gas silicate or aerated concrete is a specific material produced in the form of blocks. Construction from them is carried out according to generally accepted rules, but there are some amendments and additional procedures necessary for aerated concrete, but not used when working with dense materials. Laying walls from aerated concrete blocks can be done independently, but you need to have a sufficient understanding of the properties and features of the material. Otherwise, proper laying of gas silicate blocks is impossible; some rules for conducting work may seem strange and unnecessary. The process itself is not particularly difficult, but it must be considered from the very beginning.
Features of aerated concrete
To build a house, it is necessary to use suitable materials. About 100 years ago, one of the representatives of the cellular concrete family, aerated concrete, was developed. It was conceived as the optimal type of building materials for private housing construction and in this regard had the most successful set of qualities. However, initially builders treated aerated concrete with great doubt, since it was radically different from conventional building materials and did not meet generally accepted standards. The reason for this attitude was the porous structure of aerated concrete, due to which it received a lot of positive and negative qualities. The advantages of aerated concrete are:
- light weight, reducing the load on the foundation;
- low thermal conductivity, allowing you to save on heating your home;
- smooth geometric shape, allowing for thin-seam installation of aerated concrete blocks;
- the material is easy to cut and process, which is constantly used when laying gas blocks.
Disadvantages of the material:
- low load-bearing capacity, limiting the height of buildings (for private houses - up to 3 floors);
- hygroscopicity, requiring reliable protection from contact with moisture;
- low strength, requiring reinforcement of the masonry and installation of armored belts under all floors.
In addition, the disadvantages include the presence of shrinkage, poor ability to hold fasteners, high demands on the strength and immobility of the base.
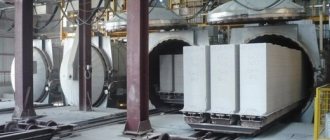
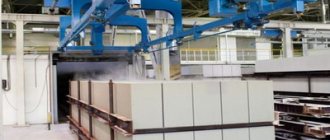
Pores in aerated concrete arise during the manufacturing process when a chemical reaction of aluminum powder with lime occurs in the presence of water. A large amount of gas is released, and the mass of material rises like yeast dough. The result is a mass of aerated concrete, which is cut into aerated blocks with an even and precise shape using special equipment.
Wall laying options
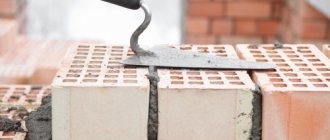
Walls made of gas silicate blocks are erected using cement-sand mortar and a special construction adhesive, which is prepared from a dry mixture by adding ordinary water. Studies have shown that in a thick layer of mortar, “cold bridges” appear much more often, so the bonding and laying of the gas silicate block should be done with as thin a layer of the binder composition as possible. This is only possible when using glue. Cement mortar produces a layer with an average thickness of 9-12 mm, and a layer of construction adhesive - 3-5 mm, so cement mortar is used only for laying the first row of gas blocks to connect the wall and foundation. It is recommended to carry out further masonry using glue, and if tongue-and-groove blocks are used, then it is simply impossible to use cement mortar due to the precise fit of the elements - the groove and the tongue to each other - the mortar will not fit into the space between them.
Moisture protection
Walls made of gas silicate are erected with the simultaneous formation of as thin a layer of binder solution as possible. You can prepare both cement-sand and adhesive mortar yourself.
- Sand-cement mortar is prepared traditionally, in proportions 1:3 (cement - sand). During winter construction of a house, ordinary mortar cannot be used, since at subzero temperatures the strength of the composition is impaired by the formation of ice.
- The glue is prepared on the basis of Portland cement, to which mineral additives and polymers are added. Due to the finely dispersed composition of the glue, the layer of solution is very thin, and “cold bridges” do not appear in it. But the first row of blocks needs to be laid only on cement mortar, and in winter several methods are used to heat the masonry site, including heat guns, tents and local heating.
But the standard adhesive composition in its pure form cannot be used in winter. For negative temperatures, special anti-frost additives are produced, with which the glue successfully hardens in the cold faster.
Construction adhesive for gas silicate
Technical characteristics of aerated concrete
The technology of laying aerated concrete blocks requires the master to know its parameters. This is necessary to determine the suitability of the material for construction under existing conditions. Let's look at the characteristics of autoclaved aerated concrete D500, the most popular type in private housing construction:
- density - 500 kg/m3;
- compressive strength class - B2.5;
- frost resistance - F50 (50 cycles of freezing and thawing without loss of performance under conditions of maximum moisture saturation);
- fire hazard - none;
- moisture resistance - none (needs protection);
- thermal conductivity - 0.14 W/m·C;
- the average thickness of external walls (for the Moscow region and other regions with similar climatic conditions) is 0.5 m.
Aerated blocks of other brands have similar parameters, only the density and compressive strength differ.
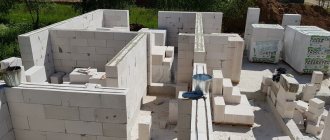
Laying aerated concrete blocks
The quality of the construction of the future house depends on how correctly the aerated concrete laying was done; the technology requires strict adherence to it.
Waterproofing
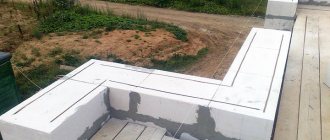
Laying the first row of aerated concrete blocks requires special attention and careful work. A layer of waterproofing material is laid on the finished, dried foundation. For waterproofing, which protects aerated concrete walls from moisture, roll and coating materials are most often used.
Marking
Before starting work, make external markings and stretch boundary cords or thin rope around the entire perimeter to mark the boundaries. To speed up work and perform more accurate markings, it is most convenient to use a laser level.
Deviations in the height of the foundation should not be more than 40 mm. For large differences in height, it is necessary to bring the height of the foundation to acceptable levels.
First row
Laying walls from aerated concrete blocks begins with the formation of corners. Corner blocks are installed using cement-sand mortar. To prepare it, you will need to thoroughly mix cement and sand in proportions of 1:3.
Attaching non-load-bearing partitions to the wallSource eyecorrector.ru
Laying of aerated concrete blocks is carried out using an adhesive composition prepared according to the attached instructions. It is diluted until a homogeneous mass is obtained that does not contain lumps. The glue is applied using a quilt to the vertical seams. For work, it is most convenient to use a small kilt equal to the width of the block. This will speed up the work process and help reduce glue consumption.
Aerated concrete blocks require preliminary preparation - cleaning from dust and dirt with a brush. The first row is laid out on concrete mortar, connecting the blocks together with glue. They are laid at the same level, avoiding height differences. To adjust the installation height, use a rubber mallet. The material is adjusted using a special hacksaw.
Construction of floors made of aerated concrete blocksSource tolkobeton.ru
After laying the first row, it is better to wait about 5-6 hours until the concrete solution sets and firmly fixes the material in the required position. The dried row is sanded with a plane to grind down the unevenness at the joints to the same level and treated with a sanding board for smoothing.
Laying subsequent rows
Now there is no need to rush and immediately proceed to the installation of subsequent rows. The cement-sand mortar should set firmly. This will help prevent the walls from moving from the required level during subsequent work.
All subsequent rows of aerated concrete blocks are laid out on an adhesive solution. After laying each row, the levels are checked and the surface is leveled with a sanding board.
Tools and devices necessary for laying gas blocks
Before laying aerated concrete blocks, it is necessary to prepare the workplace and acquire the necessary accessories. For work you will need:
- rubber hammer;
- scraper bucket;
- glue carriages;
- notched trowel;
- grinding float or special plane for aerated concrete;
- mixer and container for mixing glue;
- electric drill with grinding wheel;
- wall chaser;
- grinder with cutting wheel;
- hand saw for aerated concrete;
- band-saw.
Only the most necessary or most effective tools and equipment are listed. During the work, additional accessories may be required, which are purchased as necessary and available. As a rule, the choice of tools is made based on your own skills and preferences, but it is impossible to do without some of the listed tools (for example, without grinding or cutting devices).
Adhesive for aerated concrete
During construction work, do-it-yourself aerated concrete blocks are laid using glue. Regular masonry mortar is not suitable, although it is used for laying the first (bottom) row. The main reason for the need to lay blocks on a special composition is the tendency of the material to absorb water. If a regular sand-cement mortar is used, the water from it is immediately absorbed into the gas block, and the hardening regime is disrupted. It will not be possible to achieve the expected strength of the connection of the rows; the masonry will be of poor quality and fragile.
There is another reason for using specialized compounds. Walls made of aerated concrete are laid using a thin joint (2-5 mm). This is an important point, ensuring the absence of cold bridges and condensation that destroys the walls. If the glue is replaced with a regular solution, the seams will become thicker (1-1.5 cm), which will cause colder areas to appear. Wet stripes will appear on the wall along the seam lines, aerated concrete will begin to accumulate water and lose its heat-saving qualities.
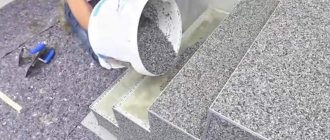
At the same time, laying an aerated block with glue is no fundamentally different from conventional technology - the composition is applied to the surface of the row, coating the vertical seams as well. Then the gas block is laid and leveled, checking its position with a building level, installing it horizontally and vertically. In order to ensure a thin seam, it is necessary to apply the glue in an even and neat layer. To do this, they use a carriage and a special bucket-trowel, which moves along the surface of the row and produces a layer of glue of a given thickness, which is immediately calibrated with teeth.
Adhesive compositions for aerated concrete are the same sand-cement mortar, but with moisture-retaining additives and special components for elasticity and better adhesion. They are sold in bags; at retail outlets, adhesive compositions are marked with a special mark “for aerated concrete.”
Tile adhesive can be used as a substitute, but this is only a temporary measure until the standard adhesive composition is delivered.
There are many videos on the Internet in which representatives of various construction teams claim that laying aerated concrete blocks with glue is not a mandatory procedure. It is quite possible to use ordinary sand-cement mortar, they say, justifying their words with the famous “We all lay gas blocks like this, and nothing happens.” Let's leave these statements to their conscience, but to build the walls of your own home it is better to use standard materials and technologies.
Technology for laying gas silicate blocks
tool used for laying blocks
Laying gas silicate blocks with your own hands can be done using the following tool designed for the following operations: • preparing the solution • applying the solution • leveling the blocks • treating the surface of the blocks.
To prepare the working solution, use a hand-held electric drill with an attachment and a plastic bucket. For ease of application of the solution, trowels of various widths and notched trowels, which are containers for the solution, are used. To level the position of the blocks, use a building level and a wooden hammer. Processing of gas silicate blocks is carried out using a marking square, a saw, a tool for cutting connecting grooves, a grater and a soft brush to remove dust and material residues.
preparing gas silicate glue
To lay the blocks I use a special glue, which is a portioned dry mixture, which includes: • a mixture of fractional sand • chemical additives • Portland cement. In addition, the dry mixture contains additives that retain heat and moisture, giving strength to the seam and preventing the formation of cracks.
The preparation of gas silicate glue is carried out immediately before application. The dry mixture is gradually added to a container with clean water, the solution is mixed to the consistency of a paste, using a drill with an attachment. The solution is left to ripen for 5 minutes and mixed again. Now you can carry out thin-seam masonry. The prepared adhesive solution retains its qualities for one and a half hours.
For application, it is better to give preference to adhesive mixtures: • Aero Stone® • Thermocube® • Bonolit • Poritep • KS-3 glue.
Professionals advise
Choose an adhesive mixture that you have already worked with once and will cope with the task. The high price of dry adhesive mixtures for blocks requires the ability to apply a thin layer of glue. If you cannot apply the adhesive solution in a thin layer, it is better to abandon the idea of gluing the blocks immediately. Find a professional mason who can apply 2-3mm of adhesive and ensure the block sticks.
Check the quality of the adhesive solution on a separate block. Using a notched trowel, apply adhesive to the side of the individual block. The quality can be assessed by the following parameters: the adhesive mixture is well distributed between the teeth, the resulting grooves do not merge. This indicates that the adhesive mixture was prepared correctly.
block laying
The technology for laying gas silicate blocks requires a foundation with a relatively flat surface. The surface of the foundation is covered with a waterproofing layer. The laying of blocks begins with a high foundation angle, which is determined using a building level. The most responsible, regardless of the chosen masonry method, is the first row of blocks.
Professionals lay the first row of blocks only on cement mortar, simultaneously leveling the overall surface of the foundation. Taking into account the high hygroscopic qualities of the cellular concrete block, before installing the block, its lower surface is wetted. This prevents the transfer of moisture from the solution into the silicate block. All subsequent blocks are laid in continuation of the horizontal row.
Guides for external walls are installed around the perimeter using pegs with stretched twine. Each subsequent block is leveled with a hammer, checking the quality of laying using a building level. All irregularities and exposed adhesive on the surface of the blocks must be removed. To do this, use a grater or plane, sweep away dust or small debris with a brush.
Professionals advise
When laying blocks on cement mortar with a density of 2000 kg/cm2, the appearance of “cold bridges” in the seams is possible. The most practical option for laying blocks is to lay them in two rows. This eliminates the possibility of the formation of “cold bridges”, and then the house made of aerated silicate brick will feel like home.
Reinforcement of aerated concrete
The specificity of aerated concrete is such that the compressive and tensile loads for it must be carefully measured. At the same time, compression can be calculated in advance - take into account the weight of the walls, operational load, add the weight of snow in winter, atmospheric influences, etc. If the load is too great, you can increase the thickness of the walls.
Multidirectional loads cannot be predicted, since their nature and possible magnitude are unknown. Therefore, masonry of aerated concrete blocks must be reinforced in any case, even if there are no tensile forces. The use of reinforcing elements is determined by the requirements of SNiP, which states that every meter of masonry height is subject to reinforcement. Depending on the size of the blocks, this can be every 3 or every 4 row.
Installation of metal corrugated reinforcing bars with a diameter of 8 mm is carried out in a groove, 2 rows of which are made using a manual wall chaser. They make 2 grooves at a distance of 5-6 cm from the edges of the masonry. The reinforcement should not end at the corners; it is necessary to bend the rods and extend them at least 30 cm per turn. The longitudinal connection is made with an overlap, the rods are welded (knitting them with a wire is pointless - large loads will simply break or move the binding). The depth of the grooves is about 25 mm; they are half filled with the adhesive mixture, the rods are immersed, after which the groove is completely filled and the surface of the row is carefully leveled.
Some sources suggest using metal or fiberglass mesh as a replacement for rod reinforcement. This is extremely unprofessional advice, since the metal mesh will increase the thickness of the seams, the steel will rust and form red stripes on the surface of the walls. In addition, the metal forms a cold bridge that attracts condensation. Fiberglass mesh is completely unable to fulfill its functions - it stretches, which is incompatible with the very idea of reinforcement.
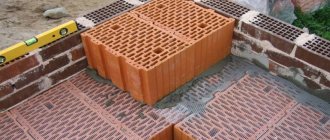
In addition to masonry reinforcement, there are armored belts under the ceilings. Laying walls made of gas silicate blocks does not withstand pressure well, therefore, the last row before laying the floor slabs is made of U-shaped blocks. They form a continuous tray along the entire perimeter of the external walls. A pre-welded reinforcement frame in the form of a spatial lattice (4 rods) is installed in the recess and filled with concrete. When it hardens, you will get a strong and reliable reinforcing belt. It takes on the load from the weight of the slab and distributes it evenly onto the aerated concrete wall.
In addition to the armored belt, reinforced lintels are used over window or door openings. The same U-shaped blocks are used here, extending onto the sides of the masonry by at least 25 cm. Sometimes standard concrete lintels are used, but these are guaranteed cold bridges, which is extremely undesirable for regions with frosty winters.
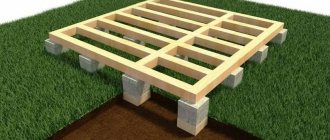
Preparing the foundation before laying walls
Before laying the gas silicate block begins, it is necessary to check the horizontalness of the foundation surface with a water level - the evenness of the laying of the first and subsequent rows of gas silicate bricks depends on this. If the difference along the edges of the wall is 10-20 mm, the foundation should be leveled with a layer of cement-sand mortar. Further laying of blocks with the tongue-and-groove system will be much simplified if the first row is laid perfectly horizontally. It is also necessary to check the angles of the perimeter - they should be 900. Control is carried out by measuring the diagonals of the perimeter of the house.
Foundation for a house made of gas silicate
To prevent rain or snow water from leaking under the foundation, it is necessary to lay out the gas-block wall so that it protrudes 1-2 cm onto the edges of the foundation slab. This way the moisture will flow directly onto the blind area and into the drainage. That is why it is necessary to install two or three layers of roofing felt waterproofing between the wall and the base of the house so that the walls do not become moist and moldy. When making a decision and arranging waterproofing, the thickness of walls made of gas silicate blocks does not matter - walls of any thickness must be protected from moisture.
Technique for laying aerated blocks
The technology for laying aerated concrete blocks with glue differs little from the traditional method of laying piece materials. However, during the work process a lot of nuances arise that are characteristic only when working with aerated concrete. Therefore, step-by-step instructions for installing the material will be very useful for untrained craftsmen. Even if the user has previously had to work with brick or cinder blocks, laying gas silicate blocks with his own hands will require careful study of the procedure. Let's take a closer look at it.
First row
Before laying the first row of gas blocks, it is necessary to waterproof the foundation using bitumen mastic or hot tar. A double layer of roofing material is laid on the surface of the tape, which will become the basis for the masonry. This is an important point, since the entry of capillary moisture from the soil can quickly damage the material.
The bottom row must be laid on a regular sand-cement mortar with a thickness of at least 10 mm. This is necessary in order to level the gas blocks in height and compensate for possible differences in levels between different corners of the tape. Using a building level (laser models are most convenient), determine the highest corner of the foundation. All other sections of the foundation will be aligned to it. Place a gas block at each corner and stretch a fishing line between them. Its position is leveled horizontally by placing a solution under the gas blocks and leveling their position between themselves and the top point. Then the remaining blocks are laid, an extension is made and the masonry is closed. The solution takes longer to dry than glue, so you can lay out the bottom row with the utmost care and ensure a high-quality base. It is important to be mindful of doorways and skip blocks where they are located.
Subsequent rows
When the solution has set, check the condition of the surface and level the bottom row using a sanding board (or plane). This procedure will have to be repeated after each subsequent row of masonry. The work is dusty and not the most pleasant, but the quality of the masonry requires effort. When the row is completely ready, carefully remove dust and aerated concrete chips. Then apply a layer of glue and begin laying the second row. The principle is the same - gas silicate blocks are laid in the corners, then the gaps between them are filled. It is necessary to bandage the rows with the blocks shifted by at least 13 cm (optimally - by half the length of the block). Glue is applied not only to horizontal, but also to vertical seams - this is important, otherwise cold air will enter the cracks.
Every 3rd or 4th row of blocks must be reinforced. A metal corrugated rod with a diameter of 8 mm is used. Fiberglass reinforcement is quite capable of performing its functions, but it is impossible to bend it at the corners. Therefore, only metal rods should be used.
For ease of work, aerated blocks are laid out along the entire length of the wall. The material is placed so that it is possible to take the next block with maximum convenience and lay it on the surface of the row without unnecessary movements. This is an important point, since the glue sets quickly enough, and you need to have time to take the next block, lay it on a row and carefully align it. If there is a pause, it will be very difficult to move the block.
Before laying the ceiling, an armored belt is made. The frame of reinforcing bars must be prepared in advance so that you do not have to urgently knit it when the concrete for pouring has already been prepared.
Methods for laying blocks
The following methods are distinguished: • cement (cement-sand mortar) • adhesive (dry adhesive mixture). The whole secret of laying blocks using cement or glue will lie in the thickness of the seam. When using the cement laying method , the thickness of the seam reaches from six to ten millimeters. When using the adhesive method, the thickness of the seam is up to three millimeters.
Therefore, laying gas silicate blocks with glue, in the opinion and advice of professionals, can be considered a more practical and economical way. Let us remind you that the consumption of adhesive mortar compared to cement mortar will be five times less. The density of the adhesive solution is 1400 kg/cm2, and the density of the cement solution is 1700 kg/cm2.
True, adhesive mortar is more expensive than cement mortar. When calculating the preliminary cost of laying gas silicate blocks, the manufacturability of laying work and the ingenuity of the craftsmen help out. This video will show you how to build a partition from blocks with your own hands.
Common Mistakes
In the process of laying gas blocks, inexperienced craftsmen often make the same type of mistakes. As a rule, there is no one to take lessons on how to work with the material, so you have to act according to your own understanding. Often users forget about important details of the process, or try to do things differently than the technology requires. The most popular mistakes are:
- lack of waterproofing cut-off between the foundation and aerated concrete;
- laying blocks without bandaging rows;
- lack of reinforcement of masonry rows at every meter of height;
- the use of inappropriate types of adhesives for aerated concrete (for example, in cold weather they use summer glue);
- lack of reinforcement of lintels over windows and doors;
- the side (vertical) joints of the masonry are not filled.
As a rule, users know what to do in a given case. Errors occur due to inattention or forgetfulness. Therefore, you need to work with the material with maximum attention and care, not forgetting about all additional procedures. This will help achieve automation and get high-quality and reliable results.