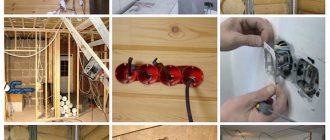
A socket is not only a mandatory functional element of electrical wiring, used to connect electrical household appliances, but also a significant interior detail.
The trouble-free operation of the outlet, as well as its neat appearance, depend to a large extent on how well the installation is done, right? To make the correct installation, it is necessary to take into account a number of nuances that are present in this work, one of which is the correct installation of socket boxes.
Have you never installed a socket box and are afraid of making mistakes? We will help you understand all the features - the article discusses in detail the types of installation boxes and the intricacies of installing each of them.
Attention is also paid to the installation of socket boxes in common types of bases - concrete, plasterboard, tiled wall. The material is supplemented with visual photos and useful videos.
Basic rules for installing socket boxes
Before installing the socket box, you must select the location for its installation. But since the socket is a source of increased danger, its placement in some rooms is subject to special requirements specified in the “Rules for Electrical Installations” (PUE).
According to the PUE:
- there must be a distance of at least 50 cm from the electrical outlet to the pipe through which the gas passes;
- sockets in the bathroom can be installed at a distance of at least 60 cm from the source of splashes (sink, shower, bath);
- It is recommended to install switches on the side where the door handle is located, and the distance from the device to the floor should be up to 100 cm;
- You cannot install sockets in saunas, baths, or rooms where laundry is done.
There are no special rules for other premises. Sockets should be placed in such a way that their use is convenient for all family members.
It is also necessary to follow safety requirements and install devices taking into account the location of electrical appliances in the house so that their cords reach the outlets without the use of extension cords.
You may also be interested in information about the nuances of installing an outlet for a washing machine or an outlet for an electric stove.
Recommended installation locations for sockets and switches in the room from the point of view of practicality and convenience
Varieties and classification
Depending on the material, shape, design features and parameters, there are different types of socket boxes.
Material of manufacture
Manufacturers produce several models:
- Plastic – convenient and practical products, resistant to fire. The non-flammability of the material allows it to be used on wood surfaces;
- Metal - when heated, they conduct electric current. At the moment, they are practically not used, with the exception of houses made of wood.
- Wooden - an intermediate option, acceptable for rough installation of open wiring.
Plastic socket boxes in plasterboard
Metal glass
Wooden socket boxes for open wiring
A wooden socket box is sometimes found on homemade wiring for bathhouses, garages, and outbuildings.
Manufacturing form
The socket box can have different shapes, most often it is:
- Round – suitable for collecting group switches and sockets. It is easier to make a groove under them.
- Square - accommodate 1-4 mechanisms, allow you to lay the wire with a reserve. They often contain elements of the “smart home” system and dimmers.
- Oval – roomy, designed for 1-5 mechanisms.
Round glass with rosette
Square socket box
Oval for two points
Installation of all products is carried out after gating the surface.
Depth separation
The letter N is used to indicate depth. Mounting boxes are recessed to 40, 42, 60, 45 and 62 mm. Models with a depth of 80 mm are intended for terminal blocks when the wiring is not equipped with junction boxes.
Differences in the fixation system
It is better to choose the socket box fasteners depending on the surface for installation (hollow or solid walls). According to the method of fastening the product, there are:
- with spacer legs - designed for installation inside hollow walls;
- with lugs for screws for fixing sockets and switches;
- with permanent connecting tunnels - for combining several parts into blocks.
The socket box is installed on alabaster without fasteners.
Installing a box in hollow walls
Socket boxes designed for walls made of composite materials, in particular plasterboard, have a slightly different design than installation boxes for concrete and brick bases.
Fixing the glass in the wall is done without gypsum mortar, which makes installing the socket box into plasterboard much faster and easier.
To make holes, it is better to use a wood crown, as they are smooth and neat, which makes the process of installing the socket box easier.
At the top of the glass there are four screws arranged in pairs. Two of them protrude slightly outward and are intended for attaching a switch or socket.
The other two are slightly recessed into the socket body. On the bottom of each screw there is a metal or plastic tab, which, when the screw is turned, moves and fixes the box in the drywall.
Before inserting the glass into the wall, run the electrical wire through the pre-made hole in the back of the box
Before installing the socket box, make markings as described above. Making a hole in drywall is much easier than making a hole in a concrete wall. You can simply cut a circle with a knife or drill along the contour with a drill, and then cut it with the same knife.
However, when using these methods, the edges are not very smooth. In addition, drywall is a rather fragile material and can break.
It is best to do the job using a wood crown. After the hole is prepared, bring the wire out into it and insert the socket so that the screws are positioned horizontally. Secure the cup into the drywall by tightening the two recessed screws clockwise.
Image gallery
Photo from
Preparing a socket box for drywall
Features of mounting mounting cups
Rules for tightening clamping screws
Forming holes for wiring entry
Drilling
Regardless of the depth, size, or diameter of the concrete socket, the drilling process is the same. To install the box, use a plaster/alabaster solution. There are many drilling methods, but some of them have proven to be the most effective.
Crown for concrete
To create holes for the socket box, use a concrete crown with a diameter of 70 millimeters (provided that the standard diameter of a regular mounting box is 67-68 millimeters). The crown has pobedite teeth, which are used to cut the circle. Centering is carried out with a Pobedit drill located inside.
The bit is carefully attached to an electric drill or hammer drill, then a hole is made by striking or rotating. The wire is first moved to the side to avoid damage. To simplify the process a little, you can make a special centering hole in the center of the marking of the future box using a Pobedit drill.
When the hole is ready, the crown is pulled out, and the recess is brought to the required parameters with a hammer, chisel or impact bat on a hammer drill.
Using a hammer drill and a pobedit drill bit
First, a socket box is applied to the wall, outlined with a marker, then the center of the circle is drilled with a hammer drill or impact drill to the full depth of a pobedit drill. Then they go around the perimeter in a circle, drilling deep holes close to each other. When everything is ready, use a hammer drill with an impact bit or a chisel/hammer to knock out the concrete and make a hole of the required diameter.
Holes using an angle grinder
This method is the fastest, but very dusty. However, deep concrete socket boxes are often installed this way. The process is simple: draw a square on the wall (of the optimal size to fit a socket box of the required diameter) and divide it into 4 parts, then cut along the lines with a grinder. Next, the squares are knocked out and the hole is made in this way.
Installation of socket boxes in ceramic tiles
If it is necessary to install a socket or switch in a wall that is supposed to be tiled, marking and making holes in the concrete should be done before finishing work begins. Electrical wires are laid in advance in the resulting recesses.
After laying the tiles, markings are made again and holes of the required depth are drilled in it. It is best to drill the tile with a diamond core bit, periodically cooling it with water.
A gypsum solution is placed in the recesses, it is also applied to the back of the socket box, and then the box is pressed into the hole and leveled.
To install several sockets, a template is made in advance, according to which the wall is first marked, and then after facing it is applied to the tile, and holes are drilled along it
The nuances of installing a multibox on a plinth
What should you do if your house has already undergone high-quality repairs, but you need another point to connect electrical household appliances?
In this case, it is not at all necessary to rip off the new wallpaper and ditch the wall; you can make a socket directly on the baseboard.
Multiboxes fit all types of standard single sockets. They can accommodate not only electrical, but also telephone sockets, as well as Internet cable connectors.
However, it should be noted that this method can only be used on collapsible plastic skirting boards with a cable channel. Before installing the socket box, it is necessary to lay the wire inside the baseboard.
To do this, remove the cover from the part where the socket will be located. This operation is performed from a corner or from a nearby plug; simply pry the cover with a screwdriver and carefully remove it.
Cut the baseboard so that there is a gap the width of which matches the size of the plastic trim. Insert the multibox into it, thread the wire through the hole in its body, and secure the socket box with dowels.
