This article is intended to help you lay parquet with your own hands, without resorting to the help of professionals.
Parquet will create an aesthetic perception only if it is installed correctly. Independent work takes place if you carefully prepare for the process - study the rules, prepare the foundation and the material itself. This article is intended to help you lay parquet flooring yourself, without resorting to the help of professionals.
Methods for laying parquet
On the screed
On the logs
On plywood
Instructions for independent work
Tools and materials
Preparation of parquet boards
Preparing the base (for all methods)
DIY parquet board installation
Puttying and grinding the surface
Primer and varnish
Conclusion
Types of installation
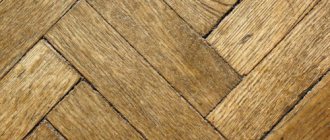
How is parquet board laid? Traditional laying with parallel stripes is called classical.
Classic laying of parquet boards
It remains popular because it does not require special skill - the slats have tongue-and-groove locking joints. All that remains is to connect the boards to each other, corresponding to the laying area.
Other types:
- French Christmas tree
- English Christmas tree
- Dutch styling
- Artistic parquet
Helpful information
Any technology that differs from the classical one requires an increase in the number of parquet boards - consumption increases up to 50%.
Choosing materials before laying parquet
The floor in the apartment is of great importance. It is not only the main element of the interior, but also serves as a surface on which heavy furniture stands. Therefore, it is important that the floor looks attractive, and at the same time has high strength and wear resistance.
One of the best materials is parquet. This floor not only has an excellent appearance, but also has excellent technological characteristics.
You should choose a parquet board based on the size of the room, its design and financial capabilities.
The price of parquet boards is quite high, because real wood is used for its production. Unfortunately, unscrupulous manufacturers often produce low-quality and sometimes even hazardous to health products for profit. Therefore, you need to select materials with special care.
The parquet board should consist of three layers. The first, also known as the front layer, is usually made from expensive wood, the most noble materials being oak and mahogany. Several layers of varnish or special oil are applied on top of the front layer. The second layer consists of short pine slats; for cheaper options, moisture-resistant plywood can be used. The last layer is a two-millimeter layer of spruce.
If you are planning to lay parquet boards on concrete, then the thickness of one element can vary from 10-15 mm. Laying parquet boards on joists requires a material thickness of about 2.5 cm.
Also, the arrangement of parquet floor elements may differ in the number of lamellas. Boards can be single-cavity or multi-cavity. It depends on how many wood elements the top layer consists of.
Related article: How to make a pitched roof
Options for laying parquet flooring
Parquet is laid on a base prepared in several ways: on a screed, on joists and on the subfloor surface. Before laying parquet boards correctly, it is important to find out the details:
On the screed
Laying parquet is possible only with a perfectly level base - otherwise the surface of the boards threatens to have significant differences and in the future the lamellas will fall out of their places due to loose joints. The moisture content of the base is also considered a significant disadvantage - laying parquet boards on a freshly prepared screed is prohibited.
It is important to meet the deadline, then measure the surface humidity with a special device and, after satisfactory data, begin work. This slows down repairs, especially if there is no other place to live.
On the logs
- The difference from the previous installation method is in the following advantages of the base: Possibility of laying insulation or communications in the box (only a water-based underfloor heating system is prohibited). Sound insulation qualities increase. The installation speed is high. The only negative is that this method of preparing the base does not allow for shaped laying of parquet.
On plywood
The advantage of this method is the ideal surface of the future parquet flooring. However, to achieve this result, careful work is required:
- High-quality tongue-and-groove, moisture-resistant wood is selected.
- The concrete floor is waterproofed.
- Each laid sheet of plywood is checked for level.
- Great attention is paid to fastening. Large gaps and bumpiness are prohibited.
- After laying the rough wooden floor, the entire surface is impregnated with special antiseptic and moisture-repellent agents.
All manipulations take a lot of time, but the result is worth it
Step-by-step installation instructions
Preparing the base
This type of work must be taken seriously, since the quality of all further work depends on it.
There are two types of floor preparation:
- On an old cement screed.
- For floors requiring new concreting.
The old screed is checked for its evenness, quality and absence of cracks.
If there are cracks, they are filled with liquid concrete mortar. Differences on the plane are also checked. Acceptable standards may be 2 mm by 2 meters.
If differences exceed such standards, then the easiest way is to level the surface using a self-leveling mixture.
Before starting this work, the surface must be cleaned of dirt and dust and painted with primer paint.
After treatment, the mixture is poured onto the floor and leveled with a needle roller. Drying time for the mixture is up to 2 days.
Note. When the concrete composition dries, it is necessary to check it for moisture. For this purpose, use a hygrometer, and if it is not available, simply press a piece of polyethylene tightly onto the floor and, after about a day, check for the presence of condensation.
Parquet laying
When laying parquet boards on a concrete base with your own hands, you must use the following instructions.
- Remove all bulky furniture and unnecessary items from the room.
- Clean the floor surface from dirt and wipe off dust.
- Treat the concrete screed with an adhesive composition, which is applied using a roller and wait until it dries completely.
- Prepare glue for parquet: be sure to add a hardener to the oil base.
- Apply glue to the floor area with a spatula and lay the first row of boards on it.
- After laying out 3 rows, give time for complete drying.
- Lay parquet boards as closely as possible to each other, using special devices. In order for a parquet floor to have high strength, it must be laid in a “running start”, i.e. according to the principle of a chessboard.
- Lay out the first row, starting from the long board, and in the next row, cut it by more than half.
- For temperature expansion, moisture ingress or, conversely, drying out, leave a gap between the wall and the parquet.
- After completing the work, fill the gap with sealant.
- At the end of the work, the floors are sanded, then the gaps between the boards are filled with a special putty.
- The floors are varnished in three steps. You can rub the boards with an oil or wax solution, but varnish is considered the most durable finish.
Note. Before starting work, the parquet board must be brought into a room with a constant temperature and left there for approximately 3-3 days. This is done for the purpose of allowing the material to properly acclimatize to the temperature in the room.
Read also: how to choose parquet boards for an apartment.
Why do you need to finish the walls with a primer before wallpapering? Find out about this in our article!
How to make a decorative fireplace from cardboard or plasterboard with your own hands: https://tv-peredelka.ru/decor/elements/dekorativnyi-kamin-iz-kartona-svoimi-rukami.html
Methods for laying parquet
This involves laying the parquet with your own hands to the base. There are 4 ways to do this:
Floating floor
Glue-free technology has gained popularity due to the speed of installation and the ability to dismantle coatings without damage, for example, if you decide to move or replace part of the parquet boards. Such lamellas have a mechanical lock - a tongue and groove, which allows you to connect the boards to each other with minimal gaps. Used in classic parquet installation.
Installation with glue
Connecting the planks into a tongue and groove + smearing the base and locks with glue loses its advantage in dismantling and further using the boards. However, it provides an airtight coating that prevents moisture from penetrating inside. It is important to purchase water-free glue, otherwise drying moisture will dismantle the parquet boards.
Fastening with self-tapping screws and glue
The most durable method is that all planks are securely reinforced on all sides. However, it will no longer be possible to dismantle the parquet.
We can only hope for a long service life.
Fastening with self-tapping screws
Typically, this method is typical for laying parquet on plywood.
How to lay parquet boards using technical fasteners and glue on joists
You can lay parquet not only on concrete and plywood floors, but also on wooden logs. However, preparing such a surface will take more time. And the process of installing boards on joists is more labor-intensive.
Related article: DIY 3D panels: manufacturing technology
With this installation method, it is necessary to especially carefully prepare the logs for installation. You can lay parquet boards using either the glue or lock method. Laying on logs is especially important if you want to install a heated floor.
Before laying parquet boards using technical fasteners, you should watch a training video and read the recommendations of professionals
The procedure for laying parquet boards on logs:
- The joists must be inspected for insects, unevenness and other possible damage.
- The logs are installed in small increments and sheets of plywood are attached to them. You can connect the plywood logs using self-tapping screws.
- A backing is placed on the plywood base and parquet boards are installed on it. In this case, their locks need not just be connected, but glued to each other.
After you have laid the parquet board, you need to install the baseboards and thresholds. It is advisable that these decorative elements match each other in color, then your interior will look interesting and harmonious.
Tools and materials
Regardless of the parquet laying technology, they are the same.
- Wooden hammer (mallet). Its blows are softer, unable to damage expensive parquet.
- Fasteners Depending on the method, you choose nails, glue, or install using built-in locks.
- Jigsaw. A thin blade will precisely highlight the desired area, unlike a hacksaw.
- Measuring tools – tape measure, square, level. Easily erasable markers are recommended - chemical ones will remain on the surface forever.
- Wooden wedges. They are required to maintain gaps during linear expansions between the board and the walls.
- Drill.
- Grinder machine.
If preliminary work with the base is required, then tools with materials for it are purchased: wooden beams, plywood, dry mixtures for screed. A hammer drill, usually a reinforcing mesh. Before working with parquet, the base should already be completely ready.
Parquet preparation
Before laying the parquet board yourself, the manipulations with the purchased coating are as follows: it is removed from the packaging and laid out on a horizontal surface. The boards are left for several days in a room where adaptation to the climate will take place. In the future, this will affect the better quality of the surface - it will not move or warp, the planks will calmly accept the established position. Next, a selection of parquet is made - boards with minimal defects are set aside, they will be used for trimming or inserting.
Preparing the base
Since the installation technology is different, the floor preparation is also different. For example:
- On concrete. The old screed is removed using a hammer drill. The floor is cleaned - perhaps using a vacuum cleaner - and primed for better adhesion with the new composition. For parquet flooring, two types of screeds are used - semi-dry (pre-primed with glue) and dry. This will allow you to start work in a maximum of a week or immediately, in the case of using a bulk composition. When mixing the solution classically, you need to wait a month, constantly measuring the humidity of the floor - it should be no more than 2%. Before laying the parquet, the screed is covered with waterproofing material.
- On the logs. Preliminary work with the base is similar. Then, in relation to the level, logs are installed - wooden beams with a cross-section of 2 cm and a width of 5 cm. The fastening step is every 10 cm, otherwise there is a risk of breaking the parquet board. The external ribs of the joists must be in the same plane - an important condition for the future position of the parquet. If desired, mineral insulation is placed in the formed boxes.
- The “plywood” method is simple, but will take more time. Plywood, similar to parquet boards, is cured and laid on prepared logs or waterproofing in a checkerboard pattern. There must be gaps, otherwise with linear expansion there is a risk of fracture, especially if the quality of the wood is questionable in terms of drying. Then the finished surface is scraped. Presented to your attention is the technology of laying parquet on plywood video.
The floating floor can be laid on any of the described bases. There is only one rule - this is a classic parquet board - not an artistic or modular parquet. Read more in the article “Types of parquet”.
Preparatory stage of work
Many experts disagree on how to lay parquet boards. The most controversial issue is the use of a substrate under the coating. At the moment, there are 4 most common ways of forming parquet:
Options for laying parquet boards.
- Flooring using the so-called “floating” method.
- Installation on the base (joists).
- Laying boards on a plywood base.
- Installation on rough wood flooring.
Thus, there are no clear rules on exactly how to lay parquet boards. You can install the coating on any surface. The main thing is that it is level and there are no significant differences in height. The permissible deviation should not exceed 2 mm per 1 linear meter. Therefore, if your wooden floor meets these requirements, then the parquet board can be laid directly on it.
It should be taken into account that parquet is laid on a solid base, having previously lined the mounting surface with a soft substrate. It will also help comment on some of the unevenness of the base. If the installation takes place on an initially soft surface, such as linoleum, then there is no need for such a substrate.
Parquet laying technology.
But if the floor in the room is uneven and old, then it is necessary to use fairly thick plywood or chipboard. In this case, you do not have to dismantle the old wooden covering. The plates will also serve as an additional fastening frame. This method will help strengthen the entire floor structure.
Related article: Making a wall-mounted clothes dryer with your own hands
Craftsmen do not advise installing parquet boards on a concrete screed, even if it is thoroughly dried. As a rule, flooring laid on a rough base becomes deformed over time and “leaks.” In addition, concrete easily condenses moisture on its surface, and parquet boards “do not like” it.
The floor surface must be cleaned of dust and dirt. Moreover, this must be done extremely carefully. Only then can you get a perfectly smooth and reliable parquet. Moreover, the dust is first collected using a fairly powerful vacuum cleaner, then wet cleaning is carried out. And after the surface is completely dry, the floor is primed. The base must be primed at least 2 times, allowing each previous layer to dry completely.
Tools required for installation
Whatever installation method you choose, you will definitely need the following tools:
Laying parquet on a subfloor.
- a special finishing strip (it can be replaced with a piece of softwood timber);
- finishing crutch (you can purchase it in specialized stores or make it yourself);
- heavy wooden mallet;
- spacers (small wooden wedges with a tip thickness of 0.5-1 cm);
- jigsaw or hacksaw for working with wood;
- hammer.
Before laying the parquet board, do not forget to prepare your measuring tools. You will need a building level, a square and a centimeter tape (with millimeter divisions). Without this equipment, you will not be able to properly form the coating.
Foamed polyethylene can be used as a substrate. Such material with one foil side will serve not only as a soundproofing, but also as an insulating coating. Cork substrate has higher performance, but it is much more expensive. If you are planning to lay parquet boards on a concrete base, then you also need to take care of the vapor barrier. This will increase the reliability of the flooring and allow it to last much longer.
Article on the topic: How to remove old wallpaper without extra effort: remove it from the walls, peel it off quickly, rip it off, peel it off, tear it off, remove it easily, how to remove it, photo, video
Do not forget that the installed parquet board must be puttied and varnished. Accordingly, you will need materials for this type of work.
Installation of piece and modular parquet
So, the base and boards for laying are ready. Materials and tools were purchased. You can start laying parquet. The instructions are as follows:
It is required to draw up a plan on paper indicating the markings of individual planks and actual dimensions. So, it’s easier to navigate on a plane.
They immediately decide whether the method will be adhesive or floating.
Regardless of the type of installation - herringbone, classic - the first parquet board is laid in the far corner of the room. A wooden wedge is installed between it and the wall. A tight fit is prohibited, otherwise the entire canvas will be deformed.
In the glueless method, the planks are inserted into one another, forming an angle or continuing a row. Working with glue involves coating the locking mechanism of all lamellas and the required layer on the base before laying the parquet board. The elements are driven together with a mallet.
You cannot immediately cut parquet according to a specific pattern. There is a risk of making a mistake. It is better to carefully measure each parquet board. If the work is tiring, there is always the opportunity to order a service from professionals.
Work continues until the entire area is covered. After this, the wooden wedges are removed.
Laying parquet boards
Parquet connection diagram.
Installation of parquet boards is usually carried out using the floating method. That is, the dies are connected using the tongue-and-groove method. This allows the floor to change its area depending on the temperature and humidity in the room. In addition, if necessary, you can always replace a section of the coating that has become unusable.
Related article: How to make shelves and racks in the garage
Calculate how many whole boards you will need. Determine the size of the scraps that will need to be added to the row being laid out. It makes more sense to start laying with them. Some of these pieces will be hidden under the baseboard, so they will not spoil the appearance of the coating.
There must be a gap of 1.5-3 cm wide between the wall and the floor covering.
It is necessary so that the parquet board can expand.
Installation starts from the wall. In order for the gap to remain constant, you need to use wooden wedges. Next to them, according to preliminary markings, the first board is placed. Each subsequent die is joined next to the previous one, knocking them together using a strip and a hammer.
The next row must be laid so that the seams are spaced apart. That is, they must move relative to each other. The boards can be simply mounted or glued in the grooves. This will help form a much more reliable coating. After the floor covering is completely formed, the gaps near the wall must be covered with floor plinths.
Final floor treatment
Modern stores sell parquet boards with and without varnish. If you purchased option 2, then after installing the coating it must be sanded and sanded. This way, you will remove the top layer of wood along with dirt and damage that may have occurred during transportation and storage.
This work requires specialized equipment, which not only reduces the time required for surface treatment, but also regulates the thickness of the layer being removed. To perform this task, you can hire specialists or rent the necessary equipment. In this case, it is wiser to use a belt type sander. The result of her work is considered optimal.
The coating must be puttied, removing small cracks and chips. For this purpose, special mixtures are used. Experts advise adding dust generated during grinding to them.
Putty and sanding of parquet
During operation, the parquet board gets damaged, especially if the quality is low or average (see price and quality table). Therefore, it is important to bring the finished surface into perfect condition. To do this, prepare putty (wood dust and glue) and cover joints, cracks, and possible chips with it.
All that remains is to sand the entire area of the finished parquet.
Using a special machine, the procedure will go quickly. In the absence of it, they use coarse and fine-grained sandpaper. The first time they remove all the unevenness, the second time they polish it.
Priming and varnishing - the final stage
The choice of varnish depends on the desired effect. Glossy will emphasize the beauty of the design, matte will mute the intensity. Before opening the area with varnish, the surface is vacuumed and a primer is applied. This way, the varnish will lie flat. It is applied in several layers - from 3 to 9. Each layer is allowed to absorb for a day.
The varnish is left to dry in absolute calm - you cannot open windows, doors, or turn on ventilation.
