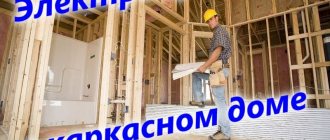
Combination of aerated concrete with wooden materials
When arranging housing, the interior space can be divided by partitions made of wood, and vice versa, in houses made of timber, aerated concrete partitions can be installed.
Both options include general preparation for masonry. The nuances differ slightly. In wooden houses, masonry is done according to markings, paying close attention to the quality of fastening of flexible or rigid connections along the very surface of the wall, as well as for the first and top row. To prevent structural noise in a wooden house, you will need fibrous soundproofing material (tape), which is placed at the joints with the floor, ceiling and walls
Frames using wood, blocks and drywall are also a very common option. This type begins with the dimensional marking of the future partition and laying the first layer of blocks. Then the timber is attached to the frame, and then the drywall. But this option is considered costly and time-consuming, so it is rarely used. This method will be inexpensive only if instead of a steel frame there is a completely wooden one.
Frame partitions will require additional insulation from mineral wool, sawdust, shavings, but the structural and thermal insulation block does not need to be insulated. That is why cellular aerated concrete is a more practical option for all types of houses.
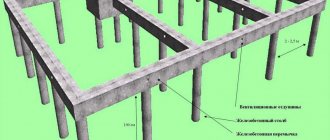
Columnar foundation
This type of foundation can be made from asbestos-cement pipes, screw piles or ready-made blocks. But the principle of building a foundation is the same everywhere. Suitable for unstable swampy, peaty, sandy or waterlogged soils, as well as for regions with deep freezing.
Stages:
- Mark the area where you will dig post holes. If you are building a 6 meter long veranda, make 3 rows of posts along the length. Install 4 pillars in one row. It turns out that each pillar will be 1.5 meters away from the other.
- To install the posts evenly, make formwork.
- To dig holes, you need to find out how thick the soil freezes in your area. The holes should be 25-30 cm deeper than the frost depth. If you are making a foundation on screw piles, use their length as a starting point.
- Pour sand into the holes 10-15 cm deep and compact it.
- Insert pillars. Check that you have placed all the posts at the same height. Take a board, place it on two adjacent posts and place a level on it.
- Bury the piles. Insert reinforced mesh into asbestos-cement pillars and pour concrete inside. It is also advisable to fill the screw pillars with concrete mixture. This will protect the material from corrosion. The foundation will be stronger.
- Insert studs into the posts. They will set with concrete, then you will install timber on them.
- Lubricate the posts with mastic and cover with roofing felt to protect them from moisture.
Errors when building a foundation will occur if you do not take into account the quality of the soil and dig a trench or holes to a depth less than necessary. The trench cannot be left standing for a long time. Let's say you dug it out in the fall, and are planning to build a veranda in the spring.
What should be the foundation and how to expand it
The width of the foundation must provide sufficient support area for the cladding. Taking into account the insulation, the width of the part of the base protruding from under the main (load-bearing) wall should be at least 16 cm (5 cm of insulation, 3 cm for the ventilation gap and at least 8 cm for the brick support). This condition is not always met. In some cases, it is necessary to expand the area of the foundation protrusion.
The main way to expand the projection area is to install a steel angle on the anchor bolts. The shelf of the corner should be located in the same plane with the protrusion, expanding it. The greater the expansion required for the protrusion, the larger the size of the corner will be needed and the thicker the anchors needed to attach it to the base.
Another method is to drive pieces of reinforcement into holes in the base, install formwork and fill the “steps”. This option allows for a more durable attachment of the additional platform to the base and eliminates the possibility of corrosion for the load-bearing corner.
IMPORTANT! In any case, before starting work, a careful calculation of the additional site will be required, as well as the ability of the foundation to withstand the additional load from the weight of the cladding.
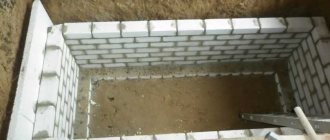
Preparing the wall surface
The surface of the wall must be carefully prepared so that no problem areas remain on it by the time the facing brick is laid.
To do this you should:
- Inspect the wall, remove foreign objects - lights, drains, equipment elements, trim, etc.
- Remove old paint, remove peeling areas, remove flaking.
- All detected defects are repaired with putty. In difficult cases, you will have to completely plaster the wall.
- To install the insulation, you will need to apply a layer of primer to ensure better adhesion of the wall and the adhesive.
Preparation of the solution
The quality of the mortar is an important point, since facing bricks are resistant to water absorption, which complicates the creation of strong adhesion between the cement mortar and the surface of the block. This problem is especially pronounced in clinker bricks, which require special additives that increase adhesion.
Solution composition:
- Cement M500 - 1 hour.
- Sand - 4 hours
- Water.
The consistency of the finished mortar should be such that the laid brick does not “ride” on it, like on a layer of lubricant. It is not recommended to add any additives, with the exception of pigments that give a contrasting color to the seams to create an additional decorative effect.
Some masons add some clay to the solution to increase plasticity. Opinions differ on this matter - some see this as harmful due to the possibility of washing the clay out of the solution and reducing its strength, others argue that this method, on the contrary, makes the seams stronger and more durable. There is no consensus; everyone is guided by their own point of view.
Seam thickness in brickwork
The optimal seam thickness according to SNiP is 8-12 mm. In practice, they prefer to do 10-12 mm, this makes it easier to hide the reinforcing material in the seams. Maintaining the same thickness of the seam is not an easy task; it is best to use a special device - a dispenser, which allows you to apply a layer of mortar calibrated in thickness and shape.
Laying the bottom row
The prepared base is laid out on a dry row of bricks. This is necessary to find out which bricks will have to be cut to exactly match the length of the wall. The lining is carried out taking into account the type of masonry - the ratio of bonded and tread blocks.
In places where there are window or door openings, the layout is carried out without interrupting the row, since a full row will need to be laid over the opening without interruption. Openings are made as bricks are laid and the block is trimmed.
Laying corners
The beginning of the work is laying out the corners. They rise to a height of 4-6 rows, after which a control cord is pulled between the corner blocks and the wall is laid. When laying corners, you should carefully monitor the presence of a right angle, verticality and other geometric parameters of the masonry.
Wall covering
Wall rows are laid along stretched cords between the corners. As the rows grow, work on the walls is suspended in order to re-build the corner ligaments. After this, the cords are tightened again and work continues in the same order.
Geology
Projects for extensions are developed based on the results of surveys on construction geology and an audit of the existing building, even if the house is standard. On-site surveys are not a cheap undertaking, but the extension will be reliable and will not reduce the reliability of the house if and only if, unlike a new building, the soil underneath is homogeneous and its basic properties are as close as possible to those under the house. To determine whether it is even possible to build an extension in a given place, in the area for the extension, soil samples are taken in advance with a garden drill from the same depth within 1-1.5 m in an envelope - in the corners and in the center. The time for sampling is a really warm spring, when the soil above dries out; in mid-latitudes – early May. There should be no rain for at least 3-4 days before sampling. Before sampling, wells are thoroughly cleaned of soil that has crumbled from above. Each sample is immediately poured into a glass jar with a tight-fitting lid; plastic bags are no good!
First, we evaluate the heaving, subsidence and load-bearing properties of the soil by visual inspection of samples; under the house and the extension they must match to within a class. For example, a house on dry, non-heaving and low-subsidence sandy loam with a bearing capacity less than normal 1.7 kgf/sq. cm. And 2 m from the wall, i.e. under the proposed extension there is also non-heaving, but completely non-sagging cartilage or gravel with a load-bearing capacity that is obviously greater than normal. You can't fit in. Or, let’s say, instead of cartilage, dry silty sand, not heaving, but more subsident and weakly load-bearing; The result is the same.
If no visible differences are found in the samples that impede construction, we evaluate the homogeneity of the basic properties of the soil, including its water content and plasticity, in a comprehensive manner, based on relative humidity. For this:
- We weigh the enameled steel vessel and write down its weight Vp.
- Pour part of the sample into the container, immediately weigh it, and record the initial gross weight Ext.
- We heat the container with the sample over low heat until the soil crumbles into dust, i.e. will not dry completely.
- We also immediately weigh the container with the sample and record the final gross weight Vk.
- We calculate the initial and final net weights of the sample Рн = Вн – Вп; Rk = Vk – Vp.
- We calculate the relative humidity of the sample as H = 1 – (Rk/Rn).
For example, the initial net weight of the sample is 440 g, and the final net weight is 365 g. Its relative humidity will be 1 - (365/440) = 1 - 0.83 = 0.17 or 17%. The H values for all samples must coincide to within 10 percentage points (percentage of percent), if self-construction is planned, or up to 20 percentage points, if the project is developed by specialists and approved as expected. Let's say all samples gave moisture values of 17%, 18.7%, 16%, 16.5% and 19%. The deviation is calculated from the smallest value and its permissible value will be 1.6% for self-construction, and 3.2% for project construction. In this case, self-construction is impossible; geology must be ordered and a project developed.
Features of the material
Foam block is a construction raw material that is produced from liquid, sand, cement and special additives. The material may contain both organic and synthetic foaming agents, while the former are environmentally friendly components. They are made from natural products and are classified as non-hazardous materials. As for synthetic elements, they are characterized not only by low price, but also by quality. Such blocks are not recommended for the construction of residential premises, as they belong to the fourth hazard class.
Foam blocks are characterized by a cellular structure; the bubbles inside them are obtained using chemical reactions that occur during mixing of the cement mixture with the finished foam. Blocks are obtained either by pouring into molds, or by cutting the total mass. Unlike other types of building materials, foam blocks have a durable and smooth surface, are resistant to rotting processes and provide the extension with good thermal insulation. They are divided into structural and construction, construction and insulating and thermal insulation types.
Foam blocks have several main advantages.
- Frost resistance and durability. Due to the fact that the construction product has high resistance to low temperatures, its service life is five times greater than the strength of aerated concrete.
- Protection against thermal loss. Significant savings on heating are observed in completed buildings. The blocks are not afraid of moisture, so they allow you to avoid sudden heating of rooms in summer and cooling in winter. Thus, a favorable microclimate is created in the extensions, which is similar to a log house.
- Affordable price. Compared to brick, foam block walls are much cheaper to build.
- Versatility. The finishing of the material can be done in any decorative way, from plaster, tiles to lining.
- Fast construction. The light weight and density of the material simplifies the work, especially when it comes to installing electrical wiring, water supply and sewerage. In addition, laying the blocks is simple, since the linear tolerance can be up to 3 mm.
- Good sound insulation. The blocks have acoustics that absorb sounds from the walls and do not reflect them.
- Convenient size. The products are produced with high precision geometric shapes, so they can be laid not only on concrete mortar, but also on glue. Thanks to this, it becomes possible to avoid the appearance of cold bridges, which are usually present in concrete or brick walls.
- Fire safety. This material is completely fire-safe and also perfectly protects buildings from the spread of fire. In the event of a fire, the foam block heats up, but does not explode or collapse, which is possible thanks to its internal reinforcement, which is resistant to high heat.
As for the shortcomings, there are few of them.
- The material needs a protective lining. If this is not done, the walls will quickly absorb moisture and cracks will appear on them over time.
- Sometimes during production there are errors in geometric dimensions, which complicates construction work.
Materials
An extension to a wooden house can be built from different materials. Based on this parameter, we can talk about the operational characteristics of the building, its reliability and complexity of construction. Let us consider in detail how structures made from different building materials are characterized.
Foam blocks
Many homeowners choose foam blocks. Working with this material is quite simple, and it is not too expensive. Wall blocks are light in weight. They can be used to build structures of various shapes and sizes.
Thus, it turns out to build a high-quality extension, quite stable and without unnecessary internal jumpers. Due to such actions, the wooden house will seem to increase in length.
timber
From a technological point of view, the construction of such a structure turns out to be more complex and time-consuming. Making an additional room out of brick or gas blocks/foam blocks is much simpler and easier. The same can be said about log buildings. To build them, the owners will have to spend a lot of time and effort.
A timber extension will require a very strong and high-quality foundation. Experts strongly recommend making the same foundation for a timber extension as for the wooden house itself.
You will also need to take into account the shrinkage of wooden walls. The building will definitely shrink, even if it is made from the highest quality materials and is carried out according to all the rules. This process will take at least a year. The owners will need to keep under control the condition of the expansion gaps on the walls and in the roof truss system.
Brick
Homeowners often use brick to build an extension. The structure is strong and durable, but its construction takes more time. The result is a capital construction. It is not advisable to place it in the foreground, because brick buildings do not combine well with wooden ones. This applies not only to brick, but also to stone extensions, which also take a very long time to build, and in addition this entails large financial costs.
Gas silicate blocks
Good structures are made from gas silicate blocks. The material attracts buyers with its non-flammability and environmental safety. True, under conditions of constant temperature fluctuations and prolonged negative external influences, aerated block structures wear out faster and become more fragile. In addition, the blocks in question cannot boast of sufficient hydrophobicity.
Arbolit
This is a special wood block, which is one of the light varieties of concrete with organic filling. Arbolite blocks come in different types: large-format masonry, hollow, thermal insulating.
They contain water, wood chips, cement and special chemical additives.
Wood concrete is characterized by high vapor permeability, low water resistance, and low weight. The material does not require additional reinforcement and is easy to process.
SIP panels
Good extensions are made from SIP panels. This material is considered universal; it is most often used in the construction of frame buildings. It has good thermal insulation characteristics, sufficient noise insulation, and low weight. You can quickly make a warm extension from SIP panels, following all the necessary technologies. In addition, the building material in question is environmentally friendly and safe.
OSB panels
Oriented strand board is often used for the construction of extensions. This is a special multilayer material that has an affordable cost, but is characterized by high reliability. OSB panels look neat and attractive and are lightweight. Working with them is easy and convenient.
OSB panels are different. Materials with varying degrees of strength and density are available for sale. But you need to take into account that these elements do not tolerate sudden changes in humidity levels, since they are based on wood components.
Sandwich panels
Another building material with a three-layer structure. Extensions made from sandwich panels can be erected very quickly. The material boasts environmental safety, hygiene, and low load applied to the foundation. In addition, sandwich panels are characterized by excellent sound insulation properties.
Wall installation
The construction of a garage from aerated concrete has become very popular. Any structure can be built from this material.
Regardless of the type of building, construction technologies must be strictly followed. Aerated concrete can be laid immediately without stopping, since it is lightweight and does not have the property of squeezing out the adhesive mixture. If you are laying a brick, for example, in this case it is necessary to take certain pauses.
There are special standards for the correct installation of walls. The thickness of external walls should be from 375 to 400 mm, and indoor walls up to 250 mm. If you build a decorative partition, the thickness should be no more than 100 mm.
Particular attention should be paid to laying the first line of blocks. If you start high-quality masonry from the first block, you will ensure the durability and safety of the future structure
There is an opportunity to build a building yourself or entrust this work to professionals and order the construction of houses from aerated concrete, the price of which will suit you.
Before laying the first line of blocks, you need to prepare the base well. To do this, you need to carry out insulation.
The substance can be a cement liquid based on dry components, as well as roofing felt, rolled bitumen or polymer material. The insulation is leveled from above using a cement-sand mixture. After the first laying line, it is necessary to level the plane with a special plane for aerated concrete. The remaining dust is removed with a brush.
After laying all the rows, leveling is required again to prevent differences between the blocks. The second row of blocks starts from the corner. To ensure that all rows are even, it is necessary to install special wooden slats. If the glue protrudes onto the surface, there is no need to rub it in; it is better to simply remove it with a trowel.
Possible types of foundation
- Slab. It has the form of a monolithic slab located on a sand and gravel bed. It performs well on heaving soils that have noticeable seasonal movements - the base “floats” on the surface, changing its position along with the soil. The disadvantage of this type is the high labor intensity of the work and the inability to build a basement or cellar.
- Tape. The most common type of foundation. Allows you to make a basement, and it can be built later, when the construction of the walls is completed. The costs for such a base are lower than for a slab base, and labor costs are much less.
- Pile. This foundation is used in areas with high groundwater levels. Piles are driven (or screwed, poured) into the ground until they come into contact with solid layers. The support is strong and reliable, but the construction of a basement is excluded. In addition, driving piles in close proximity to a residential building is dangerous. The solution may be screw piles, which can be screwed in manually.
For small extensions, a strip shallow type of foundation is most often used, less often a slab type is used, for which ready-made reinforced concrete slabs are used, laid on a bed of ASG. It should be taken into account that laying slabs requires equipment that is not always able to drive close to the house due to the presence of other buildings or other obstacles.
Types of extensions
Options for building extensions to a house are shown in Fig: non-residential (unheated and not insulated) open, non-residential closed, residential light and residential massive. Only electricity can be supplied to non-residential extensions from communications through a separate circuit breaker and RCD (residual current device). The light residential extension is also supplied with only electricity, but this can be done from the general house network. Heating – local stove or electric, for example, heated floor; in this case, you need a separate automatic circuit breaker and an RCD for heating. Any communications are connected to the massive residential extension without additional restrictions.
Types of extensions to an individual house
Connection with home
The next important factor in the classification of extensions is the degree of their connection with the main structure. Based on connectivity, extensions are divided into:
- Remote - spaced from the house at a distance of at least 3 depths deeper than the entire laid foundation, incl. pile If, for example, the house is on a strip buried 1.6 m deep, and the bathhouse nearby is on piles driven 2.2 m deep, then it should be at least 6.6 m away from the house.
- Adjacent - not meeting the criterion of remoteness, but not having a complete mechanical connection with the house, i.e. The foundation of the extension is separate, there are walls on it on all sides, incl. and facing the house. Most often, in order to save land, materials and work, they are built adjacent to the house and under a common roof with it. Self-construction with subsequent legalization is possible if the foundation of the extension is chosen and laid correctly, see above and below. All types of extensions, except massive residential ones, can be built adjacent to them.
- Connected - having at least one common load-bearing wall and/or common branch/section of the foundation tape with the house. A massive warm extension to the house is carried out only in connection with the main building. The legalization of self-construction is unlikely; in fact, it is a question of your relationship with local authorities and their attitude towards you.
Residential extensions to houses are most often built adjacent, and missing communications are installed after acceptance - who will check if the house is standing and people live in it? The tax office and utility workers will still count theirs for the living space. The strip foundation of the adjacent extension is made with a deformation gap of 6-12 mm between it and the foundation of the house, filled with roofing felt, fiberglass and other insulators, but in this case this is not optimal. A gap of 30 mm between the adjacent walls of the house and the extension is caulked with pre-compressed sealing tape (PSUL) and covered with decorative overlays along the outside contour. It seems to be cheap and cheerful, especially if the extension is structurally lightweight (see below), but there are no eternal sealants. In the conditions of the central zone of the Russian Federation, after 10-12 years, dampness begins to accumulate in the gap between the adjacent walls, and it becomes the source of destruction of the entire house. Therefore, builders specializing in extensions give a 5-year guarantee for adjacent ones, as they say, right away. Please keep this in mind if you order a turnkey extension.
About remote extensions
A remote extension completely eliminates the specific organizational and technical difficulties of the extension, because According to all laws and rules, it is a separate building. The foundation of a remote extension can be anything, incl. non-recessed insulated, for example. Swedish stove, and the structure on it can be prefabricated of any type. The remote extension is connected to the house by a covered, insulated gallery on a columnar base or hanging on beams. Both are not considered a mechanical connection to the house.
A remote extension is especially beneficial if you need to add a kitchen. Increased heat loss from the premises in this case is insignificant, but the living rooms are reliably insulated from kitchen fumes and high humidity. And most importantly, in private housing with a kitchen they often block the furnace/boiler room or simply install/hang a heating boiler in the kitchen. Its removal from residential premises greatly reduces possible dangers from autonomous heating; the likelihood of burning when burning solid fuel is practically reduced to nothing. In addition, it facilitates the location of residential buildings and local sewerage structures on the site in accordance with sanitary standards.
What are the mistakes when laying aerated concrete?
When building houses from cellular concrete, mistakes are often made both at the stage of design and construction of the box, and at the stage of finishing work.
Below is a list of them and measures to help avoid problems:
| At what stage is an error made? | What is it? | How to do it right |
| Design of a low-rise building | Construction of a monolithic frame filled with gas blocks. | The strength of aerated blocks, even low-density ones (today d300 products have strength class B2), is quite enough for a three-story house. The frame is not only extra money, but also a place for active heat loss. |
| Design and non-design construction | Construction of foundations with insufficient rigidity. | To prevent the formation of cracks in aerated concrete masonry, the foundation should be made only of reinforced concrete: a slab, a strip with a depth below the UPG, bored piles with a reinforced concrete grillage. |
| Carrying out masonry | Lack of horizontal (cut-off) waterproofing. | Between the surface of the plinth and the first row of masonry there must be two layers of waterproofing material. Optimally, this is roofing material glued to mastic. |
| Carrying out masonry | Poor leveling of the base under the first row of masonry and each subsequent row. | A smooth surface is the key to high-quality masonry. Moreover, due to the thickness of the solution, it can only be leveled on the base. In the rows, leveling is carried out using a plane and a trowel on aerated concrete, control is carried out by level. |
| Carrying out masonry | Using DSP for the entire masonry. When working with the solution, aerated concrete, which already has a high initial humidity, becomes even more wet. Accordingly, the thermal insulation qualities of the wall are reduced. The reason for this is also the large area of the seams with a high thermal conductivity coefficient. | Ideally, only the first row of blocks is laid on a regular mortar - the second and subsequent ones are mounted with glue. |
| Carrying out masonry | Missing or incorrect dressing. | We talked in detail about dressing options. When chain laying, vertical joints must move at least 10 cm. |
| Strengthening masonry | The absence of an armored belt or its implementation with a gap. | The load-bearing monolithic beam must be installed along the entire perimeter of the masonry - including along the gables, if they are aerated concrete. That is, it necessarily loops. |
| Strengthening masonry | Missing or incorrect reinforcement of openings. | In the row preceding the opening, it is necessary to lay reinforcement. Its ends are inserted into the masonry 50 cm from the vertical boundaries of the future window. In the absence of lintels, the same reinforcement is done above the opening. When the lintel is mounted, only the heels of its support are reinforced. |
| Wall connections | Rigid connection between the outer and inner walls. | Bandaging blocks when connecting walls can only be used when they bear the same load. Otherwise, you need to use flexible connections. |
| Wall insulation | The use of materials with low vapor permeability for external wall insulation provokes the accumulation of moisture in aerated concrete. | Outside, you need to install a material that allows steam to pass through better than aerated concrete itself. Among the insulation materials, these are various types of mineral wool. To use, for example, polystyrene foam, you need to wait at least six months until the initial moisture content of the masonry decreases to equilibrium. The same applies to finishing materials, but they can simply be mounted using a ventilation façade system. |
What material is the extension being built from?
- Timber extension.
- Frame extension.
- Brick extension.
- Extension made of foam blocks.
Timber extension
Timber is considered one of the best materials used for these purposes.
Moreover, it doesn’t matter what kind of timber it is - glued, rounded or planed - thanks to its parameters, work will be carried out in a much shorter time. Its advantages:
- produced at wood processing enterprises, which ensures its sorting according to wood quality;
- are subjected to special treatment, which ensures that the timber is resistant to rotting and prevents it from being damaged by wood beetles;
- heat treatment is possible, through which the timber is given the color desired by the customer;
- any type of timber is an environmentally friendly material that can create a natural ecological system in the house.
Timber is a natural building material from which an extension can be made to either a wooden house or a brick or block one, at least as a veranda or summer kitchen.
Frame extension
This is a budget option for an extension, as it does not require significant investments in consumables. In addition, it can be erected on the basis of a pre-prepared foundation with a minimum investment of time. Frame construction involves the creation of an extension based on a frame made of metal beams or wooden blocks, built around the perimeter and over the entire area of each of its walls. After completing the frame, the outer and inner planes of each wall are sheathed with special slabs used in construction - chipboard or OSB - between which any insulation is laid. As such, mineral wool, wood processing waste - sawdust, polystyrene foam, etc. can be used. The insulation on the street side must be pre-insulated from moisture.
In general, this type of structure is not difficult to install, and with a certain amount of effort, almost any householder can build it.
Brick extension
The construction of this kind of addition to the main building, of course, requires certain knowledge and skills, but the extension will also be more solid and durable. Several points are important here:
- In order to preserve the style of the main building, a brick extension, as a permanent structure, should be erected on the back side of the house.
- Since a brick structure has significant weight, the foundation for such an extension must be strong.
- Costs will understandably increase taking into account the cost of bricks, foundation costs, as well as internal plastering of walls.
- The method of joining the main building and the extension will require special care.
Extension made of foam blocks
Such an extension is no less durable than a brick one. A modern building material that is very beneficial in many respects is foam blocks:
- does not require the construction of such a powerful foundation as in brick construction, since its average density is several times less in comparison with brick, which means it is lighter;
- for the same reason of low density, and therefore the presence of air pores, foam blocks retain heat better;
- due to the large dimensions of foam blocks compared to brick, a structure can be erected faster;
- In financial terms, such an extension is much more profitable.
The only drawback of this material is the need to protect it from the effects of an aggressive external environment; usually for this purpose, the outside walls are lined with siding or covered with brick.
What is the construction of walls from aerated concrete blocks?
Wall masonry is the creation of this type of structure from aerated concrete blocks, which are laid out in a certain way, row by row, on a fastening mortar.
After hardening of the connecting mixture, a part of the structure is obtained, which will subsequently become residential or commercial.
Can the material be used?
Contrary to popular belief, aerated concrete blocks have many advantages as a material for private construction. About 30 years ago, its failure was due to improper joint mortar used by inexperienced builders. It was believed that a regular cement-sand mixture is the best solution for aerated concrete blocks. But, due to the incompatibility of materials, such buildings were destroyed after the first frost.
In addition, simple material began to be produced at home, in an artisanal way. Blocks that were not created using technology did not meet the quality parameters and also contributed to the formation of a negative experience.
Advantages of aerated concrete blocks for creating walls:
- A light weight. It is easy to transport it from production to work site; it is not difficult for workers to lift it.
- Easy to process. The material is pliable, easy to saw, you can create different shapes from it, which is convenient when laying non-standard walls.
- Installation is quick. The blocks are large in size, working with them takes much less time than with brick or log house.
- Retains heat well indoors due to its porous structure.
Flaws
- Fragility. Scrap often appears during transportation; protective measures are required during installation and storage. To counter this, order 5-10% more material than is actually required.
- High sensitivity to moisture. High-quality waterproofing is necessary. Construction is carried out only in the warm season, when the air temperature is in the range from +5 to +35 degrees. If you need to leave the work unfinished, without finishing for the winter, conservation will be required.
- When shrinkage or seasonal movements of the soil occur, small cracks appear on the wall material. They do not pose any particular danger until they grow in the depths. Periodically, it is necessary to repair walls made of aerated blocks so that cracks do not increase and destroy the walls.
Aerated concrete is used successfully as a building material for load-bearing structures, meets all safety requirements, is environmentally friendly and non-flammable.
Read more about the pros and cons of using this material here and here.
Examples of projects made from various materials
Before choosing the type of extensions to a wooden house, check out the ready-made options for construction projects. Beautiful photographs of completed buildings will help you choose the shape, style, materials, and design of the structure.
Project options for attached structures made of different materials:
- wooden - from timber, logs, boards;
- stone - reinforced concrete panels, brickwork, foam blocks;
- glazed - tempered or reinforced glass in frames, plastic glazing, polycarbonate;
- frame – OSB panels with insulation;
- open - verandas, terraces, porch structures with a canopy.
Most often, different types of materials are used in the construction of an extension.
It is important to build a strong frame, foundation and rafter system to ensure the longevity of the structure
Extension to a frame house, design and installation features
A frame extension to a wooden house based on building a strong frame, sheathed on the outside and inside, with insulation between them, will allow you to quickly and efficiently obtain a warm room. An additional structure can be equipped for any purpose.
Using frame technology, you can attach the following types of buildings:
- garage;
- a full-fledged room for a kitchen, toilet, bathroom, room, hallway;
- bath or sauna;
- covered veranda.
Frame construction is a convenient option that allows you to decorate a room outside and inside in any style. An extension on a frame using the selection of finishing building materials will allow you to obtain a building in a single architectural style.
Ideas on how to make a carport
Extension to a house made of foam blocks - photos of interesting projects
The construction of an extension allows you to increase the area of the house and gain additional space. Foam block materials are a solid basis for construction. They are light in weight, retain heat well, and do not require construction skills to create masonry.
Options for adding additional buildings to a house made of foam blocks:
- indoor full premises on one or several levels;
- open verandas, porch structures;
- bay windows.
To build a structure made of foam blocks, it is important to provide for the organization of a high-quality foundation - from pouring concrete or laying blocks
Extension to a wooden house made of timber: installation nuances, style features
Due to the low cost of a wooden block, you can get an inexpensive additional room. The material is easy to install in a log house, saves heat, and is environmentally friendly. Construction of wooden attached structures will take no more than 1 month, depending on the type of foundation.
Cobblestone attached buildings can be in the form of:
- a separate box located on either side,
- open or covered veranda;
- bay window design.
The construction process from a wooden block allows you to create buildings of strict shapes - rectangular or multifaceted. An extension made of timber after the construction of a residential building begins no earlier than 3 years later.
Walling
Laying aerated concrete walls
So, let's describe the main stages of building a house made of aerated concrete:
1
After completely strengthening the concrete base and cleaning it from dust, it is covered with roofing felt to protect it from moisture.
Foundation waterproofing
2
To lay out the very first row, it is better to use cement-sand mortar rather than glue. It dries longer, and you will have time to perfectly align future walls and check the evenness of the row
3
The solution for the first row is applied in a layer of 10 mm. This thickness will be enough to level the installation height. Please note that it will be impossible to correct errors later - you will need to destroy the incorrectly laid block and install a new one in its place. Only small cracks can be covered with adhesive.
4
Blocks with a tongue-and-groove connection are more convenient to use. They are also coated on the sides with adhesive.
5
According to the rules, any laying begins from the highest point. To do this, stretch a fishing line around the perimeter of the building, leveling it with the building level
6
The second block is installed in the opposite corner, and only then do they begin laying between the corner blocks. The central block is cut if necessary
Cutting aerated concrete
7
To get a perfectly flat wall, you should stretch a rope between the corners and focus on it when laying out
8
If the blocks are laid unevenly, after the solution has dried, their surface can be sanded
9
All subsequent rows also begin to be laid from the corners, but with the seams shifted. Just like brick, aerated concrete is laid out “with dressing”, so that the upper block necessarily overlaps the seam of the lower one.
10
It is more convenient to apply the glue with a special ladle with teeth. After laying, each block is tapped tightly to the adjacent one with a mallet (rubber hammer)
A scoop with teeth will help distribute the mixture evenly.
11
To strengthen the wall, it is reinforced first in the first, then every fourth row. Bandaging is also required over windows and doors. To do this, with a distance of 3 cm from the edges, grooves are prepared in the blocks into which the rods are laid. Please note that ligation of reinforcement should not be in corners, door and window openings. The recesses are filled with adhesive solution
Reinforcement of aerated concrete
12
A wooden lintel is attached over windows and doorways. 3 rows of blocks are laid on it: the first outer one, 15 cm thick, then half of the second 15 cm thick, the third 10 cm thick is placed inside
13
Next we need reinforcement mesh. It is cut to the size of the window, and metal rods are attached to it. The resulting frame is placed between the blocks, filled with cement mortar
14
Above the window lintels, an armored belt is made - formwork made of 10 cm thick blocks, inside which the solution is poured and reinforcement is laid.
15
To install the Mauerlat (support for roof rafters), metal studs are also mounted here. For them, it is better to use not ordinary rods, but special threaded products. In this case, the Mauerlat will hold more firmly
Method of laying out a window opening
To keep cutting of aerated concrete to a minimum, the dimensions of the blocks should be taken into account when determining the length of the walls
Do-it-yourself laminate on a wooden floor: a complete description of the process. Laying schemes, what materials should be used (Photo & Video) + Reviews
Construction of an extension to a house made of foam blocks
Let's consider one of the popular technologies for building an extension to a house with your own hands - walls made of foam blocks on a strip foundation.
- We check the upper part of the foundation “ribbon” for compliance with the horizontal level. If there was a deviation along the horizon when laying the foundation, do not despair - everything can be corrected, although additional “movements” will be required.
Note! If the deviation is less than 2 cm, then we will cancel it by changing the thickness of the horizontal seam when laying the first row of blocks. If there is a discrepancy with the horizontal level of more than 2 cm, we make a screed along the top of the concrete. We install waterproofing on the surface of the foundation. It’s up to you to choose the type of insulation; we can only recommend roll insulation, proven by time and generations of developers – roofing felt. A positive feature of this material is that you don’t have to wait for it to dry and set. It is enough to spread the roofing material along the foundation strip, press it down with bricks so that it does not blow away, and you can begin work. We begin laying the wall by arranging the corners. How can you not explain
One thing is important - the angle must be strictly vertical and maintain 90 ° at the base. It will not be difficult for anyone who has an understanding of “brick” masonry with its dressing, grooves, pokes and spoons to arrange a corner
For a person who is far from all this, but is ready to make an extension to the house with his own hands, it is advisable to get advice from a specialist. For a small extension, there is no need to raise the corners to their full height - it is enough to arrange 3-4 rows of each, then lay a gap between them, evenly distributing the load on the foundation. First, even before installing the corners, lay out the blocks on the foundation “dry”, calculate their number in a row - this will eliminate the need to lay halves or even smaller pieces of blocks in the most inappropriate places for this in the wall structure - under door and window lintels, at corners . Otherwise, the dressing may be damaged, resulting in weakening of the entire structure. We lay the first row on cement mortar, all subsequent rows on a special adhesive mixture. The advantage of the adhesive mixture is that its plasticity allows you to obtain a horizontal seam less than 1 cm thick. The cement mortar is not so plastic, but it is perfectly suited for leveling the first row. We repeat the process of laying blocks until the required height is reached. To further strengthen the structure, we insert reinforcement into the masonry every 4-5 nearby. To do this, we make a longitudinal groove along the entire row, including the corners, place a reinforcing rod in it, and cover it with the next row of blocks. Now the reinforcement is inside the masonry, connects the entire structure, and gives additional strength. Along the last row of the entire perimeter we install a monolithic reinforced concrete belt. For detached buildings made of foam blocks, the installation of a belt, in some cases more than one, is a prerequisite. For a small extension, provided there is a high-quality foundation, the installation of a monolithic belt is not necessary, but is desirable.
Advantages and disadvantages of concrete blocks
Foam concrete blocks are produced from foamed concrete by molding from a semi-liquid solution or by cutting a hardened foam concrete mass. In addition to traditional cement, water and sand, the composition includes a foaming agent. Thanks to it, the structure of the material acquires porosity and lightness.
Foam concrete blocks are used in private construction for the construction of walls, partitions, and insulation of load-bearing structures.
The material has the following characteristics:
- Density from 300 to 1200 kg/m³. The most porous concrete is used for thermal insulation, the densest - for the construction of load-bearing structures.
- Light weight. Foam concrete is twice as light as brickwork.
- Low thermal conductivity. According to this indicator, it is close to wood.
- Dimensions of standard blocks are 200x200x600 mm or 200x300x600 mm, weight 11-22 kg. With such dimensions and weight, the laying of elements is carried out without the use of additional construction equipment and much faster than with brick.
Disadvantages include:
Foam concrete is quite hydrophobic, i.e. absorbs moisture from the environment. This reduces its thermal insulation properties. Therefore, external walls must be protected with finishing.
An extension to the house is a good reason to update the decoration of the entire house Source kamtehnopark.ru
Not very high frost resistance of the material - F15-F75. This means that it can withstand 15-75 freeze-thaw cycles without changing strength or destruction. For comparison, highly frost-resistant concrete is graded F300-F1000.
Varieties have been created based on foam concrete - gas silicate, polystyrene concrete, expanded clay concrete, wood concrete (chip concrete), fiber foam concrete. They have a porous structure, high thermal insulation properties, and sufficient mechanical strength. Rooms made from these materials have a favorable microclimate due to vapor permeability and environmental friendliness. They are easy to process with tools - sawing, drilling, attaching brackets.
Form and purpose of the extension
An extension to a residential building can be built in any shape.
The configuration of the extension depends on the purpose of the room, size and building materials used. For example, a structure attached from foam blocks to a wooden house is often made rectangular. An extension made of brickwork will make the structure round in shape. The following structures can be attached to the house:
- rectangular. Can be made from any material. Most often, bathhouses, garages, verandas, rooms, and sheds are built in the form of buildings with right angles. Roofs of one or two slopes are built over such structures;
- complex. Polygonal extensions are a complex architectural object. This could be a bay window, a terrace, an attached pergola, or a veranda. A domed roof is often erected over a building of complex shape, which is located separately from the roof of the main building. There are possibilities for installing the roof in one or two slopes;
- rounded. A structure with a curved line of walls is easiest to build from brick, blocks or frame elements. The roof of the building can be built separately in the form of a dome or built as a continuation of the main roof.
You can arrange an attached room for any purpose. The insulated structure can be equipped as a room, gym, office, kitchen, bathroom, bathhouse. An extension without insulation can be used seasonally.
Additional room
Most often, the tasks of adding an additional room to a wooden house include expanding the usable living space. The attached structure, after insulation, heating, and electricity, can be equipped for various tasks.
In the additional room you can equip:
- gym;
- nursery;
- kitchen;
- bathroom;
- cabinet;
- hallway;
- living room;
- winter Garden.
The entrance to the premises is equipped from the side of the residential building. The design requires window openings.
Enclosed veranda
The most common option for adding premises to a residential building is the construction of a covered veranda. You can quickly and efficiently make an extension to your house from a frame. Lightweight construction does not require a strong foundation. Windows are made hinged or closed.
In a room protected from precipitation and wind, you can arrange:
- pantry;
- place for summer holidays;
- seasonal cuisine.
Most often, covered verandas are built at the main entrance to the house. After insulation, the room can be adapted into a hallway or room.
Open veranda
Attaching an open-type structure will provide an excellent place to relax in the warm season. The veranda without glazing offers a picturesque view, which will make the attached area convenient for gathering guests and having tea at home.
An open veranda is built:
- made of brick;
- from logs or timber;
- from blocks.
Important! Open verandas or terraces are most often built in regions with warm climates. In areas of northern latitudes, this room will be unclaimed for most of the year. The structure is a canopy with railings, which has an entrance from the side of the house or street
For construction and finishing, it is necessary to choose materials that are resistant to temperature changes, precipitation, and ultraviolet radiation.
The structure is a canopy with railings, which has an entrance from the side of the house or street. For construction and finishing, it is necessary to choose materials that are resistant to temperature changes, precipitation, and ultraviolet radiation.
Porch with canopy
As protection from cold and wind, you can attach a porch with a canopy to your house with your own hands. For construction, practical materials that are resistant to weather conditions and climate change are most often chosen.
Algorithm for constructing a porch with a canopy:
- arrangement of the foundation - pouring concrete, screwing in screw piles or laying blocks;
- installation of perpendicular racks. Porch supports are made of brick, timber, logs, and metal pipes;
- roof organization. Depending on the project, the porch canopy can be a continuation of the roof or have 2 slopes. Place a rafter system above the racks, which will serve as a frame;
- covering with roofing material - metal sheet, ondulin, slate, tiles;
- hanging a drainage gutter, drain.
Ensure the safety of the porch structure during snow melting. If the canopy is a continuation of the slope or is located below, snow guards should be installed on the edge of the main roof.
Norms and requirements
When constructing walls made of aerated concrete, you need to rely on SNiP No. 3.03.01-87 and STO 501-52-01-2007. According to these regulatory documents, the height of buildings made of aerated blocks made by autoclave is allowed no higher than 5 floors or 20 m.
Also, according to the standard, the strength of aerated concrete blocks is determined:
- for external walls in a 5-story building, blocks with a strength of at least B3.5 and a cement-sand mortar class of at least M100 can be used;
- for walls in a 3-story building - strength not lower than B2.5, mortar class - not lower than M75;
- for walls in a 2-story house - strength minimum B2, mortar class - M50.
To erect load-bearing walls of a building with one floor, you need to use a block thickness of at least 300 mm. Moreover, this rule applies not only to residential premises, but also to outbuildings.
For the construction of basement walls, it is recommended to purchase elements with a density of D600 and a strength grade of B3.5. The thickness of such products should be at least 300-400 mm. When constructing non-residential buildings, you can use blocks of slightly lower density D500 with a thickness of 300 mm or more.