Set of socks, Omsa socks
349 ₽ More details
Set of socks, Omsa socks
349 ₽ More details
Wallpaper paper
Modern technologies today make it possible to reliably protect homes and commercial facilities from intruders. One of the possible options is the installation of roller shutter systems; with their help, you can not only secure the room, but also prevent the entry of sunlight and dust, and also provide sound insulation. Installing roller shutters yourself will help you save a lot of money, because professional installation will not be cheap.
You can install roller shutters yourself
Purpose of roller shutters
Roller shutters are a more modern version of conventional shutters. They are presented in the form of a metal sheet that moves along guides during the opening/closing procedure. When fully opened, the devices collapse into a box, which is installed above the window. The product performs a number of functions:
- Protects against intrusion by strangers. Improved models are monolithic and help to reliably protect property. To break into a structure, you will need to use cutting tools, which will create noise. To increase the level of security, many equip systems with alarms.
- Reduces noise level in the room. This property is especially important if the houses are located next to the roadway. After installing the roller shutter, sound insulation increases by 12-15%.
- Adjusts lighting. With the help of devices you can adjust the optimal light. There are models in which the light fluxes are adjusted using special slats.
- Creates additional thermal insulation. Installing roller shutters with slats filled with insulation reduces heat loss in winter by 20%.
- Decorates the facade. The canvases are available in a variety of colors. Manufacturers can make custom-made roller blinds with any patterns that will organically fit into the exterior of the room.
In this video you will learn how to install roller shutters:
Design and types of structures
The material of roller shutters is the main criterion when choosing. Using this parameter, the reliability and strength of the devices is determined. Systems are divided into 8 classes according to the degree of protection:
- P1-P2 is a classic version of devices whose main function is protection from noise and dust. Such structures are not able to protect against intruders. These roller blinds are made by rolling rollers.
- P3-P5 - made of steel or extruded profile, such products reliably protect against burglary.
- P6-P8 - have the highest protection class. These include armored and bulletproof systems. Control is carried out both manually and automatically.
The first ones open and close by hand or with a mechanical handle, and are equipped with an external lock with which the system is locked. Automatic designs are regulated by a key fob or control unit.
Cloths in most cases are made of aluminum or steel. Each metal has both advantages and disadvantages:
- Steel structures are heat and sound insulating. The internal voids of the devices are filled with polyurethane foam. The main disadvantage is the heavy weight. Roller blinds are always equipped with automation due to the fact that it is very difficult to open and close the system manually. In addition, steel is susceptible to corrosion; you can get rid of this disadvantage if you regularly treat it with anti-corrosion agents.
- Aluminum products are characterized by ease of operation and decorative qualities. Their advantage over steel ones is the low weight of the structure. The devices can effectively protect an object from burglary, noise and sunlight.
The main part of roller shutter systems is the canvas, which consists of lamellas of equal size. Profile guides promote uniform movement of all panels of the panel. The box contains a control mechanism, which, depending on the model, consists of various parts (handle or remote control). The system is locked using locks.
Installation methods
The simple design allows you to install roller shutters yourself. There are several ways to install the system: built-in, integrated and external.
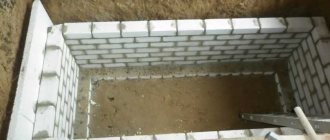
There are several ways to install roller shutters
The latter is a simpler and more common installation method. This is due to the fact that there is no need to additionally equip a niche under the box. The system is installed above a window or doorway, with guides on the sides. This method has a number of features:
- Used for furnishing buildings with windows. Roller blinds can be operated both manually and automatically.
- The products do not block the opening due to their location above it. The frame of the structure protrudes in relation to the plane of the facade.
- The cost of the system of overhead roller shutters is significantly different from the built-in ones; their price is 2-3 thousand rubles. higher.
The peculiarity of the built-in installation is that the frame and guides are fastened to the internal slopes of the window or door . This method has its advantages:
- High resistance to burglary.
- Often used on large windows due to the reduction in light opening after installation work.
- When moving, the shaft comes out onto the glass, so with this method it is recommended to equip the systems with an electric drive.
Complex installation involves the location of a special opening at the top of the window, which must be provided during the construction or reconstruction of the building. When installing in this way, there are various options for placing the guides and the box.
Installation features
There are several ways to install roller shutters, depending on the size and characteristics of the opening. At the same time, their functionality is retained in full. The peculiarity is that both sides of the roller shutters are front. However, on one side there is a box protruding forward by 13 - 34 cm from the plane of the canvas, so the design is not symmetrical.
The box is designed to protect the roller shutter curtain control mechanism - a shaft with a drive is installed inside it, onto which it is screwed during lifting. Installation of the structure using the overhead method can be done from any side of the opening - external or internal. The method of installing roller shutters can be built-in or external.
The external method is the simplest and most accessible for self-installation, because... there is no need to equip an additional niche. The box is mounted above the window or door, and the guides are on the sides of the wall. Features of this installation method include the following:
- installation is carried out on openings with glazing;
- automated and manual control possible;
- the opening maintains its height since the box is installed on the wall.
Built-in installation involves installing a box with guides inside the slopes of window and door openings. The advantages of this method include the following:
- high level of protection against burglary;
- the ability to reduce the light opening of a large window;
- It is recommended to have a special niche in the wall, which is laid during the construction of the building.
Types of fasteners
The selection of fixation elements is an important stage preceding the installation of roller shutter systems. Fastening devices must be selected depending on the material on which the roller shutter will be installed:
- If the opening is made of concrete, stone or brick, it is optimal to use plastic dowels with a screw for fastening. In addition, you can use steel expansion anchors. The depth of entry into the wall should be at least 3 cm.
- If the room is built from materials that have internal voids, the best option is steel anchors with an insertion depth of at least 7 cm.
- The box is attached to metal structures using screws.
- When installing the system in wood, screws or tie rods are used.
- The controls are secured using nail screws.
DIY roller shutter installation instructions
4. Product installation
4.1. General principles
4.1.1. The main types of installation of roller shutters are presented below:
4.1.2. During installation, the roller shutter guide rails must be leveled in vertical planes, the protective box must be leveled in the horizontal plane.
The roller shutter should be located symmetrically relative to the opening. The frame and guide rails must be adjacent to the frame of the opening along its entire length. Local gaps of no more than 5 mm are allowed. The difference in the lengths of the diagonals, measured at the extreme points of the guide rails, should not be more than 2 mm.
Installation and alignment of product elements on the wall before fixing them can be done using metal spacers installed in the area of the fastening points. Seams and gaps after installation of products must be sealed with sealing materials.
The accuracy of product installation during installation is controlled by the construction level of standard sizes US6-1 /US6-4 of the 1st accuracy group GOST 9416-83 and a 1-5 m tape measure GOST 7502-89 of the 2nd accuracy group. It is allowed to use building levels and tape measures of other types, but not lower than the specified accuracy group.
4.1.3. Roller shutters must be securely fastened and thus not pose a potential danger to human life and health. The fastening points of the products must ensure a uniform distribution of forces acting on the products and their reliable transfer to the elements of the building structure.
During the installation process, you should pay attention to the correct and uniform tightening of fasteners in order to avoid distortions of the product and ensure its performance.
When attaching roller shutter guide rails, the maximum permissible distance between the fastening elements is 500 mm, and the distance from the edge of the rail to the fastening point should not exceed 150 mm.
The choice of fastening element is carried out taking into account the distribution of loads, the strength of adjacent building elements (brickwork, concrete, gas silicate blocks, etc.). When using expansion dowels, the building elements must be able to withstand the pressure of the expansion dowel.
Wooden plugs, polyurethane foam, and silicone are prohibited from being used as fasteners.
When fastening products with dowels, you should work with long drills so as not to damage the surface of the roller shutter elements with the drill chuck. The drilled hole should match or be slightly smaller than the diameter of the dowel.
4.1.4. When sealing installation seams and gaps, sealants in tubes (silicone, polyurethane foam, acrylic) should be used. When sealing individual seams and gaps larger than 3 mm, plaster solutions should be used (except for the installation of unpainted aluminum guide rails) that are compatible with the opening material and approved for use by the customer.
After hardening, the sealing materials protruding beyond the plane of the tires and boxes are removed and, if necessary, the final sealing of the seams is carried out. When using polyurethane foam, you should pay attention to ensure that the elements of the roller shutter box do not become deformed.
After completing the installation work and finishing the façade of the building, the protective film should be removed from the roller shutter frame. Clean and wipe contaminated areas.
4.2. Typical (operational) procedure for installing protective roller shutters
4.2.1. Upon arrival at the installation site, unpack the product and check the completeness. One set should include: protective box assembly - 1 pc., roller shutter curtain - 1 pc., guide rails - 2 pcs., complete set - 1 set.
4.2.2. Check the quality of preparation of the opening frame.
4.2.3. Mark and drill 08 mm holes in the guide rails through two walls. Make the lower and upper holes at a distance of 100...150 mm from the edges of the tire. The remaining holes are evenly spaced along the length of the bus with a pitch of 450.500 mm (Fig. 1, 2) - surface-mounted installation, (Fig. 3, 4) - built-in installation.
Note: when installing roller shutters on metal structures, drill holes in the guide rails, the diameter of which is selected depending on the size of the self-tapping screws or screws used.
4.2.4. For surface mounting, drill holes on the front surface of the guide rail for plugs 011.8 mm (Fig. 5). For built-in installation, drill a hole in the inner wall of the tire to 011.8 mm (Fig. 6).
4.2.5. Mark and drill 04.2 mm holes together in the front flanges of the side covers and the box cover (two holes on each side of the box) for subsequent installation of rivets (Fig. 7).
4.2.6. Mark and drill 08 mm holes together in the flanges of the lids and the rear panel of the box to attach the box to the frame of the opening:
- for surface-mounted installation, drill two holes in the rear flange of each cover (Fig. 8);
- for built-in installation, drill two holes in the top flange of each cover (Fig. 9);
- For combined installation, drill two holes in the rear and top flanges of each cover.
Note: when installing roller shutters on metal structures, drill holes in the covers, the diameter of which is selected depending on the size of the screws or screws used.
4.2.7. Mark and drill together a hole of the required size in the rear flange of the cover and the box for outputting the drive elements (Fig. 10).
Note: this operation is performed for external installation to lead out the electric motor cable, cardan, cord or cord through the wall, if the hole was not made when assembling the roller shutter box.
4.2.8. Cut the flange of the rear panel of the box at the contact points of the guide rails (Fig. 11).
Note: this operation is performed for the overhead type of installation.
4.2.9. Assemble the roller shutter frame (assembled box with side covers and guide rails) (Fig. 12). If there is no bent flange on the guide rails, install two guide devices in the covers (Fig. 13).
4.2.10. Install the roller shutter frame at the installation site:
- for surface-mounted installation, attach the frame to the frame of the opening (Fig. 14);
- For built-in and combined installation, install the frame in the opening (Fig. 15).
Align the guide rails strictly vertically, the protective box horizontally, and the entire structure symmetrically relative to the opening (Fig. 16).
4.2.11. Mark the location of the hole in the wall for the output of control elements (Fig. 17, 18).
Note: This operation is for outdoor installation.
4.2.12. Remove the roller shutter frame from the installation site (Fig. 19, 20).
4.2.13. Drill a hole in the wall to bring out the controls (Fig. 21):
- for the output of the electric motor cable, cord - hole 012 mm;
- for tape output - hole 016 mm;
- for the output of the cardan, cord - hole 014 mm. Drill a 020mm hole to the required depth for the cylindrical protrusion of the cardan.
Note: these operations are performed for outdoor installation.
4.2.14. Install a protective spring or tube into the outlet hole of the cord or cord (Fig. 22).
4.2.15. If there is a lower frame of the roller shutter, make grooves in the guide rails for the locking elements of the locking devices (Fig. 23-25). In other cases, the grooves are made “in place” after installing the roller shutter.
Note: this operation is performed in roller shutters with a tape, cord, cord or spring-inertial drive to prevent unauthorized lifting of the roller shutter.
4.2.16. Install the roller shutter frame at the installation site, having first removed the protective film from the back panel of the box (Fig. 26, 27).
4.2.17. Drill holes for installing 08 mm dowels in the frame of the opening using the prepared holes in the tires and the frame. To avoid damage to the roller shutter elements by the drill chuck, you should use long drills or drills for concrete (Fig. 29, 30).
When installing roller shutters on metal structures, drill holes of the required diameter for self-tapping screws or self-tapping screws.
4.2.18. Secure the roller shutter frame using fasteners, periodically checking the correct installation using a building level (Fig. 28, 31).
4.2.19. Connect the motor cable to the switch terminals in accordance with the motor installation instructions (motor manufacturer's instructions).
If necessary, extension of the electric motor cable is carried out by soldering the cable cores and an extension cable. Soldering points must be reliably electrically insulated.
4.2.20. Thread the tape, cord or cord into the appropriate guides (Fig. 43, 45).
4.2.21. For external installation, insert the tape or cable of the electric drive into the hole made in the wall. Thread the cord or cord into the protective elements, pass it through the wall and pre-fix it.
Step-by-step instruction
Installation and assembly of the finished structure should be carried out sequentially. Before you begin installation, you need to arm yourself with tools and also do preparatory work.
First you need to make sure the opening is even. Using a measuring tape, you need to carefully measure the diagonals and then compare them with each other. The difference in values should not exceed 5 mm. Neglecting these indicators is fraught with a decrease in the tightness of the structure and its resistance to burglary.
The building level checks the horizontality of the upper and lower parts of the slope. The verticality of the side parts is controlled using plumb lines. The maximum deviation is no more than 1.5 mm per linear meter.
You should get rid of cracks, irregularities and chips on the slopes. Finishing work is carried out using putty or by installing special overlays. To install roller shutter systems yourself, you will need the following devices:
- perforator;
- wire cutters, scissors for working with metal;
- Screwdriver Set;
- hammer;
- ladder - if you need to work at height;
- mounting gun;
- drill, drill bits for concrete and metal;
- screwdriver;
- set of wrenches;
- level and measuring tape;
- marker;
- indicator;
- multimeter;
- means for sealing joints.
Don’t forget about the tool before starting work
Box assembly
Before starting installation, you should check the purchased system for manufacturing defects and the presence of all parts. The first step is to prepare the guides. To do this, you will need to carry out a number of manipulations:
- Lay out the devices on a flat surface, then use a marker to mark the locations of future holes (make the distance between them 40-50 cm). Place the first point 10 cm from the edge.
- Drill out the marked places with a drill with a diameter of 8 mm, make 12 cm on top of the parts, so that at the end of the work you can install a decorative plug.
- When the guides are ready, you can begin preparing the box. The process consists of the following steps:
- First, the cover is applied to the main structure, then 2 holes (4 mm in diameter) are made on each side; they are needed for inserting rivets at the end of the work.
- Mark the places where the box is fixed to the wall (for an external installation method - on the side, for a built-in installation - at the top), and then drill holes with a diameter of 8 mm. Assemble the structure by connecting the box with the guides.
- The next step is marking the opening for future fixation of the system. Attach the frame to the wall, check the diagonals and vertical guides. Using a marker, transfer the marks from the holes in the frame to the wall, and then drill them. Secure the dowels and, if necessary, make recesses at the bottom of the structure to fix the locking elements.
After all the manipulations have been completed, you can begin installing and fastening the frame: remove the protective film from the rear wall of the structure, bring the latter to the installation site, align all the holes, and then secure the base using self-tapping screws and a screwdriver.
When the installation work is completed, it is necessary to secure the control system. To do this, markings are applied to the inner wall, then holes are drilled, and the tape layer and guides are fixed.
Installation of the canvas and connection of the electric drive
The next step is to attach spacer rings to the upper shaft (distance 40-50 cm). Then it is necessary to install crossbars on both sides of the canvas. The latter is wrapped around the shaft and inserted into the guides. Traction springs are located on top and are fixed in the shaft holes.
Upon completion of installation of the panel, close the box, remove the protective film from the front side, install plugs, which are then treated with silicone.
The final stage of installation is connecting the electric drive (a detailed assembly diagram is included with the device). After completing all the listed manipulations, the installation of roller shutter systems can be considered complete.
This is interesting: a louvered fence.
Preparatory work
Before installing roller shutters with your own hands, you must:
- Measure and compare the diagonals of the opening. The difference should be no more than 5 mm.
- Check the verticality of the side slopes and the horizontality of the top. Deviations should not exceed 1.5 mm per meter of length.
- Make sure that there are no unevenness, crumbling plaster or chips on the slopes.
If the opening does not meet these requirements, it must be plastered or finished in another way.
Prepare the necessary tools:
- Hammer and drill, drill bits for concrete and metal (set);
- Screwdriver and set of bits;
- Riveting gun;
- Metal scissors;
- Pliers and wire cutters;
- Screwdrivers and wrenches (set);
- Hammer;
- Level and roulette;
- Marker;
- When installing roller shutters at a height of more than 1.5 meters, a stable stepladder is required.
To connect the drive you will need an indicator screwdriver and a multimeter. To seal the joints between the guides and the wall, use any suitable sealant and mounting gun. When unpacking the roller shutters, you should immediately check that the elements are complete and that they are not damaged.
Equipment service
In order for the device to function fully, it is necessary to regularly clean the canvas and guides from dust, ice and other foreign objects (small stones, branches, leaves, etc.).
If the structure is icy, before putting it into operation, you need to clean the canvas. To do this, you need to gently tap the lamellas both outside and inside.
To remove dirt and dust particles, use a soap solution and a soft cloth. Experts recommend annual inspection of roller shutter systems for damage and deformation. It is advisable that craftsmen from the supplier’s company participate in this process.
Equipping rooms with roller shutter systems is one of the best ways to protect. If you follow the step-by-step instructions exactly, even a novice craftsman can install roller shutters with his own hands. The process will not take much time, and the result will certainly please you.
Frame assembly
When installing roller shutters with your own hands, you should know that the next operation after measuring is assembling the frame. It is installed in accordance with which control system will be used. The size of the groove (furrow) through which the control elements are introduced will depend on this.
For example, if the lifting mechanism operates using a cord and an electric motor, then the diameter of this groove itself should be 12 mm, and with a gimbal control system it should be increased to 22 mm. After you have curtained the channel of the required diameter, the box and guides are installed.
The holes for fixing the frame are made at a distance of 50 cm from each other. At the edges, the indentation should be 10 cm. But such indentations are typical for outdoor roller shutters, and if you are going to install furniture roller shutters, then the indentations can be made smaller. After drilling the holes, you need to lay the linings on the opening, which serve as the basis for installing the box.
In the photo, do-it-yourself roller shutters
[rek_custom1]