Calculation of the distance between piles
To determine the distance between the piles of a pile foundation, you need to know two quantities: the required number of piles and the dimensions of the building in plan.
The algorithm for calculating the number of supports is approximately the same for all types, so it is enough to consider one option - for example, bored piles.
The initial data for the calculation are:
- soil analysis in the construction area;
- maximum load of the future house on the ground;
- house area.
Soil analysis
You can determine the composition of the soil on the site yourself (if you plan to build a light building). To do this, at the site of the future foundation, you need to dig several holes approximately 2 meters deep.
In the process of digging "wells" you will see what type of soil you will come across, and at what depth the dense layer (for example, hard clay) is located.
You will need this parameter to calculate the length of the pile.
Collecting loads
The total load on the ground is determined as the sum of the weights of all building materials that are supposed to be used during construction, snow and wind loads.
The last two values are normative.
They depend on the region of construction and are determined according to the tables of SNiPs in force in Russia.
Determine the required number of piles
To determine the required number of supports, you must perform the following steps:
- calculate the area of the base of one pile;
- multiply the obtained result by the resistance (4);
- Divide the total load by the product of the sole area and resistance.
Having received the number of supports, it is necessary to adjust the load: after all, the piles themselves put pressure on the ground. The weight of a bored pile is calculated without taking into account its expansion.
By multiplying the weight of one element by their total number, we get an additional load on the ground.
Pile installation step
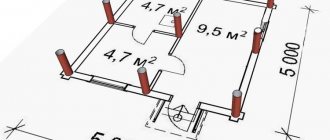
How to determine the distance between foundation piles, knowing their number and overall dimensions of the building?
It seems that nothing is simpler: calculating the distance between piles for the foundation consists of dividing the perimeter of the building by the number of supports.
But here there are some nuances - there are minimum and maximum allowable distances between supports:
- the minimum distance between the bored foundation piles along the axes should not be less than three support diameters;
- the maximum distance between foundation piles is from 5 to 6 pile diameters.
There are several exceptions to the above rule:
- when building on sandy soils, the minimum permissible distance between concrete foundation piles is 4 diameters. When the pitch decreases, over-compaction of the soil occurs, which leads to the complication of installation work;
- wooden piles are installed with a minimum step of 70 cm, regardless of their diameter;
- The minimum permissible step for reinforced concrete supports is 90 cm.
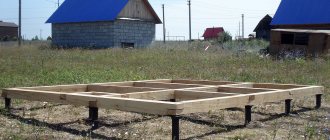
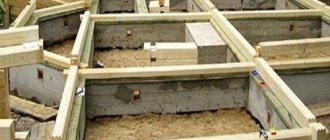
Depending on the type of foundation, piles can be placed in a row or in a checkerboard pattern. The first method is used in a pile-strip foundation, the second - in a pile-grillage foundation.
The distance between the piles of a pile-grillage foundation should not exceed six column diameters. Otherwise, the support will be subject to increased load and work as a single support. This will ultimately lead to the destruction of the grillage and even the collapse of the building.
The optimal distance between the piles of a pile-strip foundation is considered to be 1.5-2 meters.
The maximum allowable step depends on the placement of supports:
- in one row - 1.33 m;
- in two rows - 2.67 m.
Types of piles
Types of piles
The number of supports required depends on the type and size, installation method, and base area.
In industrial and civil construction the following types of piles are used:
- Driven, reinforced concrete or steel. When installed, the power hammer strikes, deepening the support. The soil around the pile is compacted, and part of the load will subsequently be absorbed by the side walls.
- Bored. A hole of the required depth and diameter is drilled for the pile. Mount the reinforcement frame in the pit and fill the hole with concrete. When arranging holes, it is possible to expand the lower part of the shaft, thereby increasing the cross-sectional area. Based on this, the distance between bored piles may be greater than that of other types.
- Vibro-submersible ones are recessed without large shock loads. The pile is given vibration, and it pushes the soil under its own weight. The method is used for large-diameter hollow pipes; the earth squeezed into the internal cavity is removed and removed from the construction site.
- Screw bases are more often used in the construction of frame or wooden residential buildings, since the installation of the support can be carried out without the use of heavy equipment. The blades are welded to the bottom of the structure, which significantly increases the support area. Therefore, the distance between screw piles may be greater than with other types of construction.
- The push-in type is suitable for small buildings and fences. Installation requires special equipment.
Reinforced concrete, metal, wood are used as materials.
For optimal load distribution, the piles are connected with strapping or grillage. A special case is the combination of a pile field and a strip foundation.
Installation
First, the future foundation is marked. To do this, knock down casting boards from boards and beams. This design consists of 2 levels: the first indicates the height of the piles, the second - the upper edge of the grillage.
Determine the landmark from which the count will be made, this could be the border of the site or a fence installed on it. Then the base lines of the foundation are marked - this is where the walls of the building will go. After this, the dressing boards are installed, and a string is pulled between them.
The location of the piles is marked in accordance with the project, lowering a plumb line from the string, and reinforcing pegs are driven under it.
We invite you to familiarize yourself with the Comparison of foam concrete and aerated concrete by characteristics
Then the following types of work are performed:
- drilling of the wells;
- installation of casing pipes;
- reinforcement of piles;
- their concreting;
- cutting casing pipes.
Drilling in private construction can be carried out either using a hand drill or using special machines.
Well drilling
After the well is ready, a casing pipe is made. For its construction, you can use roofing material. The diameter of the casing pipe should practically coincide with the well, and its length should be 50 cm greater than the depth of the well. For the upper part of the pipe, several layers of roofing felt are used and they are tied together with wire. The result is formwork for the future pile, which is placed in the hole until it stops.
If in industrial or multi-apartment residential buildings the length of the pile can be several tens of meters and the diameter - at least 1 m, then in private construction piles with a diameter of 0.35 m and a length of 2.5-3 m are most often used.
In this regard, when reinforcing such a foundation, it is important to remember several rules:
- The total length of the reinforcement cage can be less than the length of the pile by no more than 10 cm.
- The tying of longitudinal reinforcement with horizontal jumpers should be done every 70 cm. In this case, welding is not always used for connection; sometimes tying wire is sufficient.
- For reinforcement, use either 3 rods of corrugated reinforcement with a cross-section of 14 mm, or 4 rods with a cross-section of 12 mm. For transverse lintels, smooth reinforcement 6-8 mm in diameter is used.
Reinforcing blank. Scheme of a bored pile.
After the bundle of reinforcement has been installed, the pile can be concreted, that is, concrete can be poured inside the casing. It is best to use a mixer for these purposes, since it is designed for large-volume concrete work.
The selection of a suitable material is made at the design stage; standard concrete of a grade not lower than M100 is used for these purposes.
It is recommended to process each layer with a deep vibrator so that voids do not form inside the mass. It is better to prepare concrete in small portions simultaneously with compacting the previous layer.
Two methods can be used for this:
- expansion of the soil at the wellhead, after which intensive compaction is performed, and then the concrete mixture is poured;
- casing pipe of such a design that it widens at the bottom.
In the first case, it is difficult to control the quality of the resulting design. In the second, the quality will be higher, but the labor intensity of the work will increase, since a wider well will have to be drilled.
When building a relatively light private house, such widening is not necessary.
Pipe and fittings are cut using a grinder. The reinforcement bars should protrude from the finished pile, but all should be of equal height. This is necessary in order to connect the piles with the ground part of the foundation.
A pile foundation with a concrete grillage can vary in configuration, design features, and materials used.
Piles are:
- Solid - a universal option for all types of soil.
- Hollow with a multi-section core - for private construction in difficult conditions.
- Piles with a compacted face - for houses weighing more than 500 tons.
- The fifth one involves carrying out blasting operations.
To make a foundation with your own hands, you need to stock up on everything you need: casing pipes, a hand drill, reinforcement, concrete mortar, binding wire, waterproofing and thermal insulation materials, wooden panels (from which the formwork will be mounted), tape measure, any level, vibration equipment and everything that usually used for working with concrete.
Finishing work
To cover the pile supports and the space under the floor of the building, a false basement is formed. It happens:
- hinged - a space of several centimeters remains between the floor and the ground to create ventilation, an area for soil expansion when freezing;
- monolithic - no different from the foundation of the same name, but is quickly damaged due to soil pressure.
There are several finishing options. Three popular methods are discussed below.
Siding
The first is the external arrangement of the basement with siding. Advantages: ease of process, cost-effectiveness, speed of installation. Installation of siding occurs as follows:
- The surface is being prepared. The base is cleaned. If necessary, a layer of waterproofing is laid.
- Insulation. You can use polystyrene foam or penoplex for insulation. The seams between the plates are carefully foamed.
- Choice of sheathing. Constructed from galvanized steel profile. It is not recommended to use a wooden frame. If wood is used, it is pre-treated with biological and fire-retardant impregnation.
- Installation of sheathing. The elements are fastened from bottom to top. The first profile is mounted at a height of 15 cm from ground level. The distance of the frame from the wall should be equal to the thickness of the panels. If insulation is required, then this distance increases to the thickness of the thermal insulation layer. The fastening occurs in such a way that a lattice with square cells is obtained. The side of the square should be 50 cm.
- Finishing. This happens in one of two ways - the lock method or the use of pins. The first option involves fastening the siding from the bottom up, the second - from the top down.
Process:
- installation of the starting profile strictly horizontally - the distance between the attachment points should be 30 cm;
- installation of the first panel - performed 2 cm below the starting profile, then moved to the left until it stops, treated with sealant and docked with the corner element;
- installation of subsequent rows, which are adjusted to the panel of the previous row;
- securing a profile;
- installation of finishing boards.
Plaster
The second is plastering. Advantages: cost-effectiveness and speed of the process, high decorative properties. Stages:
- Preparing the base. The surface is cleaned and dried well. But before applying the plaster, light wetting will be required to increase adhesion.
- Lathing. A ready-made mesh is used. It is fixed to the base with dowels with a wide head. For 1 sq. m should be 16 or more dowels.
- Plastering. Process:
- applying the first layer 5 mm thick;
- applying a base layer 9 mm thick;
- creating a third layer 3 cm thick;
- leveling the coating using a rule and grouting with special trowels;
- painting after the plaster has dried.
Fake diamond
The third is finishing with artificial stone. Advantages: high frost resistance, excellent imitation of natural stone, light weight, affordable price.
Stages:
- Preparing the base. It is leveled and insulated with foam or penoplex boards. Before arranging the reinforcement, a reinforcing mesh is attached. For better adhesion of materials, it is enough to coat the surface with a primer.
- Stone laying process:
- starts from the corners, from bottom to top;
- then the remaining surface is covered with an adhesive solution, also from the bottom up;
- the seams are filled with cement mortar, which is carefully compacted and rubbed.
If necessary, the material is cut with a grinder.
Stages of construction of a bored foundation
The key stage in foundation construction is preliminary preparation. It involves studying the site and developing design and technical documentation based on the results obtained. The geological conclusion allows you to determine the required length of pipes. Their lowest point should be located below the freezing level by more than 15 cm. The number of supports depends on the expected mass of the future house and snow. The design load for a bored foundation per pile is within 1500 kg with a length of up to 2 m and a cross-section of 0.15–0.25 m.
The foundation installation process is divided into several stages:
- Excavation. Wells are being prepared according to the design documentation. Previously, the area under the BNFR is cleared of the top layer of soil.
- Arrangement of insulation. On heaving soils and high humidity, metal pipes treated with an anti-corrosion compound are installed. In conditions of stable, hard soil, roofing felt is used, twisted into the shape of pipes with sealed joints.
- Reinforcement. Reinforcement is placed inside the wells. In this case, you need to make sure that it does not touch the ground to avoid corrosion. The top of the reinforcement cage should extend beyond the pipes by ¾ of the grillage height.
- Concreting. The solution is gradually poured into the wells. It is imperative to remove voids using construction vibrators or other suitable tools.
- Making a grillage. To be reliable, a bored foundation with a recessed grillage must have dimensions of 0.3 m in height, while exceeding the width of the walls by 0.1 m. The grillage can be “hanging” (in conditions of arrangement in areas with uneven terrain) or recessed. It can also be made not only as a strip, but also as a monolithic recessed one. The frame is made from wood according to the shape.
- Arrangement of the pillow. This stage is typical only in the case of constructing a foundation on bored piles with a monolithic grillage. The soil layer is removed, a sand cushion and waterproofing are laid.
- Insulation. Thermal insulation materials are attached to the internal parts of the formwork.
- Reinforcement. A frame made of reinforcement is placed inside the formwork, which is twisted with rods protruding from the beams.
- Pouring the solution. The procedure performed when concreting wells is repeated. It takes about 28 days for the structure to dry completely.
Load calculation
The load on the base is the total value added from the following values:
- The weight of the house with all structures, floors and other structural elements.
- The amount of snow load on the roof in winter.
- Wind load.
- Operating load.
The weight of a house is a calculated value that is obtained by adding the weight of the walls, roof, ceilings and other elements. All necessary data can be taken from SNiP applications, multiplying specific values by the area or volume of existing structures.
This stage of calculations is the longest; it is important not to miss any structures and to take into account all the elements. It is necessary to show maximum care and consistently add the weight of all parts of the house
The snow load is determined by multiplying the total roof area by the specific snow pressure (per m2). This value is available in SNiP applications, the appropriate region is selected and the necessary data is obtained.
The same method is used to determine wind load, a very relevant parameter for some regions.
Operating load is the weight of people, furniture, household appliances and other property located in the house. These values should not be neglected, since they significantly change the overall magnitude of the loads.
IMPORTANT!
The total calculated amount of loads should be increased by 10-15% in order to have some margin of bearing capacity of the base. This can compensate for possible additional load from the weight of the skin or other elements not previously taken into account.
Gathering information for design
Load-bearing capacity of a screw pile
Critically important indicators that influence the number of required support elements are the bearing capacity of the soil and the loads acting on the foundation.
Theoretical calculation of piles on the ground
To carry out the analysis, exploratory soil excavations are carried out at the construction site. According to clause 5.5. Code of Rules, if the load on the pile cluster exceeds 3 Nm, then the pit is drilled to a depth of 5 meters below the supporting end.
On light soils - bulk, sandy, slightly clayey and swelling - drilling is carried out to the underlying dense rocks on which the piles will rest.
To independently calculate the number of supports “on the ground” it is not always possible; for this you need to have engineering knowledge.
The formula looks like this: F = Yc * (Ycr * R * A + U * ∑ Ycri * f * l).
Parameter designations:
- F—bearing capacity;
- Yc, Ycr, Ycri - coefficients from the tables of the Code of Rules;
- A is the support area;
- U is the perimeter of the pile walls;
- F is the friction force of the side walls;
- R is the bearing capacity of the soil, obtained from the table or as a result of field tests;
- L is the length of the pile.
By substituting the required values into the formula, they calculate how much load one support can withstand.
Instrumental measurement of soil parameters
There are ways to experimentally determine the bearing capacity of soils.
The static load method consists of carrying out the following set of works:
- At the construction site, test foundation posts are installed and time is allowed to gain strength if the pile is bored.
- Apply a load from a stepped jack to the support.
- Precision measuring instruments measure shrinkage after applying a load.
- Using a special algorithm and tables, the load-bearing capacity is calculated.
According to the experience of builders, this method is considered the most accurate.
The dynamic load method involves impact loads on a control pile with simultaneous measurement of foundation shrinkage after each impact. Based on the results, the desired value of the maximum possible load is obtained.
Probing using a test pile and sensors installed on it makes it possible to obtain data on the resistance of each soil layer, if they are heterogeneous.
Load calculation
Load of walls and ceilings on the foundation
The total load on the foundation is determined by calculation.
Fold:
- mass of piles and grillage;
- weight of walls, ceilings, roof;
- snow, wind and operational load.
Specific gravities of building materials can be obtained from reference books and manufacturer data.
The snow load is taken based on the results of long-term observations in the region of construction. The values are reflected in construction reference books.
For regions with strong winds, the pressure of air flows is significant. They cannot be ignored in calculations, especially for roofs with steep slopes.
The operational load refers to the mass of people living or staying in the house temporarily. Add weight to furniture and household electrical and plumbing fixtures.
The resulting load when calculating the foundation must be increased by 10–15%. Planned and unforeseen situations often arise, for example, there is a desire to cover a house with plastic or metal siding, which will increase the load on the foundation.
Example of calculating the number of piles
Let's consider the features of the calculation using the example of a square-shaped house with a perimeter of 8x8.
Other features of the structure include:
- frame type, slate roof, porch;
- foundation dimensions – 8x8, building height – 3 meters;
- the house has 3 rooms formed by the intersection of a solid wall 8 meters long and a partition 4 meters long;
- the frame is made of timber 150x150, grillage - 200x200;
- The walls are covered with sandwich panels.
Calculation of wall area:
- external – 8*3*4=96 sq. m;
- internal – 8*3+4*3=36 sq. m.
Calculation of the mass of walls using tabular values for the mass of 1 square. m:
- external (load-bearing) – 50*96=4800 kg;
- partitions – 30*36=1080 kg;
- total weight – 4800+1080=5880 kg.
Calculation of the mass of basement and attic floors using tabular values for the mass of 1 square meter. m:
- basement – 8*8*150=9600 kg;
- attic – 8*8*100=6400 kg;
- total weight – 9600+6400=16000 kg.
To determine the mass of the additional load (internal filling of the house: finishing materials, things, equipment), a table value of 350 kg/1 sq. m is used. m. When calculating the load for a two-story house, the weight of the additional load is multiplied by 2.
8*8*350=22400 kg.
Calculation of the total load on the foundation:
16000+22400=38400 kg.
Calculation of the number of piles using the formula K=P*k/S, where:
“P” – total load;
“k” – reliability coefficient (in the example – 1.4);
“S” is the maximum load on 1 pile (this value is based on the specifics of the pile, in the example it is a support with a diameter of 300 mm).
Soil resistance is determined by the specifics of the area on which the house is being built. In the example, this is soil with an average density of 3 kg. /cub. cm, weak freezing of 1 meter and deep groundwater.
38400*1.4/2600=20.6
The example given shows a possible calculation option. It does not take into account the specific specifics of an individual structure, which may affect the final number of piles and their placement in the foundation plan.
One of the main points is finishing materials and other fillings of the house, which make up about half the load. The table value is based on the average weight of the materials. If massive cladding is used, for example, granite or marble slabs, stone or brick masonry, etc., the total load may change significantly. In such circumstances, it is impossible to do without an accurate calculation of the weight of all elements related to the additional load.
For information on pile foundations and the recommended distance between piles, see this video.
Determination of the number of piles
After collecting data on the bearing capacity of the soil and the total mass of the load, the minimum required number of piles can be calculated.
Sequence of calculations:
- The total load in kg is divided by the bearing capacity of the soil, measured in kg/cm2. The result is the total required support area.
- Calculate the area of one support.
- By dividing the required area of the foundation by the cross-section of one support, the required number is obtained.
If you get a large number of piles, it is better to use supports with a larger base area.
Characteristics of soil and its properties
Table of soil characteristics.
To more accurately characterize the soil and its properties, it is necessary to dig 2-3 holes 2 meters deep. All this is necessary because the soil on the territory is always different. Next, the site will become the foundation of the house - the foundation. In this way, the site for construction will be the most suitable and preferable, which will significantly reduce the problems that may arise when the foundation begins to form.
Construction site load:
We perform accurate calculations of the load on bored piles. Now you should collect all the building materials in one place - a pile. This calculation is quite simple to perform, since here it is necessary to use standard volumetric mass values in a free table.
How to count a step
The greatest distance between bored supports is determined as the ratio of the load-bearing capacity of the pile (P) to the load of the building per one linear meter of the foundation (Q). In turn, P is the total indicator of the lateral surface and base.
Rosn = 0.7 * Rn * F,
where Rн is the standard bearing capacity, F is the base area of the bored pile, and 0.7 is the coefficient of soil uniformity.
Rbok. surface = 0.8 * U * fiн * h,
where 0.8 is the operating conditions coefficient, U is the cross-sectional perimeter of the pile, fin is the standard soil resistance at the side surface of the pile, h is the height of the soil layer in contact with the foundation.
Location of bored piles
Dividing the mass of the building by its perimeter, we get Q, for example, 6.2 t/m.
The length of the base of not only external, but also internal walls under load (if any) is added to the size. We will first select a pile Ø 30 and 3 m long. P = 12.31 t.
The maximum distance will be 1.98 m.
Now we begin to link the gap between the supports to the geometry of the designed building.
It is necessary to take into account the multiple of the sides of the perimeter and the distance between the pillars. You can increase the size of the clearance by adopting a design part with a larger diameter or length (increase the numerical value of Rosn, Rside. surface).
Construction rules recommend maintaining a distance between drilled columns from 3 to 6 of their diameters. That is, in the light the minimum gap is 2 diameters. Reduction is possible, but not rational.
When drilling, there is no such compression of the soil as when driving. However, the close location of the pillars (less than 1 m) distributes the load on the surface of the base with mutual overlap of base deformation zones. We get the bush principle.
When calculating friction along the lateral surface in a cluster, only the outer conditional perimeter of the entire cluster of support rods is taken into account, which reduces the overall value of this indicator. The deformation stress under the sole also increases, which can increase settlement. Mutual influence in the bush is calculated according to SP 50-102-2003 (clause 7.4.4).
Options for placing piles and their purpose
Correct placement of piles is necessary to maintain the integrity of the frame house and avoid subsidence. This is especially true for complex projects: projects of two-story houses, a building with irregularly shaped walls, etc. The main rule: the load must be distributed evenly.
https://www.youtube.com/watch?v=mQmAwgt_LmY
The location of house supports is of four types:
- Single. The piles are located at an equal distance from one another at the corners of the building, under the load-bearing walls, and under the vertical posts of the frame;
- Tape. This type of pile-screw foundation can withstand higher loads. The supports are located as with a single type of foundation, only the step between them is shortened;
- Bush. This implies a chaotic placement of supports under the foundation of the house. They are mounted in clusters, with most piles located in areas with the highest load (for example, under a room with heavy equipment). Under such conditions, the step between the supports does not matter, the main thing is that they are along the entire perimeter of the slab;
- Continuous (in other words, pile field). This type of foundation is relevant for areas with unstable ground cover and for heavy frame buildings. The piles are arranged in a grid around the entire perimeter of the building. The maximum step is 1 m.
According to SNiP requirements, the minimum distance between two adjacent screw piles is double the diameter of the blades. That is, if there are supports with 30 cm blades, the minimum distance between them will be 60 cm.
It is necessary to take into account that this is the distance between the blades, that is, when marking, marking the axes of the piles, one should consider not 2, but 3 diameters. The maximum distance is determined by the ratio of the weight of the house to the number of piles.
It is necessary to take into account the material and cross-section of the grillage so as not to cause excessive movement of the beams in the central part of each span. According to all calculations, the maximum is always determined as 3, in some cases - 3.5 m.
It is impossible to go beyond these values, this will create a threat to the structures of the house.
Correct placement of piles is the basis for the integrity and durability of the foundation and the entire structure. By arranging supports according to the load applied, it is possible to avoid critical zones that threaten subsidence of piles and individual parts of the house. If the building has complex contours, the placement of supports requires special attention.
For this purpose, several basic techniques have been developed.
- Single occupancy. Piles are installed under the supports of frame structures, at the corner joints of walls and under all load-bearing elements. However, their interval cannot be more than 3 meters.
- Tape placement. The piles are located under the load-bearing walls, with the difference from the single type that the interval of their location is noticeably reduced and often amounts to only half a meter. This technique is used when it is necessary to withstand a large load (for example, a heavy 2 or 3-story house).
- Cluster placement. This type is necessary to support heavy single or group structures. There is no specific pitch for this type, since often the piles are placed close to each other in a chaotic manner corresponding to the load applied. Their placement directly depends on the calculation of pressure zones. The only condition is that the elements must be present along the entire perimeter and area of the slab foundation for which they are supports.
- Continuous placement or pile field. The supports are installed everywhere under the slab foundation area, the step is approximately 1 meter. This technique is used for massive buildings or on soils with weak bearing capacity.
The pitch of screw piles installed under a frame house is up to 3 m. Most often, this figure is reduced to 1-1.5 m between supports. This is influenced by the characteristics of the soil, mass and purpose of the structure. It is necessary to calculate the distance between piles for each house individually.
Important! Piles must be evenly spaced throughout the structure. Located on external and internal corners, under load-bearing walls.
We suggest you familiarize yourself with How to make a floor in a bathhouse on screw piles with a drain
The distance between the piles is also determined by the length of the grillage, since both ends must rest on the head of the support. This is not taken into account only if a concrete grillage is installed.
It is a little more difficult to calculate the placement of supports for a slab foundation. As a rule, special design documentation is used for this. But the principle of placing supports does not change: they are placed under load-bearing walls and frame columns.
Working with piles
When all the supports are screwed in, make a grillage. The first step is leveling the height and filling with concrete. For this, the following can be used: board, timber, metal corner, beam.
The process of leveling the pile in height
Regardless of which material was chosen, it must be processed to extend its service life.
Formwork design for pouring the foundation grillage
A frame is mounted in it, which is secured using spacers. Then it is filled with concrete. After the concrete has hardened (this will take about a month), the formwork boards are removed. Concrete is treated with mastic for waterproofing.
We suggest you familiarize yourself with How to choose and make a foundation for a bathhouse
A layer of roofing material, also treated with mastic, is laid on top of it. After it has completely dried, you can begin building the walls.
The process of treating a pile foundation with mastic
After installation of screw piles, additional work is carried out. First of all, you should make sure that all supports are installed level. There should be at least 60 cm from the ground to the zero level of the house. We align all the piles so that they are in the same plane. For this you can use a grinder.
Next, the supports are concreted to give them strength. This will eliminate the possibility of tilting and deformation of the future foundation. It is also necessary to expel air from the cavities so that the foundation does not collapse in the future.
The mixture is poured into the internal void of the pile, it is also necessary to lay reinforcement, this will give the structure reliability. For this, a cement-sand mixture is prepared. Its consumption is 35 kg per 1 pile.
The final stage of mounting the supports is to weld the ends. After this, timber tying is performed. If you use a channel instead of a beam, then you can do without the heads. This will help you save a lot.
Working with a pile-screw foundation excludes the following actions:
- Adjusting the piles to the same level during screwing. This work is carried out after the installation of all supports is completed, otherwise it may provoke subsidence of the foundation in the future;
- Lengthening unevenly screwed in piles;
- Installation of supports less than 1.5 m into the ground;
- Creating preparatory holes for supports in the ground deeper than 50 cm;
Area distribution
When arranging the installation locations, take into account the minimum and maximum permissible distances.
The distance between driven piles cannot be less than 3 support diameters, otherwise there will be negative mutual influence.
When distributing supports over the foundation field, the requirement of uniform distribution of loads is taken into account.
Be sure to install piles in the corners of the building and the intersection of any walls with each other. A larger number of supports are installed under heavy capital walls.
The difference in weights between the most and least loaded piles should not be allowed to exceed 15%. Permanent loads on supports should not differ by more than 5% and short-term loads by more than 20%. This is important, for example, for the foundation for a garage built into a house.
The maximum pitch of piles is determined by the presence or absence of a grillage. In most cases, piles should not be spaced more than 1.5 m apart.
There are installation methods:
- single;
- bush;
- tape;
- continuous field.
The location of the piles depends on the load on the grillage.
The choice of option depends on previously made calculations, the configuration of the building, and the locations of maximum and minimum loads.
Single piles are designed for installing lighting poles or small structures.
Bushes are installed under large loads per unit area, for example, under the walls of multi-story buildings.
Tapes in one row are most often used in the construction of long-term retaining walls.
For private two-story houses and generally large-area buildings, foundation fields are installed, with pile spacing calculated based on the load.
Load capacity calculation
To calculate the required number of supports, two indicators are needed - the weight of the structure and the load-bearing capacity of an individual element. Calculation of the strength of one pile support depends on the brand of concrete mortar used. So, when making a pile from M 100, it can withstand 100 kg per 1 cm². With a cross section of 20 x 20 cm, the area will be 400 cm², and the support can support up to 40 tons.
Thus, the bearing capacity of the soil is much less than that of the pile itself. According to this, calculating the exact number of elements and load-bearing capacity of the entire pile-grillage structure is impossible without taking into account the strength of the soil. Previously, a calculation was given for laying the support below the freezing level. But when the section changes, the area and load-bearing capacity of the pile-grillage foundation will be completely different.
Grillage is a unifying composition of a pile-grillage structure that increases the stability of the base. When choosing a pile foundation device without it, a calculation will be required that can ensure that all elements are installed to a sufficient depth. Then you can be sure that the structure will not sag and will not be “squeezed out” by the influence of frost heaving forces.
Related Posts
- Do-it-yourself installation of screw piles
- How to calculate a pile foundation using an online calculator + calculation of the number of piles and load-bearing capacity
- Foundation on reinforced concrete piles
- Pros and cons of a pile foundation. how not to make a mistake when choosing
- Pile-screw foundation: pros and cons, tips for choosing
- Pile failure
- Drilling wells under a pile foundation
- Ways to strengthen the foundation
- Construction of a frame house on screw piles
- Advantages and disadvantages of pile-strip foundation
- Various technologies for constructing bored piles
- How to make a timber frame for a pile-screw foundation
- Leading wells
- Repair and replacement of the old foundation of a wooden house
- Pile pressing method
- A step-by-step guide to making a pile-strip foundation for a house made of aerated concrete with your own hands
- Grillage on screw piles
- Rules for constructing a shallow foundation
- Types of screw piles: how to choose the right ones?
- Pile heads: characteristics and subtleties of use
- Driven foundation: reviews, pile foundation on reinforced concrete piles
- Technologies, secrets, recipes
- Calculate the strip foundation with your own hands
- Construction of a strip foundation
- Types of foundations for a bathhouse
Read with this
- Do-it-yourself installation of screw piles
- How to calculate a pile foundation using an online calculator + calculation of the number of piles and load-bearing capacity
- Foundation on reinforced concrete piles
- Pros and cons of a pile foundation. how not to make a mistake when choosing
- Pile-screw foundation: pros and cons, tips for choosing
- Pile failure
- Drilling wells under a pile foundation
- Ways to strengthen the foundation
- Construction of a frame house on screw piles
- Advantages and disadvantages of pile-strip foundation
