- 1 Feasibility of concrete flooring on a wooden floor
- 2 Execution technology
- 3 Calculations
- 4 Preparing the base
- 5 Primer and marking
- 6 Waterproofing
- 7 Reinforcement
- 8 Installation of beacons
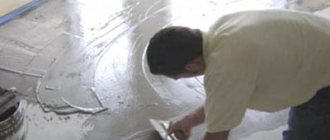
- 9 Mixing the solution and pouring
- 10 Screed care
- 11 Tips for working
- 12 Conclusion
You can extend the life of a wooden floor in a country house using a concrete screed. In this case, the surface will become smoother and more durable. In the future, it is possible to finish the floor with any material, for example, laminate, tiles or parquet.
The feasibility of concrete flooring on a wooden floor
Disputes continue regarding the advisability of using a concrete screed on a wooden floor. Many people say that concrete will make the structure heavier and, accordingly, the pressure on the foundation will increase. On the other hand, the fragility of the wooden base will lead to cracking of the concrete surface and deformation of the floor covering. There is also a high chance that the floor will be uneven. However, there are many facts that speak in favor of concrete covering on a wood floor:
- Concrete screed on a wooden floor is poured using a separate technology, taking into account the characteristics of the wood base. Laying is carried out according to the principle of an unbound screed, which neutralizes the possibility of deformation.
- It is recommended to pour cement when leveling and strengthening the base for installing hard floor coverings is required.
- Concrete is ideal for installing heated floors.
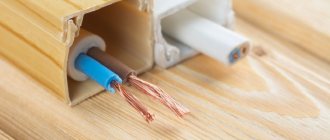
To avoid possible negative consequences from the interaction of wood and concrete, you should strictly follow the recommendations for the work. An important step in the preparatory phase is priming the wooden surface in order to ensure sufficient moisture resistance. It is recommended to use durable polyethylene film without defects as waterproofing. Its individual parts must be overlapped. To obtain a flat surface, beacons must be installed before pouring. The thickness of the concrete layer should not exceed 5 cm.
Since concrete itself is a massive and heavy material, which can lead to sagging of the screed on a wooden base or breakage in weak areas of the floor, it is recommended to add plasticizers to the masonry mixture. These additives give the solution sufficient fluidity, ductility, strength, water resistance, and the screed does not collapse for a long time even under high loads.
Return to contents
The process of applying cement screed on wooden joists
Sometimes in wooden houses or old apartments a concrete screed over wooden joists is necessary.
Due to the fragility of wood, structures need to be strengthened.
This happens by installing a metal frame or mesh, as well as a channel.
Before constructing the frame, insulation made of expanded clay, perlite or other materials with low thermal conductivity is poured into the space between the joists.
Sufficient density and elasticity of the solution must be achieved by adding polystyrene, plant fibers and other necessary components. Such additives will also act as sound insulation.
Related article: Differences between ceramic and sand-lime bricks
Sequence of work
Waterproof the base
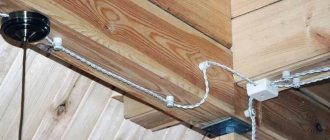
First, polyethylene film is spread on the base, and then insulation is placed. The channel is attached to the logs, a reinforcing mesh is mounted, even in two layers.
It should be at some distance from the insulation. To determine the correct spacing, approximately five clamps per 1 sq.m. are used.
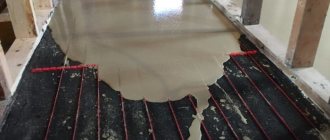
After installing the frame and reinforcement, you can fill the floor with concrete. It is better to do this using pre-installed beacons.
After applying the mixture, it is necessary to level it with a vibrating screed. In this case, air bubbles are removed, and therefore the strength of the monolith increases.
Screed care
A day after pouring, the screed is subjected to abundant moisture.
Subsequently, it needs to be sprayed with water for another week, and the newly made concrete floor must be covered with film for a uniform release of moisture for several days.
It is also necessary to monitor the temperature background and the percentage of air humidity.
After the solution has completely dried, it is polished, resulting in a smooth surface.
Some nuances
Is it possible to create a strong screed by abandoning the use of reinforcement and using simpler materials? Definitely yes. After all, the drying period for a screed using reinforcement can be up to a month, and then you will need to wait the same amount after all the work is completed. To learn how to make a screed on wooden beams, watch this useful video:
To avoid such procedures, fiber fiber is used for strengthening purposes. The random placement of polymer fibers guarantees strong ties in all directions, and the weight of the screed itself will also be reduced.
A well-arranged screed on a wooden floor will be an excellent basis for laying a coating such as ceramic tiles.
Execution technology
Scheme of a concrete screed for a wooden floor.
A screed on a wooden base is created to increase the strength of the boundary between wood and concrete. To prevent cement and wood from coming into contact and affecting each other’s quality, the concrete layer is cut off from the walls of the room with a damper tape, and from the wooden base - with polyethylene. This arrangement principle allows you to save concrete from cracking and destruction due to changes in the underlying foundation. Screeds laid on wooden floors have some features:
- the pouring mass should ensure a tight fit of the concrete to the floor;
- the cement should not come into contact with the wood (a layer of film is enough to prevent interaction);
- It is forbidden to pour the cement mixture directly onto the wooden surface;
- It is imperative to equip a high-quality waterproofing layer.
Concrete screed can be poured onto a wooden surface only after calculations and preparatory work have been carried out.
Return to contents
Which method is better to use?
A moisture-proofing layer must be laid between the wood and the monolith
For greater reliability, the “disconnected” screed method is used for wooden floors. At the same time, it is isolated from the floor covering and walls.
The floor is first leveled. A moisture-proof barrier is created between the moving part of the floor and the monolith.
For this we use:
- dense polyethylene film;
- material in the form of a damper tape, which is fixed at the bottom of the wall and floor;
- foamed polystyrene;
- roofing felt;
- material impregnated with bitumen.
Related article: Find out what types of folds can be made using curtain tape
The wood must be treated with an antiseptic and a layer of waterproofing, preferably bitumen mastic, must be applied. Then you can lay the film, leaving a 20 cm overhang on the walls and making sure to overlap. They are glued with tape, ensuring a complete absence of joints, holes and wrinkles. To learn how to make a screed on a wooden base, watch this video:
Calculations
Before you start arranging the floors, you should make a calculation. When using a ready-made sand-cement mixture, the amount of material is determined on the basis that 1 cm of layer is obtained from 15 kg/m2 of the mixture, but a reserve of 10% is needed.
To prepare concrete solutions with your own hands, you should buy the material, taking into account the proportion of 1: 2: 3 (cement, sand, crushed stone or gravel) or 1: 6 (cement, a mixture of crushed stone and sand). The required amount of material is calculated from the formula of multiplying the surface area of the room and the required thickness of the screed.
Return to contents
Preparing the base
Preparing a wooden floor for screeding.
First of all, the board covering is carefully inspected. If there are damaged joists, they should be replaced, and partially destroyed ones can be turned over. The boards are secured back with nails. When installing logs in increments of more than 40 cm, it is recommended to additionally use support bars. To prevent the nails from tearing the plastic film in the future, their heads are sunk into the boards to a depth of 2-3 mm.
Old skirting boards need to be removed. It is recommended to seal the cracks that appear at the junction of the floor and the wall with thin wooden boards. After filling they will need to be removed. This will ensure natural ventilation of the wooden base and prevent it from rotting.
If the wooden base has small cracks, a sealant or parquet putty based on wood dust is used for sealing. To prepare your own putty, take 4 volumes of sawdust and 1 part of oil paint.
If the cracks are deeper, it is better to resort to polyurethane foam.
Return to contents
Features of wood floors
Construction industry experts say that tiles do not combine well with wood flooring for the following reasons:
- wood responds subtly to changes in external factors - it expands at high humidity and dries out at low humidity. As a result, the tile covering may become cracked and peel off from the boards;
- wood quickly collapses and has low performance properties. After its destruction, the still usable tiles have to be dismantled;
- tiles laid with water-repellent adhesive prevent the penetration of oxygen into the floor, which is necessary for wood for long service life. All this leads to rapid deterioration of both the floor and the ceramics;
- wooden floors cannot withstand significant loads. The lightest tile for facing should be chosen.
Advice! It is allowed to begin tiling the wooden flooring only after 2 years have passed after the initial installation of the floor.
Thus, when laying tiles, at least 3 conditions must be met:
- ensure free circulation of oxygen and its access to the floorboards;
- distribute the planned loads evenly over the entire floor area;
- create a flat, strong base on top of the boards, which will ensure immobility and will firmly hold the tile.
READ MORE: PVC floor tiles
Primer and marking
After preparatory treatment of the base, it is cleaned from dust and debris. If necessary, the boards are sanded. A primer is applied to the cleaned surface. This treatment will create a protective layer that prevents the appearance of bubbles, the absorption of moisture from the cement mixture, and the appearance of fungus and mold.
Marking is carried out with a regular or laser level. The zero mark can be at any height. It is recommended to place several marks on each wall at a distance of 35 to 70 cm from the floor, taking into account the thickness of the future screed. Then the marking is carried out in the reverse order - from points on the wall to the floor. In both cases, a line is drawn using a level. The level of future leveling is determined by subtracting the thickness of the screed from the minimum measurement.
It is important to take into account that the standard thickness of the screed should be ±5 cm. Moreover, every 1 cm of concrete exerts a pressure of 100-110 kg/m2. Therefore, the logs need to be reinforced with beams or metal channels.
Return to contents
How to make the right concrete floor in a wooden or frame house
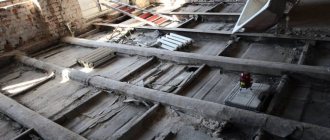
In a wooden or frame house, the floors of the first floor are usually made on wooden joists. Wooden floor joists rest on the ground or the ends of the joists (beams) hang on the walls of the foundation or basement of the house.
Wooden floors on the first floor
less durable, afraid of moisture, not sufficiently resistant to mechanical stress, and have low sound insulation ability.
on such floors .
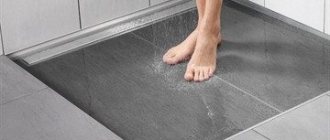
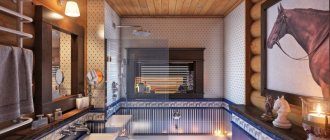
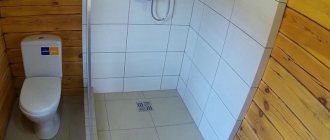
There are problems when installing floors in wet areas of a wooden or frame house - a bathroom, boiler room, etc.
The installation of a reinforced concrete basement floor is beneficial only for a house with a basement.
For a private house without a basement, the most advantageous floor design for the first floor is to install a concrete floor on the ground.
The advantages of a concrete floor on the ground with a strip foundation include the following:
- They are not afraid of moisture, strong and durable.
- Good sound insulation, no vibrations.
- High-quality backfill and waterproofing reliably protect premises from the penetration of radioactive soil gas radon.
- The absence of a cold subfloor reduces the depth of soil freezing at the base of the foundation.
- The concrete slab and soil can accumulate heat. This is especially beneficial if the house is built using frame technology, where the walls cannot accumulate heat.
- The concrete screed allows the installation of a conventional “warm floor” system.
- Communications laid in such a floor do not require insulation.
When choosing such a design for wooden and frame houses, there is a prejudice that the proximity of the soil to the lower crowns and beams of wooden walls, the lack of sufficient ventilation in these units will contribute to the accumulation of moisture and rotting of wooden parts.
For the reason stated above, developers who are building a house for themselves experience certain difficulties when choosing the design of the junction of the floor on the ground, with the foundation (plinth) and the wooden walls of the house.
The figure below suggests an option for installing a concrete floor on the ground for a wooden (log, timber) or frame house.
A wooden or frame house with concrete floors on the ground. The foundation of the house is shallow, protecting the heaving soil from freezing
Here the designers tried to make the unit as open and ventilated as possible. In addition, in the area of contact between the wood and the plinth, a thermal regime is ensured that prevents the formation of condensation in this area.
Products for construction and repair
⇆
A shallow, thermally insulated foundation was chosen for the house. Thermal insulation protects the soil under the foundation from freezing. As a result, the foundation is not affected by the forces of frost heaving of the soil.
The foundation is strip made of monolithic concrete. A brick plinth is installed between the foundation strip and the wall of the house.
The use of brick for the construction of the plinth is due to two reasons:
- Brick has a lower thermal conductivity compared to concrete.
- The base has a thermal insert made of extruded polystyrene foam. Laying with a liner is easier and more convenient than embedding it in concrete.
To protect the soil at the base of the foundation from freezing, vertical and horizontal thermal insulation is used. A distinctive feature of the unit is that the layers of thermal insulation are located inside and under the foundation strip. The thermal insulation dimensions shown in the figure are selected for the climate conditions of the Moscow region.
The figure below shows a heat map of this node, which shows the distribution of temperatures in the soil thickness and in the structures of the house in the design mode.
The heat map shows the distribution of temperatures in the soil and in the structures of the house. The temperature of the soil under the base of the foundation is close to zero degrees.
How to make a concrete floor on the ground can be found in another article - concrete floor on the ground in a private house. Next article:
Do you need heated floors in a private house?
Previous article:
How to properly make a floor screed in a private house
More articles on this topic
- The thickness of the walls of a house made of aerated concrete - gas silicate
- Cesspool storage septic tank for sewage pumping
- Leveling, wall covering with dry plaster and plasterboard
- DIY monolithic concrete staircase in a private house
- Materials for the construction of a single-layer external wall of a house
- Painting the facade and exterior walls of the house
- How to make a shelf with your own hands in a garage, shed or storage room
- Floating floor - soundproofing floors in the house
Waterproofing
The waterproofing layer is created in two stages:
- Gluing a damper tape 10-20 mm thick and 2-3 times wider than the screed. Scotch tape is used for fastening.
- Laying polyethylene with an overlap of 10 cm and overlapping the walls by 20 cm. If during the work the film is torn or punctured, it should be carefully patched and taped.
It is better to avoid a large number of joints and damage, since the tightness of the entire structure depends on the quality of waterproofing.
Return to contents
Preparing the wooden base
Before starting the main stage of work, it is necessary to carefully inspect and evaluate the condition of the wood base. Beams, joists, boards and insulation may contain areas of rot and wood-boring beetle larvae.
All detected defects must be corrected. If the boards do not creak or bend when walking on them, you can move on to the next stage. Otherwise, the wooden floor will have to be rebuilt.
READ MORE: Laying floor tiles with your own hands
First, you should check the geometry of the log with a building level. They can be laid with errors, not on a horizontal plane, which will result in distortions and deformation of the ceramic coating.
Elements that have strayed from the general plane should be aligned - lowered or raised. If leveling cannot be achieved in this way, you can attach additional boards to the joists to achieve the optimal height.
Important! If the floor with distortions is made without joists, a new screed or sheets of plywood laid in a thin layer over the floorboards will help eliminate the errors.
Since wood is susceptible to rotting and fungal attack, all elements of the floor structure will have to be treated with special solutions with antiseptic and antifungal properties.
For this purpose, use a special impregnation intended for damp rooms, or mastic with similar properties.
Hot drying oil copes well with the task of protecting wood from damage. It is applied in several layers until the solution stops being absorbed into the material, but no more than 5 times.
Each subsequent layer is applied after the previous one has dried - as soon as it stops being sticky.
When arranging a floor covering with joists, it is necessary to strictly observe the step between them. It should not exceed 50 cm, otherwise the required strength and durability of the installation will not be achieved.
A technological gap of 1 cm is left between the wall and the joists, which will subsequently be taped with damper tape.
As soon as the impregnated elements have dried, you can begin pouring fine-grained expanded clay. It is ideal for constructing dry floor screed.
Reference! Expanded clay is a lightweight porous building material made from thermally treated clay. Voids are formed in the clay, which give the final material strength and high thermal insulation properties.
Expanded clay is used to fill the entire space between the joists, leaving a 5-centimeter gap on top for complete air circulation and removal of condensation. The rough base for the tiles will be floorboards made of thick waterproof plywood or old boards.
The boards will first have to be prepared - remove the paintwork with special removers, dry with a hairdryer and treat with a sanding machine.
When arranging the rough flooring, sheets of plywood or boards must be laid so that there are small gaps between them - about 3-5 mm.
If this condition is not met, the boards will begin to expand under the influence of high humidity in the bathroom, even if there is a waterproofing layer. The result will be deformation of the subfloor, and subsequently the finished tiled cladding.
The rough flooring is secured with galvanized self-tapping screws, and all holes are closed with putty.
If necessary, the finished substrate is processed again - it is sanded, leveled with a grinding machine or an electric drill with an emery attachment.
Technological gaps around the perimeter of the bathroom must be filled with polyurethane foam, and the board covering must be treated with latex impregnation. It will thoroughly fill all the cracks and serve as additional protection against moisture.
If the boards sag and squeak, then the floorboards can be pulled down or rebuilt. A shaky base for a tile screed is not the best option. It is not possible to go through the entire base in a comprehensive manner, but only the area where the greatest deformation is observed.
- The first method of fastening the boards is suitable if the deformation of the boards is not particularly severe. The joists are located using the tapping method and each walking board is secured with self-tapping screws to each joist. Usually this method is enough to slightly level the base under the screed.
- If the floorboards are very loose and gaps have formed between them from under which the cold is drawn in, there are 2 options. The first is to make a layer of insulation under the screed (this can be penoplex or mineral wool, or you can add a layer of expanded clay). This option is accompanied by an additional raising of the floors. If it is not practical to lift the floors, you will have to open the floors and pull the boards together, pressing them tightly together using wedges. Frankly rotten boards can be sorted out immediately.
The boards must be treated with an antiseptic. If it was possible to get to the logs, then they also need to be processed. The better the antiseptic, the longer your wooden floor under the screed will be protected from rotting.
Next, it is necessary to install a waterproofing layer so that liquid concrete does not leak onto the wooden floor:
- You can cover a wooden floor with construction polyethylene film. The film should be laid with an overlap of 10 cm, the overlaps should be taped.
- You can treat the floor with bitumen mastic for internal use. Modern mastics for the home do not have an unpleasant odor, so they can be used for waterproofing residential premises. The so-called waterproofing trough is made with mastic - that is, the old floor is coated with 2-3 cm extending onto the walls.
Reinforcement
The two most popular methods of reinforcement are metal mesh and fiberglass:
- The technology for arranging the reinforcing mesh is carried out using an unconventional method. A layer of concrete without beacons is immediately poured. A break of 1 month is taken for hardening. Then the mesh is laid, beacons are installed and the second layer is poured. This technology avoids unwanted punctures of the waterproofing film.
- Fiber reinforcement differs from the above method. The strengthening material is added directly to the concrete solution at the stage of its preparation. The peculiarity of fiber fiber: its molecules are located in a chaotic order, therefore, when interacting with the molecules of the cement mixture, the material is strengthened in all directions. The use of fiberglass significantly reduces the overall weight of the concrete covering, therefore reducing the pressure on the wooden flooring.
Return to contents
Installation of beacons
The beacons are mounds of concrete for the screed, which are formed along the entire perimeter of the future floor at a distance of 15 cm from each other, provided that the 120 cm rule is used. The distance from the wall should be 25-30 cm. A metal profile is laid on the formed beacons. It should be recessed along the marks corresponding to the leveling layer. Installation must be carried out within the first hour after mixing the solution. Otherwise it will be difficult to work with.
Return to contents
Mixing the solution and pouring
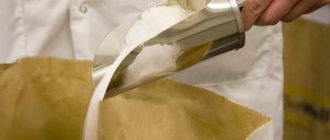
You can fill the floor with a solution prepared from ready-made dry mixtures. They are diluted with water to the required consistency, according to the instructions on the package. It is better to use special equipment for mixing. The prepared solution must be consumed within 15 minutes.
For self-preparation, it is better to use M400 cement and river sand in a ratio of 1: 3. You can work with the prepared solution for 1.5 hours. To improve the convenience of work, plasticizers or regular washing powder are used. Additives are pre-diluted in water. The powder is taken at the rate of: 1 handful for every 100 liters of water.
You should start laying the screed from the corner farthest from the door. Each measured area must be filled in one stage. The process occurs continuously. Leveling is carried out immediately after pouring. The beacons are removed after a day, and the resulting holes are filled with the same solution and smoothed with a trowel.
Return to contents
Tips for working
Recommendations to avoid complications during the work process:
- It is better to make a heavy layer for screed on a wooden floor.
- Waterproofing is a must.
- It is not recommended to pour concrete onto fresh wooden boards, as they are still subject to deformation under the significant weight of the screed.
- The solution must be prepared an hour before pouring.
- It is not recommended to dry fresh concrete flooring with heating devices. Drying should be natural.
- It is important to follow the care requirements for fresh screed - moisturizing, insulating with film.
- Drafts should be avoided in rooms with fresh concrete surfaces.
- The sequence of concrete pouring should be strictly monitored.
Return to contents