What kind of solder to solder
These alloys are made from tin, lead, copper, nickel, or silver. Tin-lead solder (PLS) is used to work with circuit boards and household wiring. Despite the great variety, they can be divided into two types:
- soft (melting point up to 300°C);
- solid (melting point over 300°C).
Any form of release: lump, wire, powder, paste. A universal option is wire up to 2 mm in diameter. It is convenient to put it on the soldering iron tip or insert it directly into the soldering zone.
An interesting offer from manufacturers is solder paste or powder. This is finely dispersed solder, to which liquid flux is added for viscosity. The result is a consistent composition with high adhesion, which can be used for soldering without prior fluxing. We simply apply the paste to the contacts and heat it up.
You can work without a traditional soldering iron, using a soldering iron. Thanks to the fine grinding, the solder melts quickly and instantly spreads over the work area (with the help of flux).
This is a good option for a beginner master. The work is simple, but you won’t be able to learn how to solder efficiently in difficult conditions: when you don’t have good flux and solder at hand.
Tags: soldering, solder, wires, lighter
Comments 126
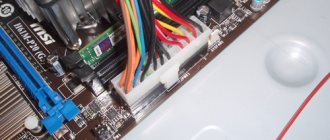
In a car, if you pair two wires, there are no solders! One horseradish will fall off or rot. Only high-quality twisting and electrical tape ZM) Tested by motorsport for many years)
the solder will never rot, but the twist oxidizes and the resistance increases
Yeah, it just breaks off near the soldering. all normal auto electricians always advised twisting + crimping, or just twisting if there are no sleeves. And yes, good twisting lasts longer than soldering.
nothing will break off, it’s been checked, everything I soldered is nothing, but I crimp it, it always rots and oxidizes, so I don’t need it here
It's not the soldering that falls off, but the wire next to it, because... There is a banal overheating. Well, soldering makes the wire rigid, and as a result, vibration works in places near the soldering. if the twist is well insulated, there will be no deterioration in contact for many years. In technology where vibration is the norm, soldering is often prohibited.
what kind of vibration is there :))) not on a drilling rig...how will it fall off from the vibration :))? this is a cast assembly :), damn, I don’t know what you’re smoking there, what kind of overheating of the soldering is there?, at military facilities everywhere you solder wires the size of your hand, what are you telling me... on poplars all the contacts are soldered into a connector that twists... similar to... xs Alika sells these for aug2 wires
Ah... news, I started using this method at work 20 years ago.
I've been soldering wiring in my car with a lighter for about five years now)))
I've had it lying around for half a year and tried it out for the first time yesterday. Works! ))
work works, but 100000% rare shit)
Ha, well, this is from the series - “without fish and cancer, fish”))
It's clear that the tip of this soldering iron won't last long. But it heats up no worse than a household 220 volt one. You could also compare it with a soldering station))
I didn’t compare it to anything at all)
and there are different stations)
Well, how? You compared this soldering iron to a rare s***. But I don’t dare object to you, I believe that you are a great specialist if you give such a highly intellectual assessment))
It's all strange. I don't have a soldering iron with a socket at hand. The twist won't last long. There is no terminal block or terminals either. But thin solder 0.5-0.7 mm POS-61 with flux on a reel and a purely English lighter are ALWAYS in your pocket.
there is neutral flux... no need to clean it off... don't confuse people
This is for perfectionists and aesthetes)
if the flux is normal, it is not visible at all, and it protects against corrosion if anything.
I always have a 12V soldering iron with me in my car. I’ve changed several cars, but it’s been wandering around with me for almost 30 years. Often in demand!
It is much simpler and more reliable, in a garage if there is no soldering iron or in the field when there is only a car nearby, we twist the wires with pliers or mighty fingers, only without any additional fiddling around, then we stupidly weld the end of the twist with the help of a battery, there you need to poke the tip on a split second and you will get a neat copper ball at the end of the twist. Ideally, you should “poke” the tip of the twist using a graphite brush, holding the twist itself with pliers or an alligator clip. There is plenty of information on the internet on how to properly weld twists.
Read also: What parts does the active part of a transformer consist of?
What about the ECU? Well, what the hell with such welding.
What does the ECU have to do with it? You’re not going to weld the wires of the ECU itself or the electrical wiring of the car itself, so of course you can damage anything in the car. In this way, you can simply weld third-party wires. And the network will not sag, unless of course the twists are the diameter of a finger. As a last resort, you can remove the terminals from the car altogether.
A gas soldering iron has been living in the garage for a year. No questions. Refill for half an hour. I took 270 rubles from China.
and in my car I have a 12-220 inverter, homemade from a computer UPS. You can connect any standard soldering iron.
And I... and I... have a soldering iron - I have it at home, I have it in the garage, I have it at work, I have it in the car, I have it at the dacha, The neighbor... has it
and, and, and... there is a welding machine. but there are no matches...for gas...() Wow! This is true! (so I solder the wires where necessary)
Do they have electricity for them?
Well, why did you attack a man, he was the 2nd Columbus who “discovered” America: ^D
They also use Chinese paste. Always helps. A small jar is always in the glove compartment
Chinese solder paste is better and more convenient.
I always carry a small, convenient 5v soldering iron in my car, plug it into the phone charger and you’re ready to solder)))) just in case, when I travel, I take a power bank with me and the soldering iron also works from it)))
and my soldering iron is set to 12V. I stupidly stick it into the cigarette lighter
Why the hell is there a soldering iron in the car?
A person who has a Lada (like me) needs to carry everything with him! suddenly the apocalypse
Hmmm. I had a “wonderful cable”), so I carried half the car in the form of spare parts and a bunch of tools.)
A person who has a Lada (like me) needs to carry everything with him! suddenly the apocalypse
It’s easier to take a trailer with you - a spare engine, gearbox, axle, cardan, the whole suspension, and a lot of little things))))) And so everything is correct - who has a Lada or some other car made in the USSR (no offense to the products, then everything was done with a huge reserve, but under the conditions and condition in which we usually get these cars...), and even an old foreign car, it’s better to carry a bunch of spare parts with you, especially on a long trip
Why the hell is there a soldering iron in the car?
Well, you’ve been traveling for a while and you want to solder a whale from China))
Friend, you are a damn genius! I can just see an advertising campaign for the sale of 12-volt soldering irons: “Nothing to do with yourself in a traffic jam? Are you waiting for your wife in the car? Are you drinking with friends at home in the car and have nothing to do with yourself? SOLDER! A soldering iron and a piece of solder are your best friends in the fight against boredom!” ))
If the solder is without flux and there is no rosin on hand, then you can use Aspirin (acetylsalicylic acid). Even steel can be tinned well with it. It smells terrible, but in field conditions it is quite applicable.
And also, as they wrote here, what if there is no light, how to connect, and someone at home has soldered wiring? And the second point, the antenna is still on the same radio, the cable is one end to ground, so until I put a terminal on it under the bolt, and just crimped it with pliers, I soldered it every week, and it fell off due to vibration
This crimped and soldered terminal on the wire is 11 years old - and nothing has fallen off, and there are dozens of them. She was standing on a vehicle.
I can take a photo of a bunch of wires that are like new on the terminal, but under the terminal and the braiding are reddish-blue oxidized, and these are factory wires from a car made in 2007
Tinned with acid and not washed. And the acid devoured the metal.
Who, whom and for what? If you are talking about the wires that I wrote, then this is a factory wire, and there are no traces of soldering, there is a crimp, and the oxidized wire is under the braid starting from the terminal block
acid flux was used when soldering, so it eats everything around
I'm already confused, what are you talking about?
Yes, there is flux and solder, but the problem with the soldering iron is that everyone has a mini torch in their car or home? Or maybe I don’t smoke, where can I get a lighter? I specifically decided to try to heat such solder, and it began to drip, a mini burner is a good thing, but there is a possibility of melting the cable braid, and again the solder flows, it’s good to twist the wires, but what if this is not possible? And as the author says, with little skill, you can heat up the soldering iron and solder the wire, and where did you get the idea that twisting is a bad thing? I have a radio station on my car, over the course of 5-7 years the wiring has changed three times, this was when I changed the radio, when I decided to install a larger cable, and not long ago when I changed the car, and that last time doesn’t count, because the connection with the battery it goes through the terminal under the bolt, but then there is a twist that I didn’t touch
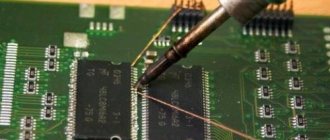
Soldering parts to boards
This process is more complex and serious than the methods described above, and it is not so easy to do it without a soldering iron, but it is quite possible. In this case, to solder, you will need the following tools:
- autogenous lighter;
- pliers;
- clip;
- brush;
- flat screwdriver.
This will be quite enough. But the most important item, without which such soldering will be impossible, is solder paste. Using this method, you can solder not only a wire, but even a radio component to the board.
First, you need to clean the area on the board where the connection will be made, and remove the insulation from the wire contact. Then the paste is applied to the board: a brush is used for this. The soldering area is heated by fire sources. This way the connection occurs, and as a result, it is possible to solder the contacts
There seems to be nothing complicated in this process, but heating should be done carefully, and it is desirable that the flame be directed, so it is recommended to use an autogenous lighter. Do not hold the wire or part with your hands - pliers or pliers are suitable for this.
A screwdriver or paperclip is used to connect the wires on the board and hold them until the final connection is made.
Necessary tool
If you need to solder a wire or something else without a soldering iron, you need to prepare the following tool:
- pliers with thin noses;
- pliers;
- knife;
- scissors;
- sandpaper;
- file;
- needle file;
- brush.
An alcohol lamp or dry alcohol lamp should be used as a fire source.
The question of how to solder without a soldering iron seems absurd only at first glance. Such soldering can be done in very simple ways, or it can be done efficiently using solder paste.
A soldering iron is a very convenient tool that allows you to quickly and reliably connect a wide variety of metal parts and mount electronic components on a printed circuit board. Its absence or power outage at the most inopportune moment significantly complicates installation. But we know how to solder an electrical wire without a soldering iron, and we hasten to share this information with all interested readers.
How to desolder a radio element
There are two types of microcircuit pins: - pin pins of the chip are soldered into the holes of the board on its reverse side (DIP - chips); - planar leads (SOIC - chips) are soldered to the pads on the side where the microcircuit is located.
Soldering DIP chips
- Sequence of actions for desoldering:
- Remove varnish from the chip solder areas with a brush or cotton swab dipped in acetone or remover (in the case of a varnished board).
- Remove any remaining solvent and varnish with a brush dipped in ethyl alcohol.
- Heat the soldering iron to operating temperature.
- Touch the soldering iron tip to the first leg of the chip (on the back of the board) until the solder completely melts.
- Remove melted solder with a suction syringe. When using a needle instead of a syringe, place the needle on the leg of the chip and, turning the needle around its axis, lower it all the way into the hole.
- After completely removing the solder from the hole, start desoldering the leads from the next hole.
- Remove the microcircuit after all pins have been completely unsoldered.
Dismantling planar chips
The sequence of actions for desoldering SOIC - chips that are not glued to the board:
- Remove varnish (if any) from the legs of the microcircuit with acetone or remover. After removing the varnish, clean the board from any remaining varnish with ethyl alcohol.
- Apply liquid flux to the soldered leads on all sides of the chip.
- Solder (short circuit) all the legs of the chip on each side, passing the tip along all the pins of the chip and dispersing the solder along the legs. There should be a lot of solder applied to the legs so that after removing the soldering iron, the solder continues to be in a molten state.
- Run the soldering iron over all sealed sides of the chip, ensuring the solder melts on all sides, then remove the chip with tweezers.
- To unsolder a microcircuit glued to the board, you need to unsolder each pin of the microcircuit one by one, lifting it with tweezers above the contact pad. After unsoldering all the legs, remove the microcircuit mechanically (with a knife), being careful not to damage the board.
Soldering wires without using a soldering iron
The question of how to solder copper wires with a cross-section of up to 0.75 mm² without a soldering iron is easily resolved. The tinned ends of the wires are twisted together. The soldering area is heated until the solder layer melts. As a heater, you need to use a source of narrowly directed flame: a candle, a lighter, matches. The solder applied to the surface during tinning should be enough to solder the wires.
If you need to solder a wire to the middle of another wire, then its end should be wrapped around the connection point (2-3 turns) or clasped around this area, bending the wire 180º. The soldering itself is done in the same way as connecting the ends of the wires.
It is recommended to solder aluminum cookware with special solder made from tin and lead.
When soldering larger wires, the mass of tin in the tinned layer may not be enough for a reliable connection. In this case, finely grated solder should be poured on top of the twisted area and heated until it melts and fills the gaps in the twist. This way you can solder copper wires with a diameter of up to 2 mm without a soldering iron.
Sometimes it is necessary to solder a wire to a flat surface. To do this, the end of the wire and a section of the surface of the part (case) are pre-tinned. The wire is pressed against the plane of the part, and finely sawn solder is poured on top of the soldering area. By heating the parts from below, the tin melts.
Features of soldering in the groove
Soldering of wires with a diameter of up to 3 mm can be done without a soldering iron using a groove. This groove is made of aluminum foil about 0.8 mm thick. Soldering is done in the following order. At the ends of the connected wires, the insulation is removed to a length of about 30 mm. The bare ends are twisted together or laid parallel.
The foil is cut in the form of a short strip with a width equal to the width of the connection area, and is bent in the form of a groove, covering the joined wires. Crushed solder and rosin are evenly poured into the groove. One end of the foil is tightly wrapped around the area to be joined so that the solder does not spill out. When working, pliers with thin noses are used. The area covered with foil is heated with a candle, lighter, etc. until the solder melts. After the mass hardens, the foil is removed.
If necessary, excess solder is removed with emery cloth or a file.
Choosing rosin and fluxes
The choice of flux or rosin depends on what materials will be soldered:
- Tinned parts. In this case, liquid rosin is used. You can replace it with flux paste, which does not dry out and does not require removal of residues. Rosin gel has a gel-like structure, the product is easily washed off with water.
- Working with small radio components. Activated rosin fluxes, for example LTI-120, are suitable for this. Glycerin hydrazine paste also has positive qualities. However, after using this product, the parts must be degreased.
- Soldering of iron, brass and copper parts of small sizes. Liquid Rosin Lux copes well with the task.
- Connection of massive galvanized parts. In such cases, acid fluxes (orthophosphoric or soldering acid, Fim) are used. Acidic compounds work quickly, so the metal does not need to be heated for a long time.
- Soldering of aluminum parts. To solder these types of wires, in the past the soldering iron tip was usually treated with rosin. However, now F-64 flux is used to work with aluminum and copper, which provides good adhesion of the metals. The product contains toxic chemicals, so it is recommended to work in a ventilated area. F-34 flux, which has less activity, is considered safer.
Preparation
Work place
Soldering is always done under normal general lighting (no worse than 500 lux); if it is necessary to create more comfortable conditions, a local lighting source is used.
Good ventilation should be ensured. The best results are obtained by a hood; in its absence, solder intermittently to ventilate the room from rosin vapors (every hour during intensive work).
Selecting a soldering iron by power
Solder using soldering irons of varying power. It is usually assumed that:
- low-power soldering irons (20 – 50 W) are convenient for working with electronics and allow you to solder thin wires;
- A 100-watt tool is used to solder layers of copper no more than 1 mm thick;
- 200 W or more allows you to solder such massive parts that initially require the use of powerful soldering irons.
The power of the device is easy to judge visually: a 50-watt soldering iron turns out to be slightly larger than a fountain pen, while a 200-watt soldering iron has a total length of approximately 35-40 cm.
Soldering iron for work
Before using it for the first time, remove any remaining factory grease from the housing. Their burnout leads to the appearance of smoke and an unpleasant odor. Therefore, the soldering iron is turned on through an extension cord, exposing it outside through the window for a quarter of an hour.
Then the soldering iron tip is forged with a hammer: compacting the copper increases service life. The tip of the sting is shaped:
- at an angle or cut - for spot work (an example is shown in Figure 5);
- knife-shaped - with such a sting several contacts are soldered simultaneously (typical for microcircuits);
- special - they are used to solder some types of radio components.
Figure 5. An example of universal sharpening of a soldering iron tip and proper maintenance of its working area
Before you start soldering, you should clean the tip from the oxide film. This procedure is carried out with fine-grained sandpaper or a velvet file, as well as chemically: immersion in rosin. The cleaned tip is tinned with solder.
If necessary, you can solder at the point with a powerful soldering iron. To do this, a copper wire with a diameter of 0.5 - 1 mm is wound onto its tip, using its free end to heat the solder.
Parts for soldering
They always solder in several stages. First, prepare the surface of the metal conductor:
- removal of the oxide film followed by degreasing;
- tinning (applying a layer of tin to contacting surfaces).
Then you can connect the parts.
Be sure to clean used wires.
The oxide film is removed with a file, sandpaper, or a knife blade. In the case of flexible wires, each wire is processed.
The insulation of the enameled wire is removed by dragging it along the surface of a PVC tube, to which it is pressed with a heated tip.
A sign of readiness is a uniformly shiny surface without any remaining oxide film.
They always solder with degreasing, i.e. wipe the surface with a lint-free cloth or napkin moistened with acetone or white spirit.
New wires do not have an oxide film. They are serviced immediately after the insulation is removed.
It is necessary to tin the copper conductor using flux; after heating, the solder should cover the surface of the metal with a thin layer. If there are nodules, it is not recommended to solder; the wire is placed vertically, passing the soldering iron from top to bottom. Excess molten solder flows onto the tip.
If it is necessary to solder aluminum, then the stripping and tinning procedures are combined. To do this, place a wire coated with rosin in sandpaper, heat it while rotating it.
The quality of some types of flux decreases during long-term storage, as well as under the influence of air moisture. Therefore, such fluxes are soldered with additional shelf life control.
Soldering wires without using a soldering iron
Wires are prone to breakage. You can solder a wire without a soldering iron if you take into account several recommendations:
- To begin with, the break point is located and the ends are cleaned.
- After this, the wires are twisted together to create a strong connection.
- The area being treated should be slightly warmed up. To do this, you can use a lighter or other heat source.
- The solder is also heated to a plastic state, after which it is applied to the joint.
When working with large-section wires, you should grind the solder and sprinkle it on the surface, then heat the surface with a candle or lighter. In this case, the solder fills the free space, thereby ensuring reliable contact. When considering how to solder without a soldering iron, you should take into account the fact that only wires with a diameter of 2 mm can be processed in this way.
Soldering wires without a soldering iron
If you need to solder a flat element, then the parts are pre-tinned. At the time of soldering, the core is pressed and sprinkled with shavings of the selected alloy, after which the surface is heated.
We repair dishes without a soldering iron
Various containers and other kitchen utensils can be repaired using so-called pencils, which are sold in specialized stores or markets. If such a device is not available, we suggest doing the following:
- We treat the damaged area with sandpaper.
- We remove traces of rust and also perform additional treatment with hydrochloric acid.
- Place a wide plate on the outside of the container by hand. This is needed to prevent solder leakage.
- From the inside, pour crushed tin and rosin onto the damaged area.
- Place the container on the fire and wait for the solder to melt.
Read also: Steady rest for lathe 16k20
Solder paste: we quickly connect parts
Another way to connect wires or metal parts without a soldering iron is to use a special paste consisting of the following ingredients:
- hydrochloric acid – 32 ml;
- tin – 7.8 g;
- zinc – 8.1 g;
- water – 12 ml.
First, we dilute hydrochloric acid in water, and then successively pour zinc and tin into it. Then we add additional components:
- glycerin – 10 ml;
- lead powder – 7.4 g;
- tin – 14.8 g;
- zinc dust – 29.6 g;
- rosin - 9.4 grams.
All ingredients are preheated and mixed together after melting.
The resulting paste-like composition should be spread on the area to be joined. After this, heating is carried out using a candle or lighter until this kind of solder completely melts. The paste connects even thick wires quite reliably, but you will have to tinker with its preparation. It is very important to comply with all the above proportions in order to achieve the desired result.
The wire that was soldered has come off the garland, is it possible to repair it without a soldering iron, how else can this wire be attached?
Usually, a broken wire can be returned to working condition if you simply connect its two ends together at the break point - in theory, for electric current, it is not even necessary for the wire to be a single whole and it will flow, even if the wires are just tightly adjacent to each other . Therefore, to restore the working state of our device, it is enough to simply, for example, twist the wires together (only when the electrical appliance is turned off, of course. For extra safety, you can even wear rubber gloves), and then wrap the fastening area with electrical tape.
If you still need to solder the wires, then in the absence of a soldering iron you can use solder paste.
Without a soldering iron, you can firmly attach the wiring to the wiring in order to further use it for its intended purpose.
It’s not news to anyone that wires can be twisted by hand, having first disconnected them from the electrical network. Twisted wires must be well insulated with insulating tape.
But there is a better solution. The electrical cables twisted into a single unit (their connection points) must be covered with molten plastic on top. On the market you can buy special finger plastic, which is melted using a special gun and coated with it on the twisting area. This plastic can be heated with a match or a lighter.
You can also buy a wire connector at an electrical parts store. Insert the wiring into it on both sides and tighten it with clamping bolts, and then insulate this connection.
Modern technologies simplify our life: you can even use technology such as soldering wires without a soldering iron. It appeared recently, but has already become indispensable: its use is often easier than working with a real device.
Read also: Igbt transistors how to check
Soldering is one of the types of joining metal parts, applied to unloaded products. Connects non-ferrous metals of small sizes, connection in another way, which is impossible. Used in electrical engineering to work with low- and medium-current wires. The soldering method involves connecting metal surfaces by applying a low-melting metal that has a high coefficient of adhesion to the surfaces being connected and good conductivity.
The tool itself - the soldering iron - determines the method of applying the connecting substance. But there are methods that explain how to solder a wire without a soldering iron in extreme conditions where there is no electricity.
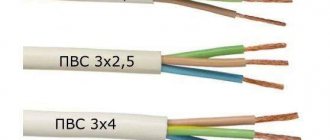
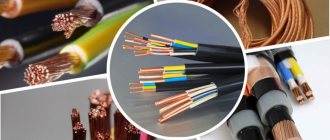
Purpose and classification of wires
A wire is an electrical product that consists of 2 or more metal wires covered with a winding of some non-metallic fabric. Serves to connect the current source with the consumer. The wire consists of 2 parts. The first is the core - the part that conducts current. The second part is insulation, that is, what protects the core from external irritants. Copper and aluminum wire is usually used as a core; the insulation is made of paper, rubber, or varnish.
There is a certain classification of wires:
- winding;
- copper;
- high resistance wires;
- installation connecting;
- output;
- wires for rolling stock;
- insulated for overhead lines;
- non-insulated;
- wires for geophysical work;
- heat resistant;
- thermoelectrode;
- warm-up;
- automobile;
- aviation;
- installation;
- communication wires;
How to use
If there is no liquid flux, use any other, but it will be uncomfortable to work with. You can prepare liquid flux yourself by dissolving pieces of pine rosin in alcohol or pieces of zinc in hydrochloric acid in advance.
Copper braid is best for removing solder alloy. The braid section must be coated with flux. This can be done with a brush, but it is better that the entire surface on which the solder will be collected is covered, and parts of the wiring inside the braid will remain inaccessible to the brush.
It will be more effective to apply flux by immersing the end of the braid in it. To do this, it is better to use a stable vessel with a fairly wide neck.
After wetting the braid with flux, it is applied to the place from which the solder needs to be removed and heated with a soldering iron. The heated braid transfers heat to the solder, and it melts and sticks to the braid, leaving the contacts clean.
When enough has been collected to prevent further collection, the end of the braid is cut off and the next section is used.
Soldering utensils or containers
The device of a homemade soldering iron.
Very often there is a need to solder a small hole in a pan or bucket. If the hole is no more than 6-7 mm, soldering can be done without a soldering iron. To do this, it is enough to use POS60 solder. The area around the hole must be carefully sanded inside the container so that the hole is given a conical shape (with an expansion into the container). This area is then treated with hydrochloric or soldering acid. A small thin plate is placed at the bottom of the hole to prevent solder leakage. From inside the container, crushed solder and rosin are poured into the hole. The container is placed on a source of directed fire. Molten solder seals the hole.
If you need to solder aluminum cookware, you should prepare special solder in advance. You can use one of the recipes: tin and zinc in a ratio of 4:1; tin and bismuth in a ratio of 30:1 or tin and aluminum in a ratio of 99:1. Such alloys can only be prepared at high temperatures by stirring the melt.
Read also: Types of air humidifiers for apartments
How to repair a broken wire
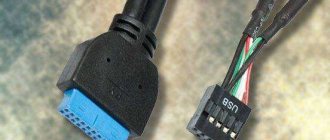
If the study shows that the cable is still broken, you will have to connect it. This procedure is carried out in several stages.
At the very beginning you will have to take care of the insulating material. The insulation and transparent protective layer must be completely removed from the headphone wires. Special pliers or a stationery knife will help make the work much easier. As a last resort, you can use scissors, but this risks cutting the wire. You only need to strip one and a half centimeters of the wire, and then just make a cut.
Please note that headphones with a microphone consist of wires connected to each other. Two wires, one of which conducts a signal, and the other is ground, are located nearby. A fracture can occur in one of them, or it can affect both. Let's move on to the next step and cut off part of the wire
The cut must be made in such a way as to divide the headphones exactly in half; it is important not to split the wire, but rather to bite it. To avoid exposing the cable to electrical damage, it must be shortened to the same length on both sides.
It can be considered lucky if only one wire breaks
In this situation, you can do without cutting and extending the cable. With the same result, this saves a lot of time. Twist the wires so that they form a secure connection. Using a soldering iron, apply a layer of solder to securely fix the twisted area.
As a final step, heat the heat shrink tubing to form the desired shape. Experts recommend using a hairdryer or similar device.
When a headset breaks down, many owners wonder whether it is possible to repair the headphones themselves without a soldering iron. Experts answer - no. All wires require reliable soldering to ensure stable contact. Twists that are not fixed with solder will constantly fall apart, and there is no question of sound quality.
Soldering process with an electric soldering iron
How to solder wires, what you need to do for this:
- Tin the soldering iron. To sharpen the tip, you need to use sandpaper until you get a smooth, shiny surface. After this, the heated tip is immersed in rosin and solder. The tip is applied to a wooden plank. The manipulations are repeated until the soldering iron tip acquires a silver color.
- Tin the wires. They are cleared of braid and coated with rosin, and a soldering iron tip is placed on top. After the flux has melted, the wire is removed.
- Solder the tinned parts. The tip of the device is treated with solder, the soldering area is heated to the required temperature. After covering the wires with tin, unnecessary movements are avoided. For quick cooling, use a fan.
Watch this video on YouTube
Features of soldering when using flux
Soldering parts using flux has the following features:
- The melting point for rosin should be lower than for solder. This condition is considered mandatory for strong adhesion of the parts.
- The flux should not come into contact with molten tin. Each product forms a separate coating that ensures reliable connection of parts.
- Rosin should be evenly distributed over surfaces.
- Liquid flux must wet all parts to be sealed and have increased fluidity.
- It is necessary to choose a product that dissolves and removes films of non-metallic materials that appear on surfaces.
- It is necessary to use a flux that does not react with the materials being joined. This helps maintain the performance of the elements.
Soldering stranded wires
Many people are interested in the question of how to properly solder such wires with a soldering iron. The connection is made as follows:
- wires are cleared of insulation;
- bare veins are cleaned to a metallic shine;
- joints are treated with solder;
- parts are fastened by twisting;
- the soldering area is cleaned with sandpaper (there should be no burrs that impair the strength of the fastening);
- the connection is covered with molten solder;
- the place of fastening is wrapped with electrical tape.
Watch this video on YouTube
Is it possible to solder copper wire to aluminum
Aluminum and copper conductors can be soldered. In this case, use special solder for aluminum. The copper wire must be tinned with high quality. This is enough to prevent chemical reactions between copper wires and aluminum wires.
How to solder correctly with a soldering iron and rosin
How to solder aluminum at home, features of aluminum soldering
How to properly connect copper and aluminum wires?
Types of terminals for connecting wires
Methods for connecting electrical wires to each other
Methods for connecting SIP wires with different cables
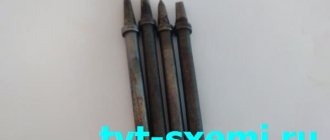
Homemade soldering iron
In places where there is no electricity, you can use a homemade analogue of a soldering iron. To do this, you need to find a copper rod (wire) with a diameter of 4-5 mm and a length of about 10 cm. One end of the rod is ground off in the form of a screwdriver, and the other is fixed in a wooden handle. This round shaped handle can be easily cut from a tree branch. Such a basic soldering iron is heated from an open flame. The soldering process itself is not much different from soldering with an electric soldering iron. You just need to adapt a heat-resistant stand into which the device is installed when heated. Installation should be done quickly - with one movement of the hand. Solder and rosin should be in a flat container. The soldering of wires or other parts is carried out in close proximity to the heating source.
Some tips on how to use a homemade soldering iron
In general, soldering is the joining of two metals using another molten metal. This metal, called solder, must fill the space between the parts and adhere to the surface of the materials being joined.
The most commonly used solder is a tin-lead alloy with varying tin content; Moreover, the more tin in the alloy, the lower its melting point. Thus, the common solder brand POS40 (tin content 40%) melts at a temperature of 230ºC, and POS60 (60% tin) - at 180ºC. The melting point of a tin-lead alloy with the introduction of bismuth (POSV33 solder) has an even lower melting point - 130ºС. When soldering aluminum, special alloys with a melting point of more than 400ºC are required. Standard tin-lead solders are sold in the form of rods or wires with a diameter of up to 2 mm.
Soldering cannot be carried out without cleaning the parts in the joint area from the oxide film. To do this, it is necessary to use flux, i.e. a substance that prevents the formation of an oxide film during soldering. When joining copper parts, rosin is usually used as a flux. Cleaning the surface of workpieces can be done using soldering acid or other acids (for example, phosphoric acid in relation to aluminum soldering). If it is necessary to solder steel products or galvanized parts, then rosin will not help; soldering acid should be used. Modern solder wire of the POS type has rosin inside it, which ensures soldering of copper without additional flux. To connect steel and nichrome elements, a flux made according to the “folk recipe” - aspirin - is sometimes used.
The generalized mechanism for soldering metals is as follows. The connected parts are pressed tightly against each other. Solder and flux are introduced into the soldering area. The soldering area must be heated to a temperature sufficient to melt the solder and flow into the gap between the metals. Before hardening, it is necessary to ensure that the melt is in the gap. Usually the whole process is easily done with a soldering iron, but parts can be soldered without it. To do this, the most important thing is to find an alternative heater that does not use electricity.
Purpose and classification of wires
A wire is an electrical product that consists of 2 or more metal wires covered with a winding of some non-metallic fabric. Serves to connect the current source with the consumer.
The wire consists of 2 parts. The first is the core - the part that conducts current. The second part is insulation, that is, what protects the core from external irritants. Copper and aluminum wire is usually used as a core; the insulation is made of paper, rubber, or varnish.
There is a certain classification of wires:
- winding;
- copper;
- high resistance wires;
- installation connecting;
- output;
- wires for rolling stock;
- insulated for overhead lines;
- non-insulated;
- wires for geophysical work;
- heat resistant;
- thermoelectrode;
- warm-up;
- automobile;
- aviation;
- installation;
- communication wires;
Soldering process
After each of the connected parts has been cleaned and treated with flux, they proceed to directly soldering the wires to the contact area of the battery.
To carry out this final procedure, you can use the same 25-watt soldering iron that was used to prepare the battery terminals from NI or CD.
As a solder, you should choose a low-melting composition, and for good spreading, use a rosin-based flux.
The final soldering procedure should take no more than 3 seconds. This applies to any type of battery (both NI and CD).
When considering how to solder a wire and a battery, it should be noted that this situation occurs much more often than it seems. First of all, this applies to special construction tools (if it is necessary to solder screwdriver batteries, for example).
There are often cases when the built-in power supply of the tool used is completely destroyed for some reason, and there is nothing to replace this screwdriver with. In this situation, the conductors powering the device are soldered to a spare battery designed for the same voltage.
The considered technique can be used when you just need to solder two batteries together.
It should be noted that instead of soldering, spot welding is used in production for batteries. But not everyone has a device for this type of connection, while a soldering iron is a more common device. That’s why soldering comes to the rescue at home.
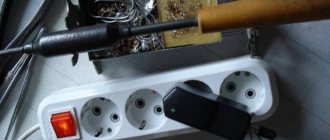
We use flame
The easiest way is to locally heat the joint with an open flame, candle or lighter. The melting point of ordinary solder is 200-280 degrees. Any combustion source can easily cope with this value.
So-called turbo lighters are best suited for these purposes, in which the flame comes out under pressure, creating a powerful local heating area. In addition, such a flame will not smoke the junction of the wires, and it can be directed with high precision.
There are compact gas burners that are generally ideal for such work. If you go on a hike, or to the country, this tool should be at your fingertips.
For such cases, it is better to use solder that is not refractory, for example, POSV33. Its melting point does not exceed 150 degrees. If you don’t have flux on hand, you can use the folk method. Apply crushed aspirin.
The wire is stripped, treated with flux, and heated with a flame. Solder in the form of a thin wire is placed directly into the heating zone. As soon as the tin begins to melt, a drop is applied to the heated twist, and then with a flame we achieve penetration of the melt throughout the soldering area.
Soldering without a soldering iron with a flame from a match or candle is accompanied by soot, so this method should be used only as a last resort. An alcohol lamp or a dry alcohol tablet is good for these purposes.
Solder paste for soldering without a soldering iron - application features
With any heating method without a soldering iron, working with hard solder is inconvenient. For soldering using a non-contact heating method (namely, we are considering them), special soldering pastes have been developed.
Any paste must contain the following components:
- Ground powdered solder. For different types of soldering, different degrees of crushing are used;
- Cleaning composition – flux;
- Binding additive for maintaining consistency and fixing parts to be soldered before soldering;
- A variety of additives that accelerate reaction, activators, antioxidants.
Solder in pastes can be either compound (lead, tin and silver in different proportions) or simply lead. The last option is the most common.
The cleaned contacts are coated with paste, connected to each other and heated in any way. The flux, having completed its work, evaporates (partially), and the solder included in the paste instantly melts and efficiently connects the components being soldered.
Solder penetration with this method is very high, the quality of the connection is much better than when using hard solder.
Soldering with paste is used not only in the absence of a soldering iron. For mounting radio components with SMD contacts, this method is simply irreplaceable.
Another advantage of the paste is that it coats the stripped contacts, reducing the likelihood of oxidation during thermal evaporation of the flux. The consistency is like sour cream; when heated, it does not have time to become more liquid and drain from the soldering area. Solder instantly envelops the contacts and remains on the surface of the parts.
An example of soldering with solder paste without a soldering iron in this video.
Another convenient material if you don’t have a soldering iron is solder tape.
In fact, it is a thin foil of solder. With its help it is convenient to connect twisted wires. The technology is as follows:
- We strip the wire, form a twist;
- Process with flux;
- Wrap the soldering area with tape;
- We heat it using any method other than a soldering iron.
The flux is located inside the solder roll and does not evaporate when heated. The thin strip melts quickly and the solder fills the tiny gaps at the junction.
Connecting wires without a soldering iron
Thin wires from a garland or any electronics can be easily connected to each other without using a soldering iron. For this purpose you will need:
- tin the ends of the wires;
- twist them together at the place of tinning and, accordingly, connection;
- heat the desired area using a lighter or matches until the solder melts; you can also use a lit candle.
This method allows you to firmly connect the wires to a microcircuit or any other electronic part.
We do the same thing if we need to solder one wire to the middle of another. In this case, the tinned end is simply bent in the form of a hook and put on the desired area.
To solder thick wires after the tinning procedure, you will need to additionally treat the surface with crushed solder. This will provide increased connection reliability.
Soldering wires without using a soldering iron
The question of how to solder copper wires with a cross-section of up to 0.75 mm² without a soldering iron is easily resolved. The tinned ends of the wires are twisted together. The soldering area is heated until the solder layer melts. As a heater, you need to use a source of narrowly directed flame: a candle, a lighter, matches. The solder applied to the surface during tinning should be enough to solder the wires.
If you need to solder a wire to the middle of another wire, then its end should be wrapped around the connection point (2-3 turns) or clasped around this area, bending the wire 180º. The soldering itself is done in the same way as connecting the ends of the wires.
It is recommended to solder aluminum cookware with special solder made from tin and lead.
When soldering larger wires, the mass of tin in the tinned layer may not be enough for a reliable connection. In this case, finely grated solder should be poured on top of the twisted area and heated until it melts and fills the gaps in the twist. This way you can solder copper wires with a diameter of up to 2 mm without a soldering iron.
Sometimes it is necessary to solder a wire to a flat surface. To do this, the end of the wire and a section of the surface of the part (case) are pre-tinned. The wire is pressed against the plane of the part, and finely sawn solder is poured on top of the soldering area. By heating the parts from below, the tin melts.
Tinning without a soldering iron
Tinning is the preliminary application of a thin layer of solder to the surface of the parts to be joined. It is produced to improve electrical contact and improve soldering quality.
Tinning can be done without a soldering iron. To do this, you need to prepare a small metal trough. In terms of size, a metal lid of a can, for example, from instant coffee, is best suited. Small pieces of POS60 tin-lead solder (pure tin is even better) and rosin are placed in the lid.
Soldering with foil.
If you need to solder wires, then first remove the insulation from their ends at a distance of approximately 20-30 mm. The container with solder and rosin is heated until the solder melts. As a heater, you can use an electric stove, a candle, a fire, or any open flame source. The bare end of the wire is immersed in molten rosin so that the flux covers the entire surface. Then the treated section of the wire is placed in molten solder for 2-3 s. After removing the wire from the melt, with a quick movement of your hand, using a rag, remove excess solder. A thin, uniform layer of tin should remain on the surface of the wire.
If you need to tin a section of a flat part, then finely planed solder and a small piece of rosin are poured onto its surface. The heating flame is brought from below the part, under the soldering area. After melting, the solder is rubbed over the surface with a steel rod. Excess mass is removed with a rag. When tinning a steel part, rosin is not used. The soldering area is carefully treated with soldering acid. The tinning process itself is similar.
Polypropylene pipe: soldering instructions
Let's consider step by step how to efficiently solder pipes:
Step 1. Select pipes of suitable diameter
Please note: newly purchased pipes must match the old ones in diameter. This will help avoid connection problems
Step 2. Having measured, cut off the required section of pipe. Do not forget to add an additional 25 millimeters, which will subsequently remain fused into the fitting.
Step 3. Heat the pipe and fitting using a burner. This must be done simultaneously.
Step 4. After this, the parts need to be connected and held for a while, waiting for them to cool.
- It is recommended to purchase connecting parts and pipes from predominantly one manufacturer. This is an important point, since each manufacturer has its own technology for manufacturing these elements. This means that the melting temperature of the parts may vary, which is not suitable for a monolithic structure.
- Before the main work, the parts must be cleaned and degreased, which will avoid compromising the quality of the connection.
- Practice first on sections of pipe so that you know what effort is required to obtain the expected result. Please note: the pipe inserted into the fitting must not be rotated under any circumstances, this will compromise the strength of the connection, since the surfaces of the parts will gather in waves.
- If you choose quality, don't skimp! Good products will last longer, which will save you money in the future.
- If the room temperature is below +5°C, there is no need to take risks and start work, because its effectiveness is significantly reduced. The connections in this case will be fragile, and the connecting parts will require additional heating. And this is fraught with unnecessary melting and deformation of elements.
Drying rules
Drying of chips must be carried out observing temperature conditions and duration. New chips that were purchased in a store, from a warehouse, or sent by mail are recommended to be dried for at least 24 hours at a temperature of 125 °C. For this you can use special drying ovens. You can dry the chip by placing it on a hot plate.
The drying temperature must be controlled to prevent overheating and failure of the part.
If the chips were dried and stored under normal room conditions before installation, it is enough to dry them for 8-10 hours.
Homemade soldering iron from a candle
You can make an improvised soldering iron from a wooden block and copper wire.
When working with such a device, soot is removed from the work area. Of course, this method is only suitable for thin wires, since the efficiency of the device is low and the heat will be dissipated along the copper wire.
Using such a simple device, you can solder a wire to the board without a soldering iron. Direct exposure to open fire can damage other parts or lead to peeling of the board tracks, so this method is virtually indispensable when carrying out extreme repairs.
Considering the low power of an improvised “spark soldering iron”, it can be used to repair thin wiring without fear of burning it out with high temperature. For example, fixing headphones on the road.
Read also: Making a sword with your own hands
Such connections are not reliable enough. Therefore, as soon as you get to a regular electric soldering iron, you should solder again.