Today you can rarely find a chandelier consisting of a primitive lampshade with one light bulb. Increasingly, manufacturers are offering complex designs with intricate designs - luxurious, chic. But here's the problem! Assembling this miracle of design sometimes seems impossible - sometimes chandeliers are a pile of parts.
More often than not, instructions are not included with this makeshift DIY kit. Just a box with packed chandelier elements. And you will have to spend time to turn these details into a real beauty, pride and shining decoration of the room.
Today you will have to read clear and detailed instructions on how to assemble a chandelier , so do not rush to call specialists. Believe me, the process of turning these details into a stylish piece of furniture will give you considerable pleasure - there is nothing more enjoyable than making something with your own hands.
In the store we see hundreds of models of chandeliers - they differ in the material of manufacture, designs, and the type of lamps used. Don't be scared! This doesn't mean you have to explore every possible option. As a rule, in general, the features of the models do not particularly affect the installation process.
Once you have learned how to assemble a chandelier, you will be able to “bring to life” absolutely any model, regardless of the number of arms, device features and other characteristics.
As an example, this article will consider the assembly of a chandelier with three arms . The scheme is quite common.
Chandelier assembly - mechanical part
The first step is to open the box with the chandelier. If you do this carelessly, you may accidentally damage its elements. It is recommended to use a utility knife to remove the tape.
Factory products are usually supplied in blocks. Everything is folded separately: shades, horns, housing, terminal blocks and other parts. The wires are already connected to the individual parts, you just need to connect them to each other correctly.
| Important! Before assembling the chandelier, make sure that absolutely all parts are available. Usually a short description is attached to the product, which indicates how many spare parts should be included, absolutely everything is taken into account, including nuts and bolts. It is advisable to check the completeness before starting work, since it is difficult to store an unpacked chandelier - some parts may break or get lost. |
It is better not to unpack those parts of the chandelier that are used last, but to put them aside. We are talking about fragile lampshades, decorative elements and a remote control (not present in all products). Carefully remove all other parts from the packaging.
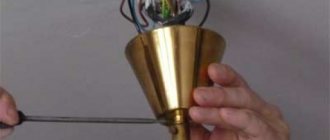
Next, you should assemble the upper part of the central body of the chandelier, so to speak, the “frame” on which the entire frame will be attached. We take a decorative “plate”, install it on the chandelier rod and tighten the top nut.
This plate is designed to mask a hole under the ceiling for attaching a chandelier in a suspended ceiling, as well as to cover connection wires. The decorative plate itself (along with the entire structure) will be attached to the ceiling using a fastening strip.
Mechanical assembly
Before you begin to study the instructions on how to assemble a chandelier, several preparatory steps are necessary. First of all, let's look at what concerns opening the box. This must be done very carefully using a stationery knife.
The tape is carefully cut off with the edge of the blade and the box is opened. Next, you need to take it out and check according to the instructions for the presence of all parts, down to the smallest fasteners.
It is best to put those parts that are needed last and especially fragile ones back into the packaging. It's best to keep items safe until needed.
First, the upper part is taken to work, that is, the frame on which everything will be held in the future.
The second stage is to assemble the middle part, on which the frame of the chandelier is already located. Be sure to attach a decorative plate to the top of the chandelier at this stage.
This detail of the future chandelier not only hides from view all the wires, which will then provide lighting. It is also designed to protect wiring from external mechanical influences.
- How to choose a phase meter - review, purpose, principle of operation, scope of application + instructions for use with photos
- How to make a transformer with your own hands - step-by-step instructions, diagram, drawings, list of materials + photo of a finished homemade transformer
- Which hidden wiring detector is better? TOP 10 best manufacturers with photos and descriptions
Another important property of the decorative plate of a chandelier is the formation of additional area for mounting the entire device. How to assemble a chandelier with a remote control is a little more difficult to explain.
Assembling a chandelier with your own hands - attaching the arms
Now we come to the stage of attaching the horns. Depending on the type and design of the lamps, their number may vary. However, regardless of the number of chandelier arms, the mounting technology is no different. Unscrew the decorative nut that secures the protective housing cover.
We take one of the horns, remove the nut and lock washer from it and insert it into the hole in the body. Then it is secured with the same nut and washer. The first horn is fixed in the chandelier body.
Install the remaining horns in the same way. We do not touch the wires for now; connect the wires in the chandelier last.
Before final fastening of the horns, check the symmetry of their location relative to each other. If necessary, adjust their placement. Now that everything is beautiful, you need to tighten the fastening nuts using a wrench. Do not overdo it so as not to strip the thread.
The principle of operation of the chandelier
Ceiling lamps equipped with a control panel support several operating modes, including a couple of basic ones, and the rest are additional options. The auxiliary mode allows you to diversify the light spectrum in the space using halogen lamps, while the main light is created by high-power LED lamps.
Lighting sources equipped with a control panel are connected in blocks, installing each specific device to the controller. In this way, high-quality functioning and appropriate interaction between the chandelier and the element sending the signal to change the mode are maintained. The control unit is the center of the entire mechanism, ensuring compliance with all technical parameters of the device.
The command transmitted by the control panel is sent via a radio channel. The device has a convenient keyboard, each button on which allows you to set the required program.
An individual device has a specific range of exposure, depending on the model. Some samples can be matched with devices with broader coverage. The kit includes a receiver that can be replaced or customized to suit your own needs.
Electrical part - how to connect wires in a chandelier
I think the main question of how to assemble a chandelier with three arms is closed. It's time to start the most crucial moment - installing the electrical wiring. There are two connection options: to a single switch and to a double switch. The grouping of wires depends on the type of connection. In the first case there will be two, in the second – three. The cable is separated by color.
I will connect the chandelier to a single-key switch, so I will have two groups - phase and neutral wires.
If you have a double switch, then there will be three groups: all neutral wires - the first, the second group is the phase wires to one key, the third group is the phase wires to the second key of the switch.
How to connect a switch for a chandelier
To turn on simple chandeliers with one lamp, a single-key switch is used; its installation is as simple as possible. When connecting a chandelier that has two or more lamps, two- and three-key switches are used.
If the wiring has already been laid, and the number of lamp groups in the chandelier corresponds to the number of keys on the switch, replace it with a new one, following the connection diagram.
Connection diagram for two-button switch
If the switch is installed on new wiring, you need to pay attention to the structure of the switch. In two and three-key switches there is one common terminal; the phase supply wire coming from the distribution box must be connected to it. And each of the remaining terminals, in accordance with the location of the key and the desire to turn on a certain group of lamps, is connected to the wires running through the box to the chandelier lamps.
It should be noted that the switch must open the phase power wire! This will protect you when you change a burnt-out lamp with the switch off.
How to connect a chandelier
Chandelier assembly - mechanical part
The first step is to open the box with the chandelier. If you do this carelessly, you may accidentally damage its elements. It is recommended to use a utility knife to remove the tape.
Factory products are usually supplied in blocks. Everything is folded separately: shades, horns, housing, terminal blocks and other parts. The wires are already connected to the individual parts, you just need to connect them to each other correctly.
| Important! Before assembling the chandelier, make sure that absolutely all parts are available. Usually a short description is attached to the product, which indicates how many spare parts should be included, absolutely everything is taken into account, including nuts and bolts. It is advisable to check the completeness before starting work, since it is difficult to store an unpacked chandelier - some parts may break or get lost. |
It is better not to unpack those parts of the chandelier that are used last, but to put them aside. We are talking about fragile lampshades, decorative elements and a remote control (not present in all products). Carefully remove all other parts from the packaging.
Next, you should assemble the upper part of the central body of the chandelier, so to speak, the “frame” on which the entire frame will be attached. We take a decorative “plate”, install it on the chandelier rod and tighten the top nut.
This plate is designed to mask a hole under the ceiling for attaching a chandelier in a suspended ceiling, as well as to cover connection wires. The decorative plate itself (along with the entire structure) will be attached to the ceiling using a fastening strip.
How to assemble a chandelier - assembly instructions
During renovations, many of us decide to change not only the decoration of the room, but also the lamps, and in this regard, the question often arises: how to assemble a chandelier correctly? In most cases, this is a simple process that does not require calling specialists, but we still believe that detailed instructions for assembling a chandelier will never hurt.
So, let's try to cover the whole process in detail. Let's look at a classic chandelier assembly diagram using the example of an inexpensive two-arm lamp made in China. And we note that using these instructions, you can easily assemble and hang a chandelier of a more complex design, however, if you have absolutely no experience in electrical installation work, and we are talking about expensive equipment, it is better to entrust this to specialists.
Let’s start with the list of necessary tools: how to assemble a chandelier:
- wire stripper (construction knife),
- multimeter or screwdriver-electric tester,
- several regular screwdrivers or a screwdriver with a set of bits,
- wrench.
If you need to assemble and hang a chandelier on a concrete or reinforced concrete ceiling, you will also need a drill and a drill bit with a Pobedit tip (diameter 6mm) to install the mounting strip. Installation on suspended plasterboard ceilings can be carried out using self-tapping screws or a special butterfly dowel.
Chandelier assembly diagram
1. Unpack the new lamp and lay out all its parts on the table. Make sure you have everything you need to assemble and hang the chandelier.
Be sure to read the instructions! Remember, your particular lamp may have its own characteristics that you need to know about. Separately, it is worth noting that the Russian-language instructions on how to assemble a chandelier in some way prove the quality of the product.
2. Remove the central body and all other parts except the lampshades from the transparent packaging. It is better to leave fragile glass shades in the packaging until the chandelier is assembled - this way they will be more intact.
3. Now we will attach the horns. To begin, unscrew the nut and remove the protective cover from the central body of the chandelier. Then insert the horn into the corresponding hole, install the lock washer and tighten the nut. The same must be done with the second horn.
4. Assess how symmetrically both horns are positioned. In this instruction for assembling a chandelier, we are considering a two-arm lamp; here an estimate “by eye” is sufficient.
5. Using a wrench, tighten the fastening units until they stop, but make sure that the horns do not move at this time. Throughout the entire process of assembling the chandelier, ensure that each part is installed correctly before tightening the mounting nut completely.
6. Now we will deal with the electrical wiring. This is the most critical step in the instructions for assembling a chandelier. Let's say our lamp has 4 shades mounted on two arms. If you want to connect it to a switch with one toggle switch/button, you can divide the wires into 2 groups: 4 blue, 4 brown.
And if your chandelier assembly diagram involves a double switch, the wires are divided into three groups:
- 1 blue wire + 3 blue wires + 4 brown wires - when toggle switch 1 is turned on, one lamp will light up, when toggle switch 2 is turned on, three lamps will light up, and when both toggle switches are turned on, all four lamps will light up.
- 2 blue wires + 2 blue wires + 4 brown wires - each toggle switch will light up 2 lamps, and if you turn on both toggle switches at the same time, all four lamps will light up.
But remember, our instructions for assembling a chandelier cannot cover all cases - your lamp may have wires of other colors.
7. Strip the first group of wires from insulation (1-2 cm), twist them together, and then connect to one of the central wires using a connector. If the kit does not include connectors, before assembling the chandelier, purchase them at any hardware store.
It is not recommended to connect wires using conventional twisting, without a connector. Such contacts, remaining uninsulated, easily oxidize, and as a result, a short circuit can occur.
8. Similarly, connect the second group to the other center wire, and then do the same with the third (if you use a double switch). All electrical installation components when assembling the chandelier are made using connectors.
9. Let's return to the protective cover that we removed at the very beginning - put it in place and secure it with a nut.
Install decorative elements (if present), in our version of the chandelier - crystal.
10. Install a decorative trim where the chandelier is attached to the ceiling.
This completes the instructions on how to assemble a chandelier, and we will move on to another, no less interesting question - how to connect it?
If you liked our instructions, click Like
Assembling a chandelier with your own hands - attaching the arms
Now we come to the stage of attaching the horns. Depending on the type and design of the lamps, their number may vary. However, regardless of the number of chandelier arms, the mounting technology is no different. Unscrew the decorative nut that secures the protective housing cover.
We take one of the horns, remove the nut and lock washer from it and insert it into the hole in the body. Then it is secured with the same nut and washer. The first horn is fixed in the chandelier body.
Summing up
Assembly and connection of a chandelier operating from a remote control can be done independently. This will require minimal knowledge about the specifics of electrical wiring and wire connections when installing a lighting fixture.
When installing such a system, combine the light bulbs into blocks connected to the controller, from which the electric current is distributed. Depending on the features of the model, the lighting device may have several control modes, to activate each of which there is a separate button on the remote control. If necessary, you can use a stationary switch.
By calculating in advance the wiring and installation location of all devices included in the kit, you will significantly simplify the installation process and increase the efficiency of work.
Electrical part - how to connect wires in a chandelier
I think the main question of how to assemble a chandelier with three arms is closed. It's time to start the most crucial moment - installing the electrical wiring. There are two connection options: to a single switch and to a double switch. The grouping of wires depends on the type of connection. In the first case there will be two, in the second – three. The cable is separated by color.
I will connect the chandelier to a single-key switch, so I will have two groups - phase and neutral wires.
If you have a double switch, then there will be three groups: all neutral wires - the first, the second group is the phase wires to one key, the third group is the phase wires to the second key of the switch.
Each output horn has two wires with insulation of different colors. Their color can be any. I always break down the wires by color this way: blue wires are neutral wires, brown wires are phase wires. First you should work with wires of the same color, for example, “phase”, and then group wires of a different color - “zero”.
Connecting wires in a chandelier for a single-key switch
The easiest way is to connect the chandelier to a single switch. In this example, the phase and neutral wires are connected to the chandelier; each arm also has two wires. We connect all the brown (phase) wires of the horns to each other. Then we connect together all the blue (zero) wires of the horns. Thus, you have 2 groups of wires.
Having divided the wires into groups, they should be connected to the main supply wire, this is the wire that is inserted into the rod. One end of it goes to the decorative cover and there it is connected to the wires that come out of the ceiling, the second end just goes into the body of the chandelier. Now we connect all the brown wires to one of the power wires, and we connect all the blue wires to the second of these wires.
Typically, the chandelier kit includes connecting caps. Remove the ends of the wires from insulation in a section 1-2 cm long, twist them together, and then screw the connector onto them using a rotating motion. Now it reliably protects the connection point.
For reliability, the place where the wires are twisted can be soldered.
When the wires are laid, you can put the cover on the lamp body and fix it with a decorative nut.
How to connect the wires in a chandelier when connecting it to a two-key switch
The first step in connecting to a double switch is to separate the chandelier arms into two groups. The easiest way is to connect an even number of light bulbs. In this case, divide them into two groups: odd - the first, even - the second. Naturally, the neutral wires will be included in the third group. With this connection, complete symmetry and harmony will be achieved.
It will be somewhat more difficult when assembling a chandelier with an odd number of arms. In this case, it will no longer be possible to implement it symmetrically. Therefore, one group will have more light bulbs, and the other will have fewer.
If, for example, you have a five-arm chandelier, how to assemble the chandelier and connect it to a two-key switch? Well, firstly, it won’t be possible to symmetrically divide the wires into groups.
Here you will have to connect the wires in such a way that one button turns on, for example, 3 lamps, the second – 2 lamps. And if you turn on both switches at the same time, all the lamps will light up. Options may vary.
Now it’s time to get down to business: the “neutral” wires will be included in the first group, and the phase wires are divided into two blocks, one is connected to horns 1, 3 and 5, and the second to 2 and 4.
As in the option using a single switch, each group now needs to be connected to the supply wire (the wire located in the chandelier rod).
Then we do everything, as in the case of a single-key switch, we connect all these groups to the main power cable. But there is one difference: the supply wire that goes into the chandelier body should be not two- but three-wire. All blue (neutral) wires are connected to one core, wires of group 1 are connected to the second core, wires of group 2 are connected to the third core.
Now all that remains is to complete the assembly of the lamp. Carefully place the wires into the housing and secure the bottom cover with a decorative nut. Lampshades and decorative elements are installed after connecting the chandelier.
Of course, the assembly of the chandelier may differ slightly, but in general the process occurs exactly as described above.
Electronics and Connectivity
After the mechanical part of the chandelier assembly is completed, you can finally begin connecting the chandelier to the network. This question is not quite simple, but no particular difficulties should arise when analyzing the situation.
The connection diagram of the wires in the chandelier will directly depend on the option for turning on the chandelier. That is, it depends on which switch you are going to use to turn the chandelier on or off.
It is possible to use a single-key switch and a two-key switch. There are also more complex options, but connecting them can only be mastered with special skills and knowledge.The simplest option is a single-key switch. To do this, you will need to divide all the wires into two groups - neutral and phase.
As for the two-key switch, the system will look a little more complicated, but it is quite possible to figure it out.
Dielectric insulated tool for work - which one is better to choose? Review of manufacturers, photos + video- Properties, scope of application of Paroc basalt insulation
- Mitsubishi Electric: company history
Here there will be three groups of wires: the first is zero, the second is the phase for one key, the third is the phase for another key.
The wires are divided into phases in such a way that when one key is turned on, certain light bulbs light up, and when both buttons are turned on, the entire chandelier lights up. All of the above are the main components of any chandelier that you need to know when assembling.
Assembling a chandelier
The further operation of the LED chandelier depends on proper assembly. So:
This is what the ceiling chandelier should look like from the inside when you complete the assembly. Check if everything is connected correctly
remove the protective film from the parts;
Installing a chandelier on the ceiling
Before installing the chandelier, assemble the tool. The set should contain:
- sampler;
- multimeter;
- pliers with insulated handles, knife, wire cutters;
- insulating tape.
In apartments of old construction, there are 3 wires at the connection point of the chandelier on the ceiling. To connect an LED ceiling chandelier with a remote control, you only need two.
The connection diagram with 3 wires is simple. If there is a 2-key switch on the wall, then you have exactly this circuit
In homes built according to modern designs, 4 wires peek out from the ceiling - grounding has been added for the chandelier body. Here we cannot do without a multimeter - with its help we will determine which of the wires is grounding. Procedure:
We turn off the machine in the panel.
visual diagram of searching for a ground wire using a multimeter
- we connect the neutral wire (N) on the ceiling with one of the phase wires, marked with the letter L;
connect these wires to the input terminals of the remote control;
All commands coming from the remote control are accepted by the controller. We connect it to the chandelier body according to the diagram printed on the back of the device:
An example of a 5-arm LED chandelier controller connection diagram
- connect double wires to terminals N, L;
- connect the third conductor to the output terminal;
- We connect the grounding to the yellow wire of the chandelier, if available.
Attention: before turning on the remote control, check the entire circuit again and only then do a test run.
How to decorate a light bulb without a chandelier
If you only have a bare socket, you can create an interesting lampshade from scratch. This is more difficult to accomplish than decorating an old lamp, but the product will become unique and can transform the interior.
For the first option you will need a balloon, PVA glue and twine. If desired, you can add spray paint and small details for decoration. The ball is inflated to the desired size of the “shade” and hung. It is convenient to use a wall bars, ladders, etc. The surface is smeared with glue and wrapped with rope, randomly or in a certain order. When the structure is dry, burst it and remove the ball through the hole left. The light bulb socket is threaded through it.
A more elegant option will work if you use lace or napkins made from it instead of twine. The shape of the lamp is made not only spherical, but also semicircular.
The chandelier can be built from wood veneer. The result is an interesting and original decor, reminiscent of elite designer models.
To do this, a strip of veneer is bent and the ends are glued together, temporarily fastened with clothespins. The second is threaded through the first and connected in the same way. Repeat several times. Cut a piece of thick cardboard and make a hole in it through which the cord from the lamp is threaded. This square is glued to the veneer.
Original lamps for an office or nursery are made from a globe. The ball usually consists of two halves. They are unscrewed and a hole is made in the upper part for the lamp socket. You can connect the halves and get a round chandelier or leave only the upper part. In the first case, the light will be diffused, and in the second, brighter. Small globes or models of other planets are used to create a composition on a single base.
In the kitchen there are many materials that can be used to decorate a light bulb without a chandelier. Lampshades are made from colanders, graters, glass jars and bottles, cups and saucers, etc. A hole is drilled in the dishes using a ceramic nozzle, glued together and placed on a wire. For the jar, a hole is drilled in the lid, and the glass is left as is or painted. A cute lampshade can be made from a bright plastic bowl.
Round Chinese lanterns are used as the basis for a homemade lamp. Various materials are glued to the surface: cotton pads rolled into cones, paper circles and candy coasters.
Attention! If flammable materials such as paper or fabric are used, it is better to choose LED lamps. They do not heat up and are therefore safe.
For the next option, you will need two hoops of different sizes (a hoop will do), rope or fishing line and fringe. A small circle is suspended from the top one and long ends are left for attaching the entire structure. Fringes are glued to the hoops. The distance is calculated so that the lower parts of the threads cover the smaller circle.
A cute lampshade is made from colored paper. Using a compass, draw rings about 2 cm wide and with different diameters. Cut out and divide into pieces, and then glue into circles, which are connected to each other until you get a lampshade. The wire can be wrapped with yarn.
For an interior in a minimalist or loft style, a metal chandelier of a simple shape is suitable.
Thick wire is wrapped around a funnel or watering can. The end is cut off with pliers. The skein is removed from the template and straightened, a wire with a cartridge is threaded inside.
Interesting lampshades are folded using the origami technique. The material used is different types of paper or craft bags.
The decorative cage looks original and beautiful. A base in the shape of a cylinder or square is assembled from wire and metal mesh. The frame is decorated with small bright birds, hanging them on a fishing line and “seating” them on perches. Toys are bought or sewn from small pieces of fabric (scraps left over from curtains, pillows and other home textiles are suitable).
For an interior in a loft or minimalist style, a lamp with a geometric shape (in the form of a cube, prism, etc.) is suitable. It is assembled from glued sticks or welded rods and wires, painted to look like metal, black or bright. The product casts interesting shadows on the walls and ceiling.
Decoupage chandeliers
This is another way to update the lamp, which results in an original, bright product. You will need three-layer napkins with a pattern, PVA glue, water and a brush.
The lampshades are removed from the lamp and cleaned. You can cover it with a layer of background paint or leave it as is.
Use the entire napkin or cut out part of the image. Carefully separate the top layer, apply it to the lampshade and coat it with glue diluted in a 1:1 ratio. After drying, coat with varnish.
Do-it-yourself ceiling chandelier repair with DPU
The chandelier has stopped turning on - such a nuisance can arise even if you bought the most expensive chandelier from the most famous manufacturer, the only question is when this will happen. If the lamp does not turn on and the warranty period has not yet expired, the fault will be repaired at the service center free of charge. When the warranty card can no longer be used, you will have to repair the chandelier yourself.
Causes of malfunction
The reasons for failure of the chandelier may be:
- The batteries in the remote control are dead;
- lamps burned out;
- Power is not supplied to the chandelier for a variety of reasons - the transformer has burned out, the controller has failed, the cartridge has burned out.

