April 6, 2020
The history of using heated floors goes back quite deep. Even Roman baths were heated in a similar way. Why does the system remain popular after so many years? All thanks to the fact that heated floors bring great benefits to their owner. In particular, with the installation of heated floors, the following appear:
- Cosiness. Walking on the heated surface of some materials is extremely pleasant.
- Saving. Heated floors can optimize the heating system. The result of installing heated floors is a reduction in heating costs. For standard rooms - 30%, but for rooms with non-standard high ceilings - by 50.
- Free space. Warm floors will help get rid of bulky heating devices.
I'm glad that there are several options for heated floors. This makes the system virtually universal - the owner of any type of home can afford to install a heated floor. There are two main types of coverage:
- water;
- electric.
Water heated floor
It represents the oldest modification. It has been used for quite a long time, and has managed to establish itself as a reliable system. And most importantly, if you have the tools, the installation can be done by a master without any preparation yourself.
A water heated floor is a system consisting of pipes that are placed under the main floor covering. In this case, there are two options for placing communications:
- "Wet". It got its name due to the fact that during its installation liquid materials are used, in particular – cement screed.
- "Dry". The pipes are mounted on polystyrene mats or wood-slat support. Most often, this type of floor can be seen in wooden houses or apartments where it is not possible to use a screed.
It is impossible to say which type of flooring is better; each type is used in different situations. We'll talk about them in more detail below. In the meantime, here are the features of a water floor in comparison with an electric one.
How can you heat a balcony?
You can heat the room that we equip on the balcony using:
- central heating outlet;
- heated floor equipment;
- installation of an infrared heater;
- the presence of an electric heater;
- placement of oil batteries.
Briefly about central heating
Heating a balcony using central heating is a very profitable way for the long term. It is seduced by reliability and proven over the years. But it also has disadvantages. Heat will only be supplied at the beginning of the heating season. In addition, this method entails quite a lot of hassle, since its equipment requires permission from the BTI.
Remember: under no circumstances should you install additional radiators on the balcony and connect them to central heating. This is primarily due to the fact that due to an unauthorized connection, your neighbors will not receive enough heat. But if your application was reviewed and approved by the BTI, then you can safely install a heated floor on the balcony from central heating:
- To begin with, experts advise covering the part of the wall where the battery will be located with foil. It will become a heat reflector. This way the room will warm up better, and the heat will not escape to the street.
- After this, it is necessary to call a specialist from the organization that supplies heat to shut off the common riser.
- Then holes are drilled in the wall for the pipes. Instead of pipes, experts advise using a plastic-aluminum hose. Then a tee with a valve is mounted on it.
- Next, heating batteries are installed. To do this, you need to fix two brackets on the wall that will hold the radiators at the top, and one bracket at the bottom to hold the battery at the bottom.
Only after all this work is completed are the batteries connected to the central heating
Particular attention must be paid to ensure that no air pockets form in the system.
Warm floors are a great alternative
A more economical option is to install heated floors, since their installation will cost less. They are electric and water. The principle of operation is simple: the air heats up and the top rises. Thanks to this, the desired temperature is maintained in the room.
Installing a water floor on the balcony
Installation of a water floor
- First, you need to insert tees on the supply and return lines when the pipe replacement work is carried out. And also be sure to install shut-off valves (valves) so that it is possible, if necessary, to shut off the supply of warm water.
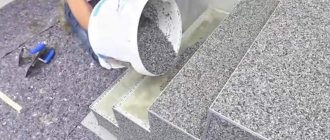
- Next, a concrete screed is laid on the floor. Its base must be leveled.
- After this, the insulating material is laid.
- Now begins the laying of plastic pipes, which are the basis of the heated floor. They are placed like a snake. The bend should be small. The distance between the pipes is insignificant.
- Next, connect the plastic pipes to the hot water supply system.
- The final stage is laying the concrete screed on the base.
For concrete screed, you can use various materials: special building mixtures or ordinary cement mortar (an old proven method).
When laying a water floor, you need to remember several mandatory rules to follow:
- If the main floor is tile or laminate, then the thickness of the screed should be small.
- For a water floor, it is necessary to purchase only high-quality materials with a long service life, since troubleshooting will then cost a significant amount.
- The “warm floor” system is installed from a single pipe. There should be no joints under the screed. Therefore, before purchasing materials, take careful measurements.
- Protect the ends of the pipes to prevent blockages.
- It is imperative to glaze the balcony on which it is planned to install heated floors.
- After completing all work, you must wait several days until all concrete mixtures have completely dried. Under no circumstances should you use a direct heat source to the underfloor heating system to speed up the drying process. But be sure to regularly ventilate the room to remove excess moisture that will form during drying.
Heating connection
The heated floor is installed, the screed is completely dry, now you can connect to the central heating and check the result of the installation. If your central heating system is already running, all you need to do to get your floor working is open the valves. A few minutes - and you can feel a pleasant warmth under your feet.
Peculiarities
A water floor is not installed in all rooms due to the specific features of the installation and operation process. Among them, the most significant are:
- Installation is not possible in every apartment, since it is extremely difficult to regulate the temperature of such a floor. When connecting to central heating, the owner relies entirely on utility services. But if you install your own boiler, you will need additional space. But not everyone can afford it.
- Installation using the “wet” method must be on a reliable surface. The reason for this requirement is the large weight of the screed.
- Raising the floor level by an average of ten centimeters after completion of the work. Therefore, this must be taken into account when renovating, since furniture “under the ceiling” may not fit into the room.
- Much attention should be paid to the flooring. The temperature of a water floor is more difficult to regulate. And given that some coatings cannot be heated to high temperatures, certain problems may arise. It is advisable to choose flooring with special markings indicating the possibility of working with heated floors.
Mounting options and fixation methods
Effective operation of underfloor heating is possible provided that the pipes are correctly installed and connected to the central heating system. The key task of the contractor is to correctly distribute the linear footage of the pipeline on the surface of the subfloor to ensure uniform heating of the floor covering.
As a rule, pipes are installed in a “snake” pattern, i.e. First, the pipe goes in one direction, then makes a 180-degree turn and is laid in the opposite direction so that the two sections are located relatively close to each other (up to 30 cm).
This way, the coolant energy is effectively distributed over the entire floor area in the room. The pitch between pipe branches depends on its thickness, material, flexibility and intended heating mode. Thin plastic pipes made of polypropylene or polyethylene are laid in frequent increments.
Before installing a heated floor, prepare a rough surface - a concrete screed or a wooden plank floor, on which film waterproofing is laid. One of three types of underlay is placed on the subfloor:
- reinforcing metal mesh;
- polystyrene boards;
- mounting rails.
A special fixing substrate is a mandatory requirement for the correct installation of underfloor heating pipes, otherwise the pipes may move during the process of pouring the cement screed, and the system will not work correctly.
Reinforcement mesh - advantages and disadvantages
Metal reinforcing mesh is the most popular way to fix underfloor heating pipes. It is sold in the form of identical lengths or in coils, and is laid on a concrete floor. Pipes are distributed along it and fixed using various fasteners.
The advantage of this method is the availability of reinforcing mesh and its low cost in construction stores. The disadvantage is the labor-intensive installation process and the high risk of damage to plastic pipes.
We recommend that you familiarize yourself with: Metal hose in a sheath with PVC insulation to protect the cable
Pros and cons of polystyrene backing
Polystyrene boards are shaped products with protrusions equidistant from each other - bosses, between which pipes are laid. There are various shapes and configurations of bosses.
The main advantage of this installation method is the speed and ease of installation of pipes, which can be arranged in any way: “snail”, “snake” and other patterns. Thanks to the protruding elements of the polystyrene plates, the pipes are protected from mechanical damage. Disadvantages include the high cost of materials and the need to use additional fasteners.
Mounting rails for laying heated floors
Tires are long products with special clamps with which pipes are secured. With their help, you can easily and quickly install flexible plastic pipes that will be protected from damage.
Compared to reinforcing mesh, mounting bars are less labor-intensive in terms of installation, but their disadvantage is that they are rarely available for sale and can be quite expensive.
In addition to the substrate, various fasteners are used to firmly fix underfloor heating pipes:
- Plastic clamps or cable ties are simple products that form a loop covering the pipe and the bars of the metal reinforcing mesh. This is the simplest and most affordable method of fixation, but it is only suitable for reinforcement substrate.
- Plastic clamps with notches are products designed for fastening pipes to a polystyrene backing. They are installed on top of the pipes and pressed into soft polystyrene, held in place by spacers included in the sharp tips.
- Plastic clips are products in the form of a small horseshoe with a flat, level base on which they are installed. The pipe is laid and held motionless.
- Metal clamps in the form of a loop that matches the diameter of the pipe. Such products have a hole for a fastening element - a nail, self-tapping screw or bolt - for fixing on the rough surface.
We recommend reading: Why heating pipes in an apartment make noise or hum, and how to fix it
Installation
The installation principle is different and depends on what type of water floor is chosen.
Installation of a “wet” water floor
When working with this type, it is meant to create a multi-layer system consisting of several elements.
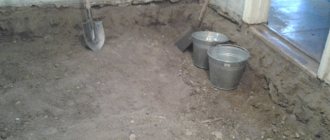
Prepared surface.
This element can be ordinary soil or a concrete platform. An important condition for this stage is a flat surface. The strong relief of the site subsequently, with a certain risk, leads to the formation of air cavities that negatively affect the heating system. The load on the pump increases.
Waterproofing layer.
Thickness not less than 2mm.
Thermal insulation.
It is advisable to use insulation with a low thermal conductivity coefficient. For example, polystyrene foam with a density of 35 kg/m3.
Pipes.
They are one of the most important elements, because it is through them that hot water circulates. It is best to use pipes made of flexible material and homogeneous in composition. For example, PE-RT.
Steel grate.
Placed on top to hold the solution. The cell size is about five centimeters.
Screed.
A solution of standard proportions is mixed. For greater convenience in
During operation, it is possible to use special additives that improve plasticity or purchase ready-made compounds. The thickness of the layer is about five centimeters.
Finish coating.
You can install any one that is compatible with heated floors. But it is best to use natural materials. Porcelain tiles work well.
Wet heated floors can be installed both in a finished building and at the initial stages of construction. After installing the heated floor, all that remains is to connect it to the heating system. It is recommended to use your own boiler rather than connect to a common heating system.
“Dry” method of installing heated floors
Installing a heated floor with your own hands can also take place in a less extensive form. For example, due to the size of the building, or due to the desire not to delay repairs, a water-heated floor can be installed in another way. This method has a number of advantages:
- Light weight. The load from such a floor is only thirty kilograms. While the tie on such chips puts a load of about 300 kilograms on the horse.
- Installation speed. Unlike the “wet” option, the coating can be installed immediately after installing the coolants. The screed will dry for about a month.
- Low layer height. Usually does not exceed six centimeters.
There are several different installation options without screed. However, the most popular of them is the use of polystyrene plates with a groove. Such mats allow you to install heating elements in recesses. Without resorting to the help of experts.
Let's look at the installation process:
- Leveling the area.
It is understood that per square meter of floor the slope should not exceed two millimeters. If it does not meet this requirement, it must be leveled. In the case of a concrete floor, a thin screed is suitable. If the floor is wooden, you will have to fix it in other ways. Ignoring this step is a typical mistake when installing yourself. Meanwhile, the slope of the heated floor leads to the formation of air cavities in the system, which negatively affect its operation. - Installation of waterproofing.
A film with a thickness of at least two hundred microns is suitable for this stage. It must be overlapped, leaving about ten centimeters of margin. The joints must be secured with tape. - Damper tape.
Its necessity is justified by the fact that when heated, the concrete slab expands. Sometimes this leads to its destruction. Research shows that when a meter of concrete is heated by forty degrees, it increases in size by 0.1 mm. The tape absorbs this expansion. - Installation of polystyrene mats.
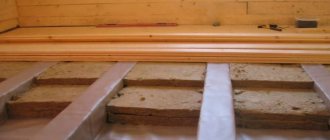
The mats have special grooves in which the pipes are attached; in order for the structure to be more reliable, its joints must be treated with glue. - Pipe laying.
An extremely important stage that you should not approach without knowing some details. Firstly, the pipes can be laid out in different ways. The most popular is the snake. However, you can lay out the pipes using a snail. The advantage of the second option is more uniform heating, but the “snake” is easier to install. Secondly, in large rooms several circuits should be made. Approximately one circuit is needed for 40 square meters. - Installation of metal heat distribution plates.
It is made into the grooves of the slab and a pipe is laid on top of them. - Rough floor.
It is constructed from gypsum fiber boards with grooves for fastening together. Next, the plates are fastened with special 19 mm self-tapping screws with double threads.
The same ceramics, laminate, or synthetic coverings are suitable as floor coverings. However, it is necessary to remember this. That they must have specialized markings confirming that the material can work at elevated temperatures.
The main positive feature of a water floor is the low cost of maintenance. All costs associated with it. It pays for itself in a few years.
How to install a heated floor: install it yourself
The main or additional heating system “warm floor” is becoming increasingly popular among city apartment owners. This is not surprising - having a well-installed and regulated floor surface heating provides many advantages.
How to install a heated floor
This approach allows you to feel much less dependent on central utilities, for which, it is no secret, the beginning of the heating season does not always coincide with the onset of cold weather. “Warm floors” provide uniform heating without creating horizontal convection currents, which often cause unpleasant drafts. The most comfortable vertical temperature distribution is created - the main heat is in the area of the feet with a gradual decrease as the altitude increases. It becomes possible to create zones with more or less heating, depending on the specific purpose of the premises. How to install a heated floor yourself: is it possible, how difficult is such a process, in what sequence is it performed - the answers to these questions will be discussed in this publication.
Existing types of “warm floors”
The variety of floor heating schemes is quite large, but according to the basic principle of thermal energy transfer they can be divided into two large groups:
1. “Water heated floors” - as the name implies, this is a system of pipes with a coolant circulating through them, located in the thickness of the floor. The liquid used to transfer heat is heated in an autonomous heating system connected to a boiler of one type or another, or from a central heating network. You can even find references to connecting water circuits to a hot water supply system, of course, if it provides for constant circulation.
Water floor heating is more suitable for a private home
However, for urban multi-storey apartments, since this article is about them, such a floor heating system is not the optimal solution for several reasons:
- Connection to the centralized heating circuit will require mandatory approval from organizations responsible for housing and communal services. And it is far from certain that such permission will be obtained - the design capacity of boiler houses may not be enough to provide additional points of consumption, and a drop in temperature in the heating risers may cause justifiable complaints from neighbors in the house.
- Ensuring correct and uniform circulation of the coolant through the “warm floor” pipes will require the mandatory installation of a rather bulky and difficult to configure distribution manifold cabinet with pumping equipment, which is not always possible in cramped city apartments.
It is very difficult to carry out extensive wiring and install equipment in an apartment.
- Water-based “warm floors” always require a fairly thick (at least 50 mm) and massive concrete screed. This may cause unacceptable additional loads on the floor slabs that were not included in the building design. In addition, the height of the screed plus a layer of mandatory insulation will significantly raise the floor surface, and in a standard city apartment this is especially difficult to manage.
- And finally, we cannot discount the fact that pipes embedded in floor surfaces are a source of potential leakage with very unpleasant consequences. Even visually noticing an accident that has occurred will not be easy, much less fixing it quickly. As a result, there is a possibility of flooding of the lower neighbors.
Water floor heating would be more appropriate in a country house where a completely autonomous heating system has been created and debugged, and an emergency with a pipe will not cause anyone but the owners any trouble. However, this is a personal decision for each apartment owner, and if you decide to go with this option, then you can find out more about such “warm floors” in the corresponding publication on our portal .
2. For an apartment located in a multi-storey building, the best option would be to use an electric “warm floor” :
- Such floors are more advantageous from a safety point of view - there is practically no risk of causing any inconvenience or trouble to neighbors.
- Installation of such heating does not require any coordination measures - the main thing is that a power supply line of appropriate power is laid.
- Such a thick layer of screed is not required, and with some types of “warm floors” there is no need for it at all. There is a clear saving of “precious” centimeters of floor level.
- There is no need for complex distribution cabinets - control and adjustments are made from compact panels, which are comparable in size to a conventional switch. The accuracy and speed of adjustments is much higher than that of “water” floors. The presence of an electronic thermostat allows you to achieve significant savings - there will always be a set temperature on the surface, controlled by a temperature sensor, and the control unit will turn the heating on and off as needed.
Thermostat with temperature sensor
- Installation of such “warm floor” systems is much simpler, less labor-intensive and not so expensive.
- If the installation and connection are carried out according to all the rules, and high-quality material is purchased, then such a “warm floor” will serve for a very long time - the period can be calculated in decades.
Electric floor heating systems come in several varieties:
- Heating cables, which are laid on a previously thermally insulated surface and then covered with a concrete screed - the basis for laying the finishing coating.
Heating cables are usually installed under a screed.
The cables themselves can also vary significantly:
a) Single-core cables of ordinary resistive action - heat is generated due to the internal electrical resistance of the conductor, just like with conventional heating coils.
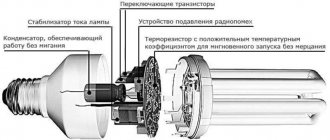
Single-core cable diagram
The heating part of the cable is enclosed in a powerful two-layer insulation, between the layers of which additional shielding copper protection is laid. At both ends, the cable is connected by special sealed couplings with “cold” wires, which are used for connection to the terminals of the wiring box and practically do not heat up during operation.
Such heating cables are the most inexpensive, but they have one serious inconvenience. When laying them on the floor surface, it is necessary to take into account that both ends must converge at one point - at the location where the thermostat is installed. In words it is simple, but in reality serious problems can arise. And one more significant drawback - the cable heats up equally throughout its entire valley, using energy rather uneconomically.
b) , two-core resistive cables are much more convenient to use .
Both wires or only one can be used as a heating element in such cables, and the second in this case serves only as a conductor. In any embodiment, the circuit is closed by the presence of a terminal coupling, which has a jumper connecting both conductors. As a rule, cables are sold with a coupling already installed at the factory, ensuring complete sealing of the contact.
With a two-core cable, installation of a “warm floor” is simplified
The internal structure differs from a single-core one by having another layer of insulation on each of the cores, which prevents short circuits. This cable has only one “cold” mounting end, and this greatly simplifies the process of laying it on the floor surface. True, the price of such heating cables is already higher.
c) If we think from the point of view of economical operation, then the optimal choice is a self-regulating two-core cable . It has a completely different structure and uses a different heating principle.
Operating principle of a self-regulating cable
The two conductors are also enclosed in double insulation and a tinned copper shielding layer. However, there is an electrical connection between the cores in the form of a semiconductor matrix, the passage of electric current through which causes heating of the cable. But the most important thing is not even this. A specially selected matrix composition reacts sensitively to temperature, changing the conductivity in each specific section along the entire length of the cable. In cold places, conductivity, and therefore heating, is maximum (in the diagram 0 is region A). As the temperature rises, the conductivity of the matrix decreases (region B), and when a certain heating temperature is reached (region C), the semiconductor “locks”, practically stopping or minimizing the passage of electric current. In a similar way, constant self-regulation of the entire cable is carried out, ensuring uniform heating of the entire floor surface while minimizing energy consumption.
Another advantage of such cables is that, unlike single-core or double-core resistive cables, which are usually sold in the form of finished products of a certain length, semiconductor cables can be cut to the required size - for this purpose, special cutting points are provided with a certain pitch (usually 250 or 500 mm). Installing a simple end insulating coupling in this case is not difficult at all - there are no electrical connections in it.
Such cables, of course, are not cheap, but the money spent will very soon be justified by the savings on energy bills.
- Electric resistive heating mats are, in fact, also a two-core heating cable, but only loops already attached with a certain pitch to a fiberglass mesh base.
Mesh mats make installation extremely easy.
This design provides several important advantages:
— The process of laying heating elements on the floor surface is extremely simplified - it does not require any additional parts. This, by the way, is reflected in the overall height of the created “pie”.
— The thickness of the screed can be reduced, and in some cases, for example, when laying tiles, it is possible to do without pouring a screed or leveling compound altogether.
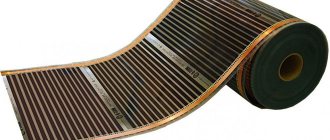
- Systems of electric “warm floors” based on the infrared principle of operation.
The main difference between these systems is the method of energy transfer. The working elements are made of special materials that, without heating up too much themselves, create a powerful flow of infrared radiation, which is converted into thermal energy when it hits opaque surfaces.
Infrared “warm floors” come in two varieties:
a) Film heating elements . Copper conductive bars are located between two durable layers of transparent polymer film. They are connected to each other by parallel strips containing carbon paste, which, when current is passed through, emits an infrared flux.
Ultra-thin film heaters for “warm floors”
The thickness of such film elements is less than a millimeter, which is very convenient for their placement under floor coverings. In principle, no screed is required, which significantly simplifies and speeds up the installation of “warm floors”. Such film coatings are sold by the meter, and you can always select the required quantity depending on the developed heating scheme.
b) Rod infrared heating mats . In this case, semiconductor carbon rods are located between the parallel conductors with a pitch of 100 mm from each other. The total width of this mat is 830 mm.
Rod infrared heating mat
Parallel connection of rod heaters ensures the operation of the system even if one or more rods fail for some reason.
Such heaters have a self-regulating property similar to that described above. This makes it possible to freely move large pieces of furniture in a room insulated with such a system - overheating and burning out of the mats will not occur, since if heat exchange is disrupted, the heating elements in this place will simply “lock up” without any damage to the rest of the floor surface.
The difference from film heaters, except for the actual design, is that rod mats always require a screed 20 mm thick - without it, the self-regulation process will be disrupted. Without a screed, you can only lay ceramic tiles on them, but even in this case, the adhesive layer must have the same thickness.
How to calculate a warm electric floor
Before you begin installing a heated electric floor, and even before purchasing the necessary components, you need to carefully calculate its parameters. This is based on the area of the room in which the floor surface heating system will be installed, and on whether such heating will be used as the main one or whether it is intended only to increase the overall level of comfort.
For the calculation, the following basic indicators of the required heating power per square meter of the total area of the room are taken, with a standard ceiling height of a city apartment:
| Apartment location | “Warm floor” is the main source of heating | “Warm floor” - additional heating system |
| Apartment on the ground floor | 180 W/m² | 110 ÷ 130 W/m² |
| The apartment is located above a heated room | 150 W/m² | 100 ÷ 110 W/m² |
However, one should not forget the fact that the heating elements are not laid on the entire surface. The indicators given in the table will correspond to reality if the area covered by the “warm floor” is not less than 80% of the total surface area of the room. By multiplying the area of the room by the indicated indicators, it is easy to calculate the required total power of the heating elements of the “warm floor”.
What are the rules for placing electric heating elements on a “warm floor”:
Basic principles for drawing up a laying scheme
- It is never intended to install any heaters, regardless of their type, under stationary pieces of furniture (sofas, wardrobes, chests of drawers, cabinets, etc.). In such areas, there is no normal heat exchange between the floor surface and the air, and this can cause overheating of the heating elements and their failure. And for the furniture itself, overheating its parts cannot be beneficial.
Even if cables or mats with an internal self-regulation system are used, which, in principle, are not afraid of overheating, this rule is still taken into account - there is no point in wasting electricity and spending money on purchasing elements that will not take part in heating the room at all.
- The distance from the nearest cable loops or heating mats to the boundary of the installation area (from internal walls or furniture) must be at least 50 ÷ 100 mm. Near heating risers or permanently installed radiators, this distance increases to 100 ÷ 150 mm. A similar interval is maintained along the external wall of the house - the massive external structure has an extremely high heat capacity, and a significant part of the electricity will be wasted, reducing heating efficiency and increasing operating costs.
- It is definitely worth completing the graphic diagram - it will be needed for further calculations and will be a good help during installation work. You should immediately decide on the location of the control unit (thermostat). It is to this point that the “cold ends” of the heating elements should approach. The thermostat unit should be located in an open area so that constant visual monitoring is possible. Its distance from the floor surface must be at least 500 mm.
This location point must also meet the possibility of laying a separate power line to it from the electrical distribution panel with a mandatory grounding loop. It is strictly prohibited to use ordinary power sockets to connect a “warm floor”. Separate circuit breakers are installed on the distribution board for each connection point (if the heated floor is planned in several rooms). Ideally, such a system should be equipped with an additional safety device - an RCD.
- If everything is somewhat clear with heating mats or film elements, for the heating cable it will be necessary to determine its required length and the pitch of laying the loops on the floor. The calculation is made according to the following method:
First you need to calculate how much cable length (L) is required to heat the room:
L = S × Ps : Pk
— S is the calculated heating area of the room, taking into account all the above rules;
— Ps – required specific power per unit area (indicated in the table above);
— Pk is the specific power of the heating cable, which must be indicated in its technical documentation.
Having determined the length of the heating cable, you can calculate the basic interturn distance of its installation on the floor surface (laying pitch):
H = S × 100: L
The meaning of all alphabetic symbols has already been indicated above.
The interturn distance value will be obtained in centimeters. It should be adhered to during installation, but it is possible to slightly vary in one direction or another without exceeding the total length of the heating cable. So, if you plan to create a zone of increased comfort - for example, in places where family members traditionally relax or play children's games, this distance can be somewhat reduced by proportionally increasing the step in other, less popular areas.
Calculators for calculating cable length and laying pitch
The calculation will be simplified if the reader uses the built-in calculator - you just need to enter the available data and click the “Calculate” button:
Go to calculations
The resulting cable length is approximate. Using it, you can select a proprietary kit with a cable having a length that is closest to the result found. And all that remains is to decide on the installation step:
Go to calculations
- When planning installation, be sure to take into account that under no circumstances should heating cables intersect in the thickness of the floor. A similar requirement applies to any heating mats - even small overlaps are unacceptable. The installation instructions must indicate the minimum distance between adjacent mats. If such information is not available, then the clearance is taken to be at least 50 mm.
- When drawing up the installation diagram, the location of the temperature sensor is also provided. It is placed at a distance of 400 ÷ 500 mm from the border of the heating zone, placing it in the middle of the cable loop.
Temperature sensor installation example
If infrared heating mats are used, the sensor should be located in their center, on the black radiating strip in the case of film elements, or between two heaters in the case of rod ones.
The temperature sensor is positioned so that it is as close as possible to the thermostat block - it is prohibited to extend the standard wire coming from the sensor.
Installation procedure for various types of electric heated floors
When purchasing everything necessary for a “warm floor” system, it is necessary, in addition to the heaters themselves, to provide components and additional materials for installation work:
- Typically, the kit should include a temperature sensor with a standard wire. If not, you need to purchase it separately.
Thermal sensor with standard cable
- Control and thermoregulation unit (thermostat). May also be included in the package or purchased separately. The variety of models is quite large - from the simplest with a mechanical regulator to those equipped with liquid crystal screens and electronic adjustment elements. However, in both cases, the connection diagram and markings of the terminal connectors are approximately the same.
The thermostat can be electromechanical or electronic
- The “warm floor” system must be laid on a previously thermally insulated floor so that thermal energy is not wasted on unnecessary heating of the floor slabs. In most cases, it is recommended to lay a thermally reflective polyethylene foam substrate with a top foil layer under the heating elements over the entire floor area.
- If the heating cable will be covered with a screed, then to give it strength, a reinforcing mesh, metal or polycarbonate, should be used.
- To fix the cable in accordance with the layout diagram, you can tie it with clamps to the reinforcing grid or, which is much more convenient, use special mounting rails. The diagram above shows their approximate location - at a distance of 500 - 1000 mm from one another.
- To compensate for the thermal expansion of the screed, it will be necessary to install a damper tape along the perimeter along all walls.
Installation of “warm floor” with heating cable
- Work should begin by cutting a vertical groove in the wall from the socket for installing the thermostat to the floor surface. Dimensions – with the calculation that a corrugated tube Ø 16 mm and “cold” cable ends can fit freely there. Usually 20 × 20 mm is sufficient.
- After preparing the floor surface (inspection, minor repairs to weak areas, cleaning from dirt and dust and priming), a thermally reflective substrate is spread on it. The strips are laid end to end and sealed with foil tape.
- Damper tape is glued around the perimeter of the room. Its height should be 1 mm higher than the planned finishing floor covering, taking into account the 30 mm of required concrete screed.
- A reinforcing mesh is laid out on the floor surface, and mounting strips are installed and fixed.
- The cable layout starts from the thermostat installation location (from the groove). The “cold” end must freely reach the place of future connection with the control unit.
Cable management using mounting rails
- The cable is laid out in accordance with a pre-drawn diagram, fixing it to the reinforcing mesh with plastic clamps and (or) to mounting rails, which have special flexible petals for this purpose. In some places where the hinge is trying to rise up, you can fix it with a drop of silicone hot glue.
Installing a temperature sensor in a corrugated tube
- After the cable is completely laid, a corrugated tube is attached to the floor in which the temperature sensor will be placed. A plug must be installed at the end of the tube. The location of the sensor has already been discussed above. The tube with the sensor fits into the groove. This arrangement of the sensor is necessary so that if it fails, you do not have to dismantle the poured floor - it will be enough to pull the sensor out of the tube and install a new one in its place.
- The next step is to check the electrical parameters of the laid cable.
— it is necessary to measure the insulation resistance. For this purpose, a special device is used - a megohmmeter. Operational safety will be ensured if the resistance is at least 20 MΏ.
— the conductivity of the cable is checked, i.e. closed electrical circuit, and resistance, which should not differ from the passport values with a tolerance of 10% in one direction or another.
All wires are connected to the thermostat terminal block (of course, with the supply voltage turned off). The location of the contacts may vary somewhat on different thermostats, but it is always accompanied by graphic and alphabetic symbols and will not be difficult to figure out. The figure shows an example of such a connection:
Wire connection diagram to thermostat terminals
- After switching, you can perform a test start-up of the heating system. Heating should be carried out briefly - only to make sure it works.
General diagram of “warm floor” layers with heating cable
- If everything is functioning normally, the power is turned off again and the screed is poured. Install a beacon system with a layer thickness of 30 mm. During concrete work, special care must be taken so as not to disturb the location of the cables.
You should carefully monitor the completeness of filling all areas with the solution so that no voids remain. For better quality work, it is better to use ready-made concrete mixtures with the addition of plasticizing and micro-reinforcing components.
Pouring a screed over the laid cable
- The system may be used only after the poured coating has completely hardened - this depends on the characteristics of the solution used. Commissioning of the system should not be carried out immediately at the design power - it is necessary to extend this process over 2 - 3 days with a gradual increase in the heating temperature of the cable.
The screed poured over the heated floor will become the basis for laying any finishing coating.
Video: instructions for laying a “warm floor” with a heating cable
Prices for heating cable and components
Heating cable and accessories
Features of installation using mesh heating mats
The design features of mesh resistive heating mats make them more convenient to install on the floor surface.
Laying the mesh mat
- The cable on them is already laid out in a loop with set pitches, and the polycarbonate mesh base will become a good reinforcement for the screed.
The base mesh can be trimmed to make turns
- In the process of laying out the mats according to the pattern, when changing direction, the mesh base can be trimmed with scissors without violating the integrity of the cable itself.
- The mats can be fixed to the floor surface with a silicone gun, “liquid nails” or with durable construction tape.
- If the screed is to be poured, the work of laying the heating elements differs little from the procedure when using a conventional cable, with the only difference being that mounting rails and additional reinforcement are not required.
- However, such mats can be used without screed if ceramic tiles are planned to be laid on them. There are some peculiarities of work here:
- a thermally reflective foil backing is not used - it will not provide reliable adhesion of the tile adhesive to the old coating.
— to locate the corrugated tube with a temperature sensor, you will have to cut an additional 20 × 20 mm groove in the floor surface, otherwise the corrugation will protrude above the surface of the mats.
Laying ceramic tiles directly on heating mats
— when laying tiles directly on mats, increase the adhesive layer by 8 ÷ 10 mm.
- The remaining actions - switching the cable part, checking and commissioning are no different from those described above.
Video: installation of heated floors using heating mats
Prices for different types of heating mats
Heating mat
Features of installation of rod infrared mats
As already mentioned, such mats have the ability to self-regulate, but this will only be possible if the conditions for their correct installation are met. These include the mandatory use of a thermally reflective substrate of the “isolon” type, and the presence of a screed or a layer of tile adhesive of a specified thickness of 20 mm on top of the rods.
- To install the temperature sensor in the desired location, a groove is made in the floor surface, into which a corrugated tube, capped at the end, is installed.
- The substrate is laid on the prepared and primed concrete floor surface. It should fit as tightly as possible to the surface. The joints must be taped with foil tape.
- The mats are being laid out. When turning, one of the current-carrying bars is cut in a designated place, between two adjacent rods.
Cutting the busbar
- The layout is carried out over the entire heated area. The mats are attached to the surface of the substrate using special tape, which will ensure a tight fit.
Switching of laid rod mats
- The cut ends of the current-carrying bus are connected by a mounting wire using a coupling crimp terminal with mandatory double-layer insulation with a heat-shrinkable tube. The mounting wires are also fixed to the surface with tape.
- To ensure adhesion of the future screed or layer of tile adhesive to the base of the floor, rectangular “windows” are cut into the thermal insulating substrate.
- The heaters are connected to the thermostat and the functionality of the system is checked.
- Next, either a 20 mm thick screed is poured, or ceramic tiles are laid on a layer of glue of the same thickness. For screeding, it is recommended to use special construction dry mixtures designed specifically for heated floors.
- After pouring the screed, further work on laying the finishing coating is carried out no earlier than 4 weeks later.
- Commissioning is carried out in the same way, stepwise, with a gradual increase in temperature to the design temperature.
You can learn more about the installation procedure for infrared rod mats by watching the attached video:
Video: installation of heated floors with Unimat rod mats
Features of installation of film infrared “warm floors”
This type of “warm floor” is characterized by quick installation - no screed or layer of tile adhesive is required, and you can begin laying the finishing coating immediately after checking the functionality of the heating system.
Approximate diagram of a “warm floor” with infrared film elements
- Surface preparation and laying of the thermoreflective substrate are carried out in the same way as with rod mats. A groove for the temperature sensor is not required.
- The film strips are laid out according to the diagram with the copper shiny side down. The film is attached to the thermoreflective substrate using tape. Overlapping is unacceptable - the distance between adjacent film strips is approximately 50 mm.
- The film is cut only in places marked with a special pictogram.
The film can only be cut along the indicated lines
- The cable part can be connected according to two schemes:
— wires can be connected in parallel on one side of the film elements.
Wires can be fed from one side...
- sometimes, in order to avoid crossing power wires, they are brought in from opposite sides. In this case, special care should be taken to prevent one bus from being connected to both zero and phase.
...or from the opposite
- Cable connections are made using standard terminal connectors:
— the terminal is inserted with one blade into the “pocket” on the copper bus (the second blade should remain lower and then crimped with pliers.
Installing the terminal on the film element
- then, the stripped wires are inserted into the terminal according to the connection diagram, and also securely crimped.
- Insulation is carried out using the bitumen tape included in the kit. It is laid on both sides and carefully crimped to achieve complete sealing of the contact connection.
Insulation of contact connections with bitumen tape
Similar actions are carried out in unused places where busbars are cut.
Be sure to insulate the tires where the film is cut
- A thermal sensor is installed - on the bottom side of the film on the black stripe in the center. It is also fixed using insulating material.
- To ensure that the contact joints, laid wires and thermal sensor do not protrude above the surface of the film, corresponding recesses or channels are cut out for them in the thermally reflective substrate.
- The connection to the thermostat is carried out according to the usual scheme.
- After checking the functionality of the system, the “warm floor” is covered with thick polyethylene film, on which the selected finishing coating is already installed.
Video: installation of film infrared “warm floor”
Prices for infrared heated floors
Infrared heated floor
Self-installation of a “warm floor” cannot be called simple. However, if you understand the nuances and carry out all actions in strict accordance with proven technologies, such a task will become quite feasible for the average apartment owner who has basic skills in construction and electrical installation work.
Warm floor with electric heater
Can be used as the main source of heating, or as an additional one. In comparison with the water one, it has its own characteristics.
Minuses:
- Price. We are talking about both the initial purchase of the material and the subsequent cost of maintenance.
- If installed incorrectly, there may be an electric shock.
- An electric floor is not as durable as a water floor.
In turn, the advantages of electric heated floors are:
- Great possibilities for temperature regulation.
- Easy to install.
- Heating occurs evenly.
Pipe laying
The method of placing heating pipes on the base may differ slightly depending on the individual parameters of the room. And the basis itself can be different.
The base can be concrete floors, on top of which a layer of insulation is laid. Alternatively, the base can be a cement-sand or concrete screed, which must be insulated from below.
All other elements for laying heated floors, such as reflective underlay, heating pipes inside the screed and tiles, do not depend on the type of base. Alternatively, in the case of installing an electric-type heated floor, you can do without a concrete screed and apply glue directly on top of the heating elements. However, with a screed it is still more reliable.
After the main screed layer has dried, you can begin the process that determines how to properly lay the heated floor. To do this, first a foil reflective layer on a polyethylene foam base is placed on the screed. Next, they begin laying the water circuit - using metal-plastic or polyethylene pipes with an outer section of 16 or 20 mm.
Do not forget about the foil reflector before properly laying the heated floor, since it will ensure that the heat waves move upward, that is, into the room. Otherwise, heat waves will spread in all directions and significant heat loss will be observed.
To place the heating circuit on the surface of the screed, special strips or mats are often used that contain holders for 16 or 20 mm pipes. The distance between the individual holders is optionally 10 or 20 cm. As an alternative, you can use plastic fasteners, but you need to make preliminary markings for them on the screed.
When laid on the floor, metal-plastic pipes will inevitably have to be bent, which can lead to breakage of the circuit if the bend is too strong. To prevent such problems, professionals recommend using steel springs 20-25 cm long and with an internal cross-section that is 2 mm larger than the outer diameter of the pipe.
To ensure uniform heating of the floor, you should not make the top cement screed too thin, otherwise changes will be felt when walking on the floor.
The most important element of the system is the pipes. The most commonly used are metal-plastic or polymer. They are durable, easy to install, but have low thermal conductivity. Corrugated pipes made of stainless steel are ideal for these purposes. They are better in all respects, they are inexpensive, but due to their obscurity they are rarely used.
To install heated floors, pipes with a diameter of 16-25 mm are used, depending on the material. There are several schemes for their installation.
Shell or snail
Due to its simplicity, it is especially popular among amateur installers, but experts do not recommend using it due to its low efficiency. In this case, the pipes are laid in a spiral, and among them there is a return pipeline with cooled water. Therefore, if the distance between the pipes is large, cold zones are formed.
Snake
Laying pipes according to this scheme requires certain skills. The snake can be regular or double. When the pipes are installed correctly, heating occurs evenly in the circuit and there are no cold zones. Relief mats with markings already on them make installation easier.
To monitor the temperature regime, two sensors are installed: one at the entrance to the system, and the second at the exit. The water circuit is attached to the reinforcing mesh using fixing elements - clips, clamps. The gap between the pipes is made no more than 10-30cm. When the heated floor is the only source of heat, then choose the minimum step.
It is very important to correctly calculate the number of water circuits. Everyone must maintain integrity; there should be no connections within the floor. The maximum pipe length cannot be greater than the calculated one. It depends on the diameter; the larger it is, the less resistance to fluid movement. This allows you to make the outline longer.
Based on the size of the room, choose a method. Sometimes combined schemes are used and installation with variable pitch is used. Near the outer walls it is kept minimal, and in the center of the room it is increased.
Crimping
Testing of the system is carried out before pouring the screed, in this way it is possible to identify errors that were made during installation.
READ MORE: Warm floor on the loggia which is better
https://www.youtube.com/watch?v=
When all circuits are installed, a leak test is carried out, and pressure testing is performed using a compressor. To carry out the tests, a small installation with a pressure of over 6 bar is sufficient. It is required to raise it to 4 bar and maintain it until the system is started. Any depressurization will be easily detected due to the fact that air molecules are much smaller than water. In addition, if the heating is not yet connected, the water will freeze and absolutely nothing will happen to the air.
Kinds
Floors are divided into several types. There are two main ones:
- cable;
- infrared film.
Cable floors involve the use of cable as a heating element. Its installation takes place using a concrete screed. In general, the installation process is very similar to the same process for water floors.
But infrared film is a qualitatively new material. It consists of an alloy of copper and aluminum. Thin and easy to install, it fits directly under the covering.
Selecting the type of coolant
For heated floors, the same coolants are used as those that fill radiator systems - water and its solutions with propylene glycol and ethylene glycol.
READ MORE: How to lay tiles in a toilet with your own hands: subtleties of the process
What are the benefits of regular or distilled water? This:
- Price.
- High heat capacity.
- Environmentally friendly.
- Versatility.
The disadvantages include: freezing at low temperatures, which leads to failure of the entire system and causing corrosion on metal structural elements. The use of materials with reduced oxygen permeability solves this problem.
It is necessary to replace the water in the system at least once a year, and antifreeze - once every 3-5 years. Low cost and freezing at very low temperatures are the main advantages of antifreeze. Additives in the form of ethylene glycol to some extent compensate for the shortcomings of the liquid: high level of foaming, strong corrosion activity and high fluidity, but it itself is highly toxic and can cause severe poisoning. It is allowed to be used only because the heated floor is a closed system.
Solutions based on propylene glycol, with little corrosive activity and good resistance to low temperatures, although more expensive, are absolutely safe.
Installation of heating cable floors
Installation of cable electric heated floors occurs in the following sequence:
- Heater fastenings.
- Creating a screed.
It should be noted that the cable may or may not be fixed. In the second case, you will have to install it yourself. But in the first, the cable is fixed to special mats made of metal or special fiber. Such mats are much easier to install.
It is worth noting the mistakes that are often made:
- Poor quality screed materials. At this stage, you should be especially careful in choosing the material. Otherwise, the screed may crack. Attempts to correct the situation may damage the heating elements.
- Installing a temperature sensor. It is installed during pouring of the screed. It should be located closer to the center of the slab, in a corrugated pipe. In the next steps it is connected to the control panel.
- Examination. Before filling, it is necessary to check whether the installed system is working.
System installation
In order for the installation of a heated floor to proceed without complications, it is necessary to strictly adhere to the established sequence of work.
Design and calculations
First of all, you need to select a heating element. This will depend on the type of device used.
System types:
- infrared floors. Heating is carried out thanks to infrared film, which is used for this type of system;
- heating mats. All heating elements are located in a special mat. Often has the shape of a snake. Its use allows you to quickly install a heated floor;
- electric cable floors. Heat is supplied from the heating element - cable. Placed on a previously cleaned and prepared base. To fix it, you will need a mesh and a set of special fasteners.
Laying schemes
When developing your own project, you should take into account various variations regarding the methods of installing a warm electric floor.
According to the method of cable laying, they are distinguished:
- A method in which the material is laid directly on the screed. The flooring is already laid on top of it. Acceptable when using infrared systems.
- The cable is laid under the laminate or tile (we are talking about floor tiles), but above the level of the screed.
- Installation is carried out in the screed layer.
The project should display the following information:
- Location of cable installation work for each room.
- Areas where power supply will occur and heating controls will be located.
- Calculation of the equipment itself.
Significant disadvantages include the impossibility of further redevelopment of the room, since the diagram is drawn in such a way that, in addition to the heating elements, furniture is indicated and located in the room, under which it is prohibited to install such equipment.
Space for furniture
Necessary calculations
The required power can be calculated using the formula: P = p*S. In this case, “P” will be the maximum power of the system, “S” will be the area of the room, and “p” will be the performance of the heating elements. Such calculations must be carried out for each room separately. As an auxiliary element, you can use tables provided by heating element manufacturers. It contains information regarding possible heat loss in the room, the duration of the cable used and the installation step. When using a film device, the calculation is made based on the number of sections that could cover the available area.
Heated floor power
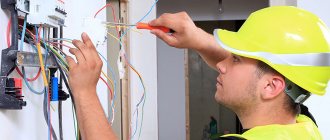
Checking the electrical wiring
The operation of these systems is based on the use of electrical energy, the consumption of which is very significant. To do this, you need to check the capacity limits of the existing wiring to see if it can withstand continuous operation of the electric floor system. To do this, take the cross-sectional indicator of the cable itself. Direct connection of the device to an outlet is prohibited. If the diameter of the existing conductors does not correspond to the possible loads, then either the old system is replaced, or a new wiring line is installed, which will be aimed exclusively at servicing electric floors. The presence of automatic fuses is mandatory.
Selecting materials and auxiliary equipment
The device package includes:
- chalk used for marking;
- heating cable;
- dowel-nails;
- protective system;
- fastenings;
- temperature sensor and regulator;
- damper tape;
- connecting wires.
Heating cable example
Additional items you will need are a set of screwdrivers, a hammer, a tape measure, a chisel, scissors for working with metal and a hammer drill.
Cable types:
- Self-regulating. The equipment is heated by a matrix made of polymers. A characteristic feature is the absence of possible overheating of the equipment. Such a cable is expensive, but its service life is several times longer.
- Resistive. The core acts as the main heating element, a material characterized by a sufficient level of resistance. Thanks to this, the current moving inside the mounted cable is converted into heat.
Installing a film floor
This process is much simpler than the previous one, since it does not imply the need to create a screed. It consists of the following steps:
- A temperature controller is mounted on the wall, to which a cable is routed.
- The floor is thermally insulated.
- The film is installed on the resulting surface. In this case, the heating element should be located at the bottom.
- Both the thermal insulation layer and the film itself are secured with tape to make it immobile.
- Installing a temperature sensor.
- Connecting and testing the system.
The choice of heating control unit should also be approached wisely. It is selected based on the room in which the underfloor heating system will be placed. If we are talking about a balcony or other cold room, you will need a heater that produces from one hundred eighty to two hundred and fifty watts per square meter. If we are talking about residential premises, 120W is quite enough.
The most important advantage of this type of flooring is that they do not carry any additional load on the supporting structures.
Electric floor based on thermomat
For the production of thermomats, a cable no thicker than 45 mm is used. It is fixed on a fiberglass mesh 0.5 m wide. The cable has a shielded core and protected by an outer sheath. For residential premises, heating mats with double cores are used due to their significantly lower level of electromagnetic radiation.
If tiles are chosen as the finishing coating, instead of concrete mortar, glue for this type of material, specially designed for heated floors, is poured over the cable
Principle of operation and construction
The heating mat includes 2 elements: the thermomat itself with a cable and a corrugation. A sensor is inserted inside it, and it protects it from moisture and aggressive influences. If the adhesive layer is so thin that it cannot completely cover the corrugation, you need to use a moisture-resistant sensor.
The thermostat complete with an external temperature sensor, mounting boxes, and wires are purchased additionally. When choosing the first element, maximum energy consumption is taken into account. The cross-section of the wires is selected based on the power of the system and the material of manufacture.
If the cable needs to be wrapped, the mesh is cut. The cable itself cannot be cut or shortened. During installation, it should be at the top; the mesh is attached to the floor using tape or staples
The installation process is extremely simple, because thermomat is a product completely ready for installation. There is no need to attach a heating cable, and uniform laying is ensured by the structure itself. Its cost is higher than that of a cable floor, but it has many advantages, including faster heating of the surface.
Installation of thermal mats
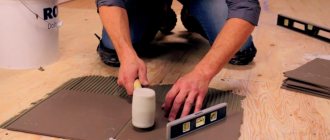
Before laying out the thermal mat, the floor is covered with a layer of primer. This will increase the adhesion of the glue to the concrete surface. Usually the glue is applied directly to the mat, but if it is a damp room, then after a thin layer of glue has been applied and dried, it is covered with waterproofing and then glued again.
In order not to damage the integrity of the cable and to apply the adhesive evenly, you need to distribute the adhesive composition using a plastic comb. The tiles are laid on the glue and leveled.
The total of tiles plus glue should be 20 mm, although some manufacturers recommend a minimum of 50 mm. This is explained by the fact that with such a thickness of the layer, the heat is distributed more evenly.
The photo shows the sequence of laying a heated floor from thermal mats under the tiles, starting from choosing a location (1) to laying the tiles (7). Installation is simplified if the room has a rectangular shape
In accordance with the PUE, it is imperative to install a protective shutdown that guarantees safety and a circuit breaker. If the system is installed in a bathroom, the thermostat should be moved to an adjacent dry room.
There are significantly fewer steps in installing heated floors using electric mats. However, the preparation of the base is carried out in the same order: repair, level if necessary, remove dust and debris
After waiting for the screed to completely harden, lay the mats. When using them, there is no need to construct a reinforcing mesh or attach a cable to it
A cement-sand or polymer screed is poured over the mats laid according to the diagram. It is laid not only along the heating system, but also in areas unoccupied by mats
After the time allowed for the cement-sand screed to harden, the floor covering is laid